
Login to RosarioSIS
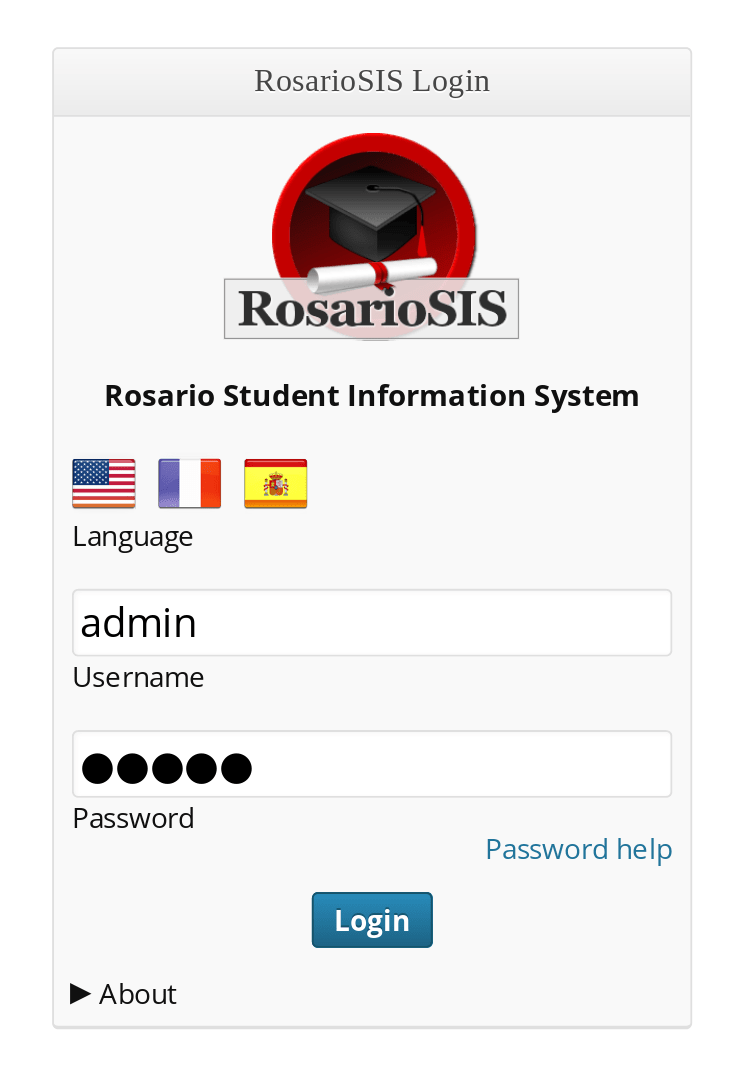
Once RosarioSIS is installed, you can log in as an administrator entering `admin` as Username and Password. If you have not installed RosarioSIS yet, please refer to the RosarioSIS installation directions present in the INSTALL.md file.
Handbook / User Manual
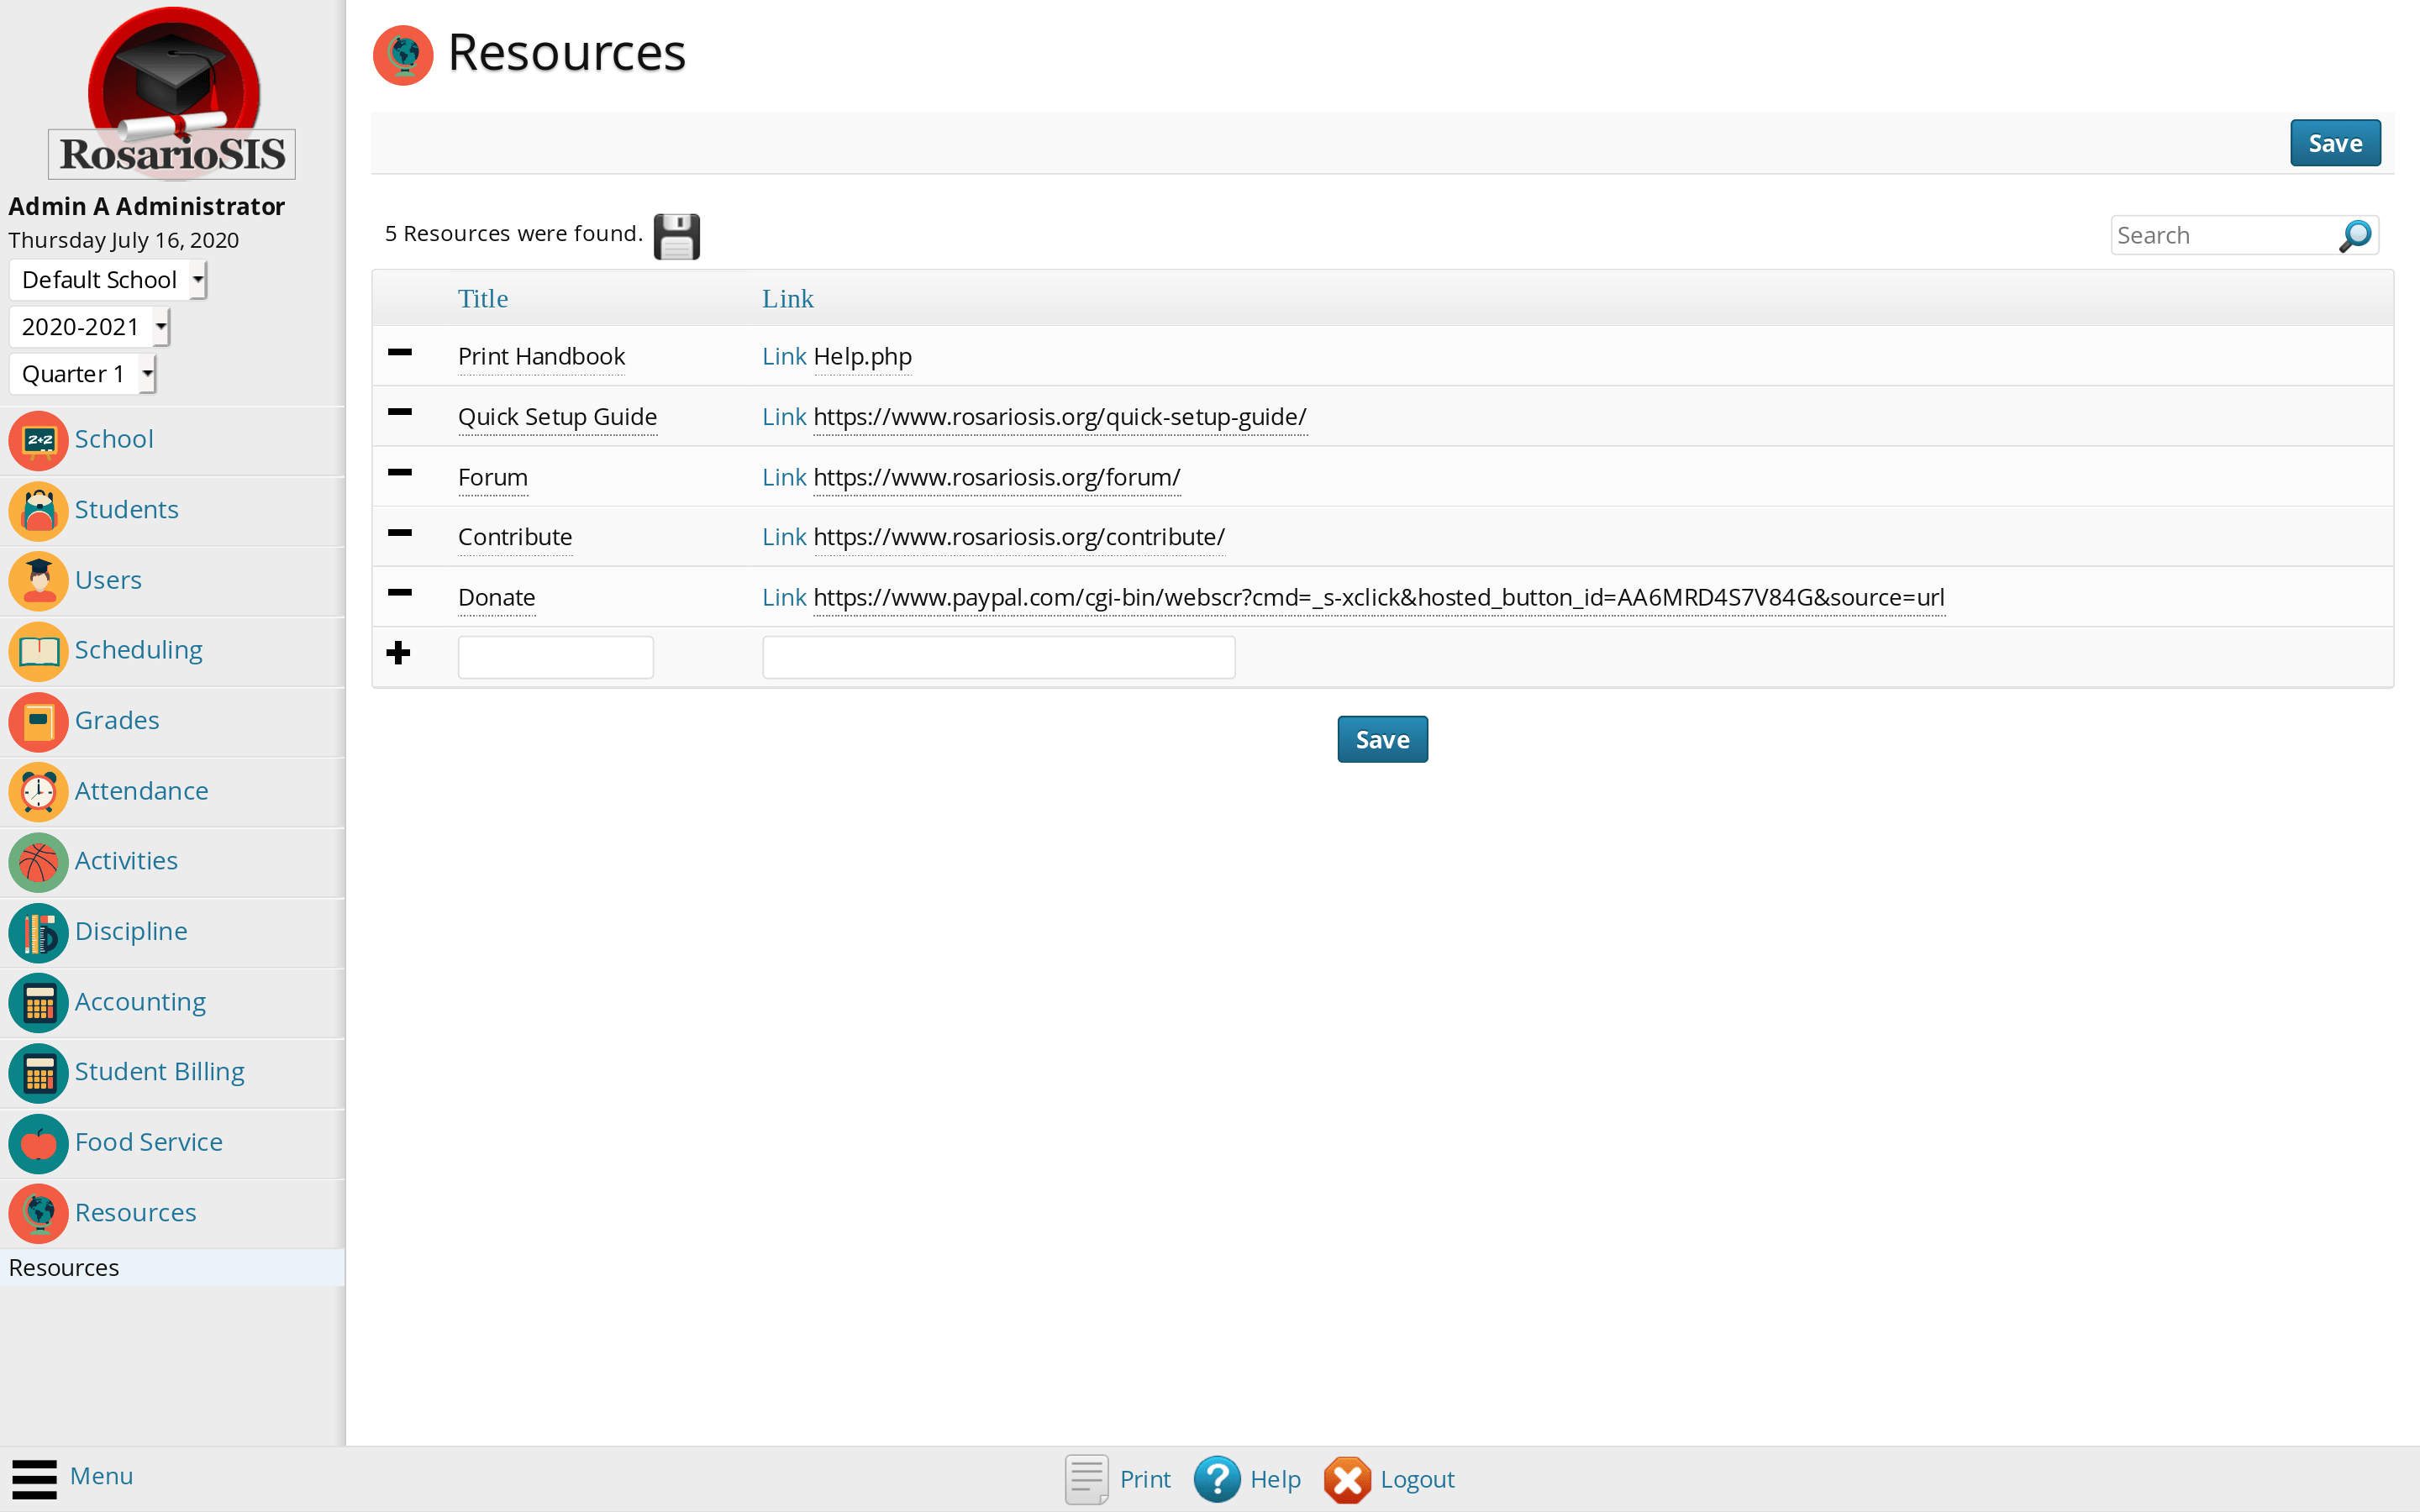
First, we are going to print / generate the Administrator Handbook PDF. You can access this page using the left menu within RosarioSIS and navigating to Resources > Resources. Then, click the link associated to Print Handbook. To generate User Guides for other profiles, login as a teacher, parent or student and repeat the same steps. You can consult sample User Manuals here.
School Information
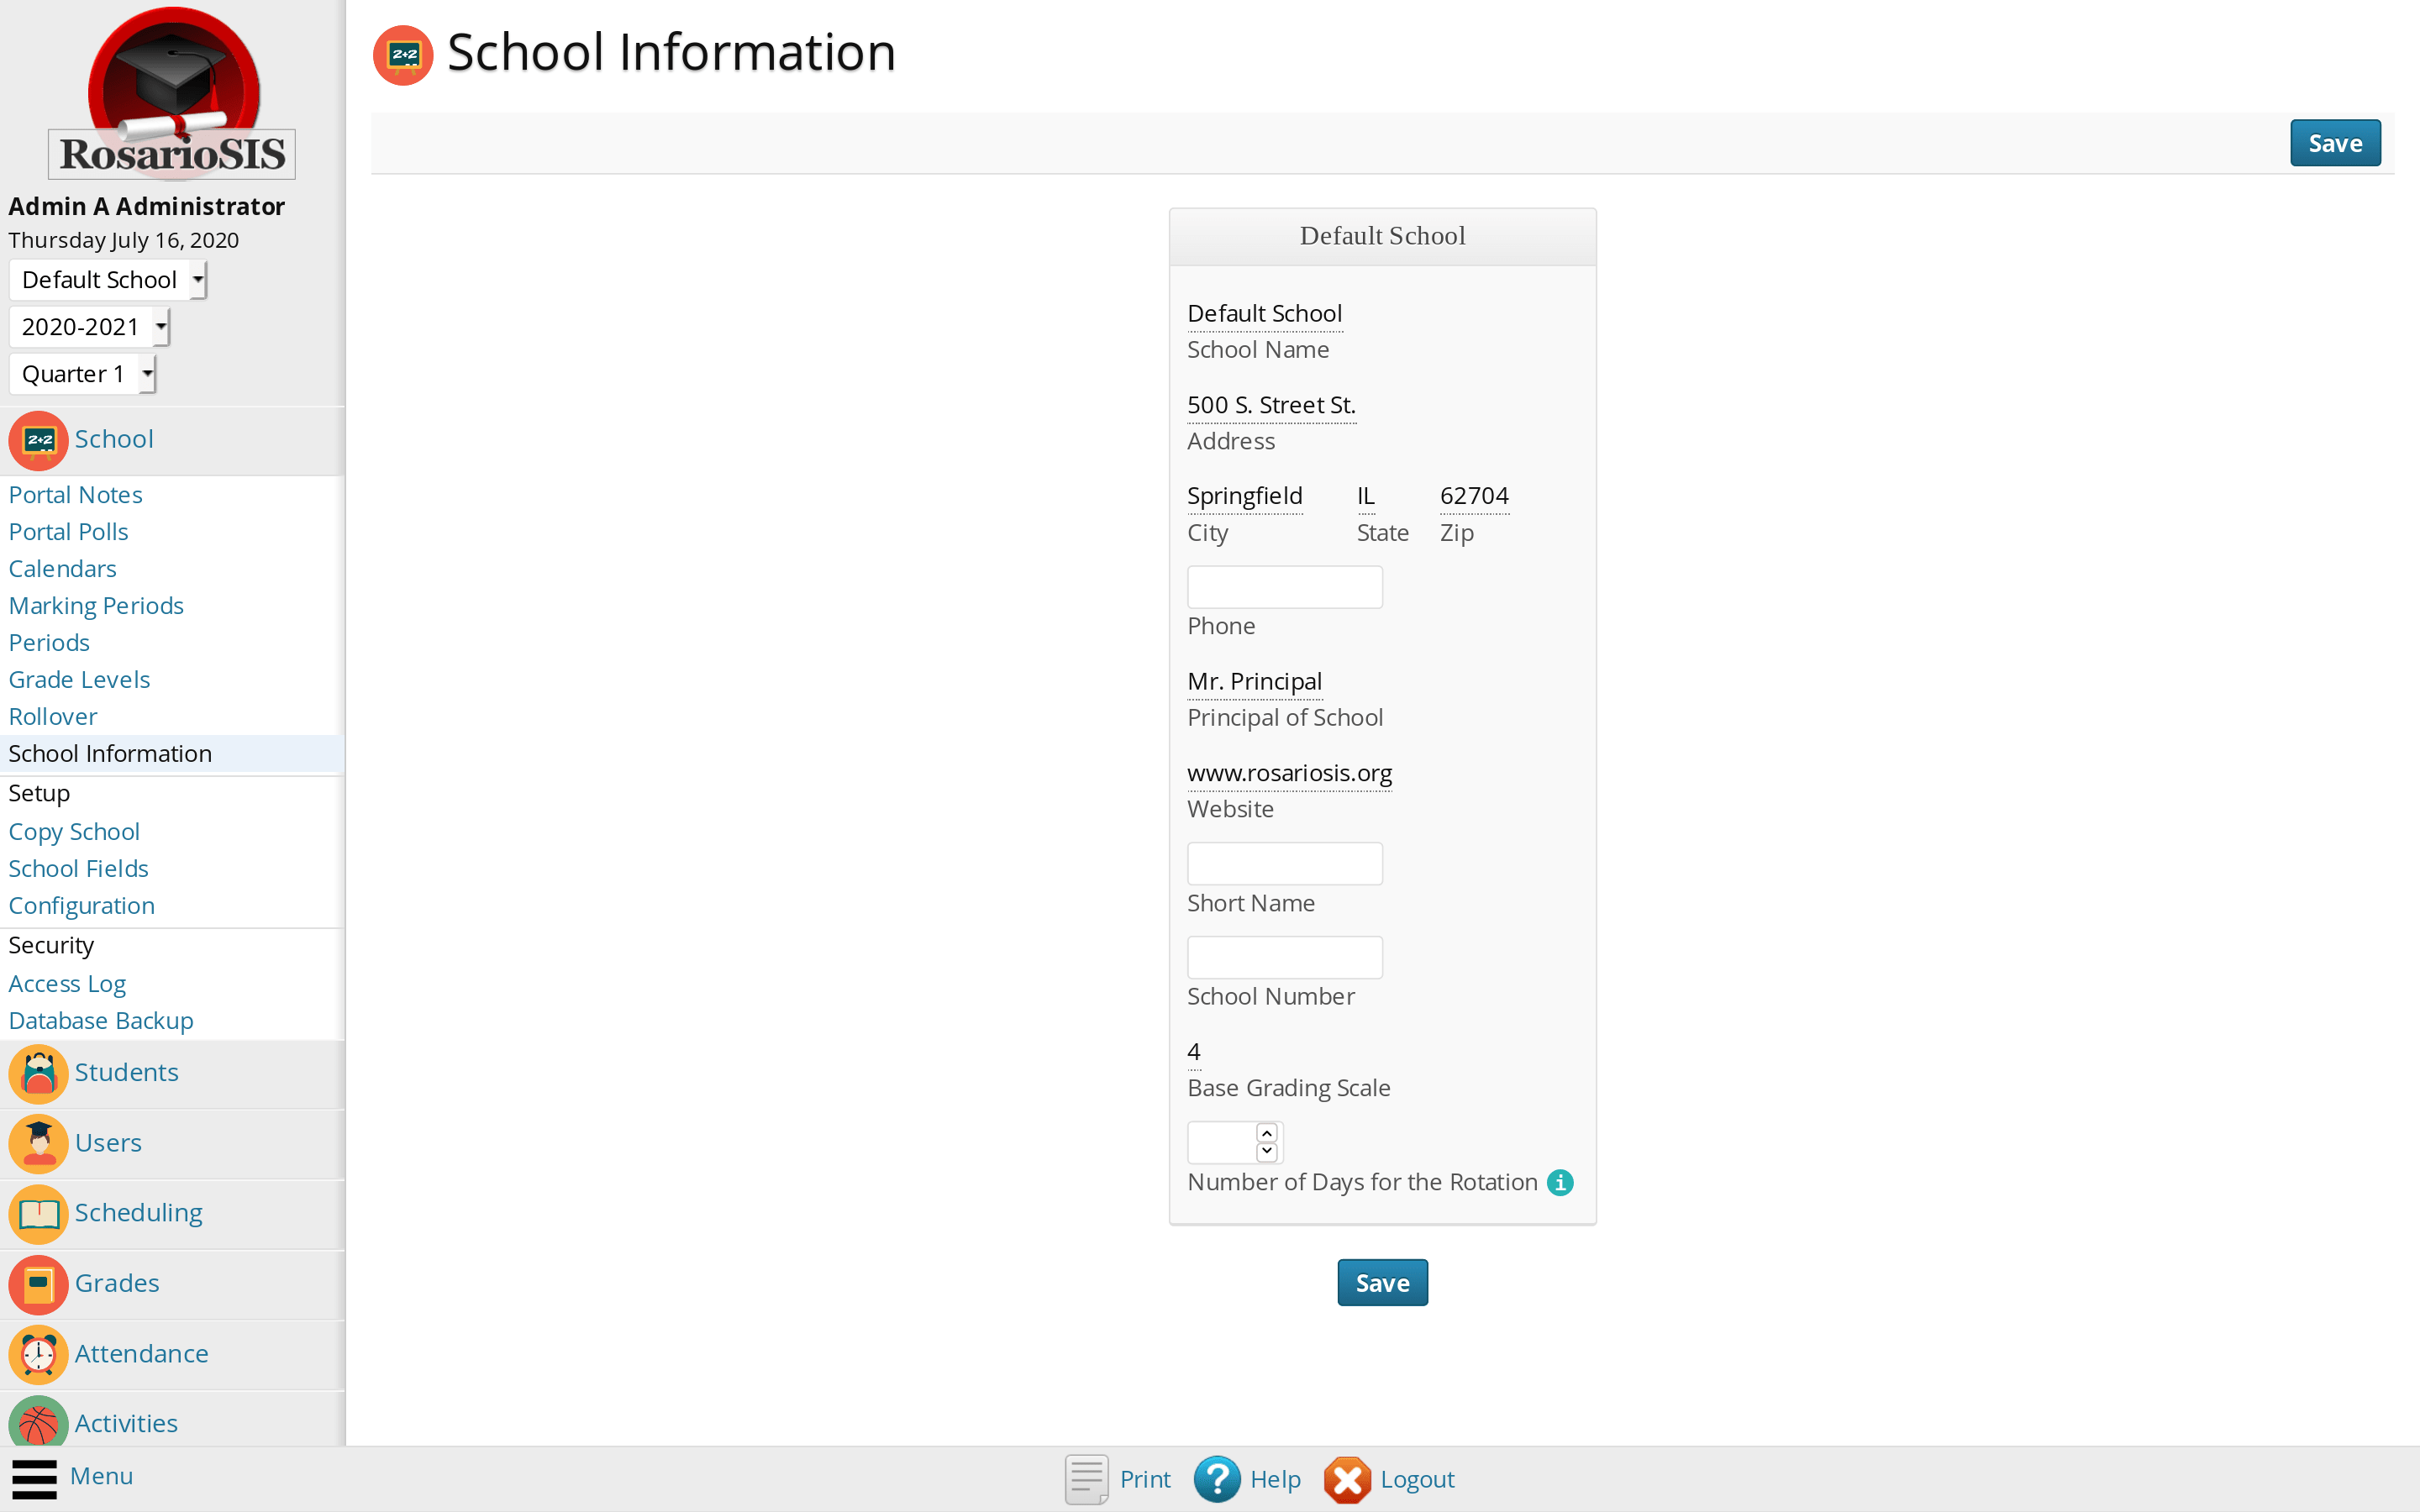
Navigate to School > School Information using the menu.
To edit the existing information, click on the texts underlined with dots, they will become editable input fields. Enter your school information and then click the Save button.
School Configuration
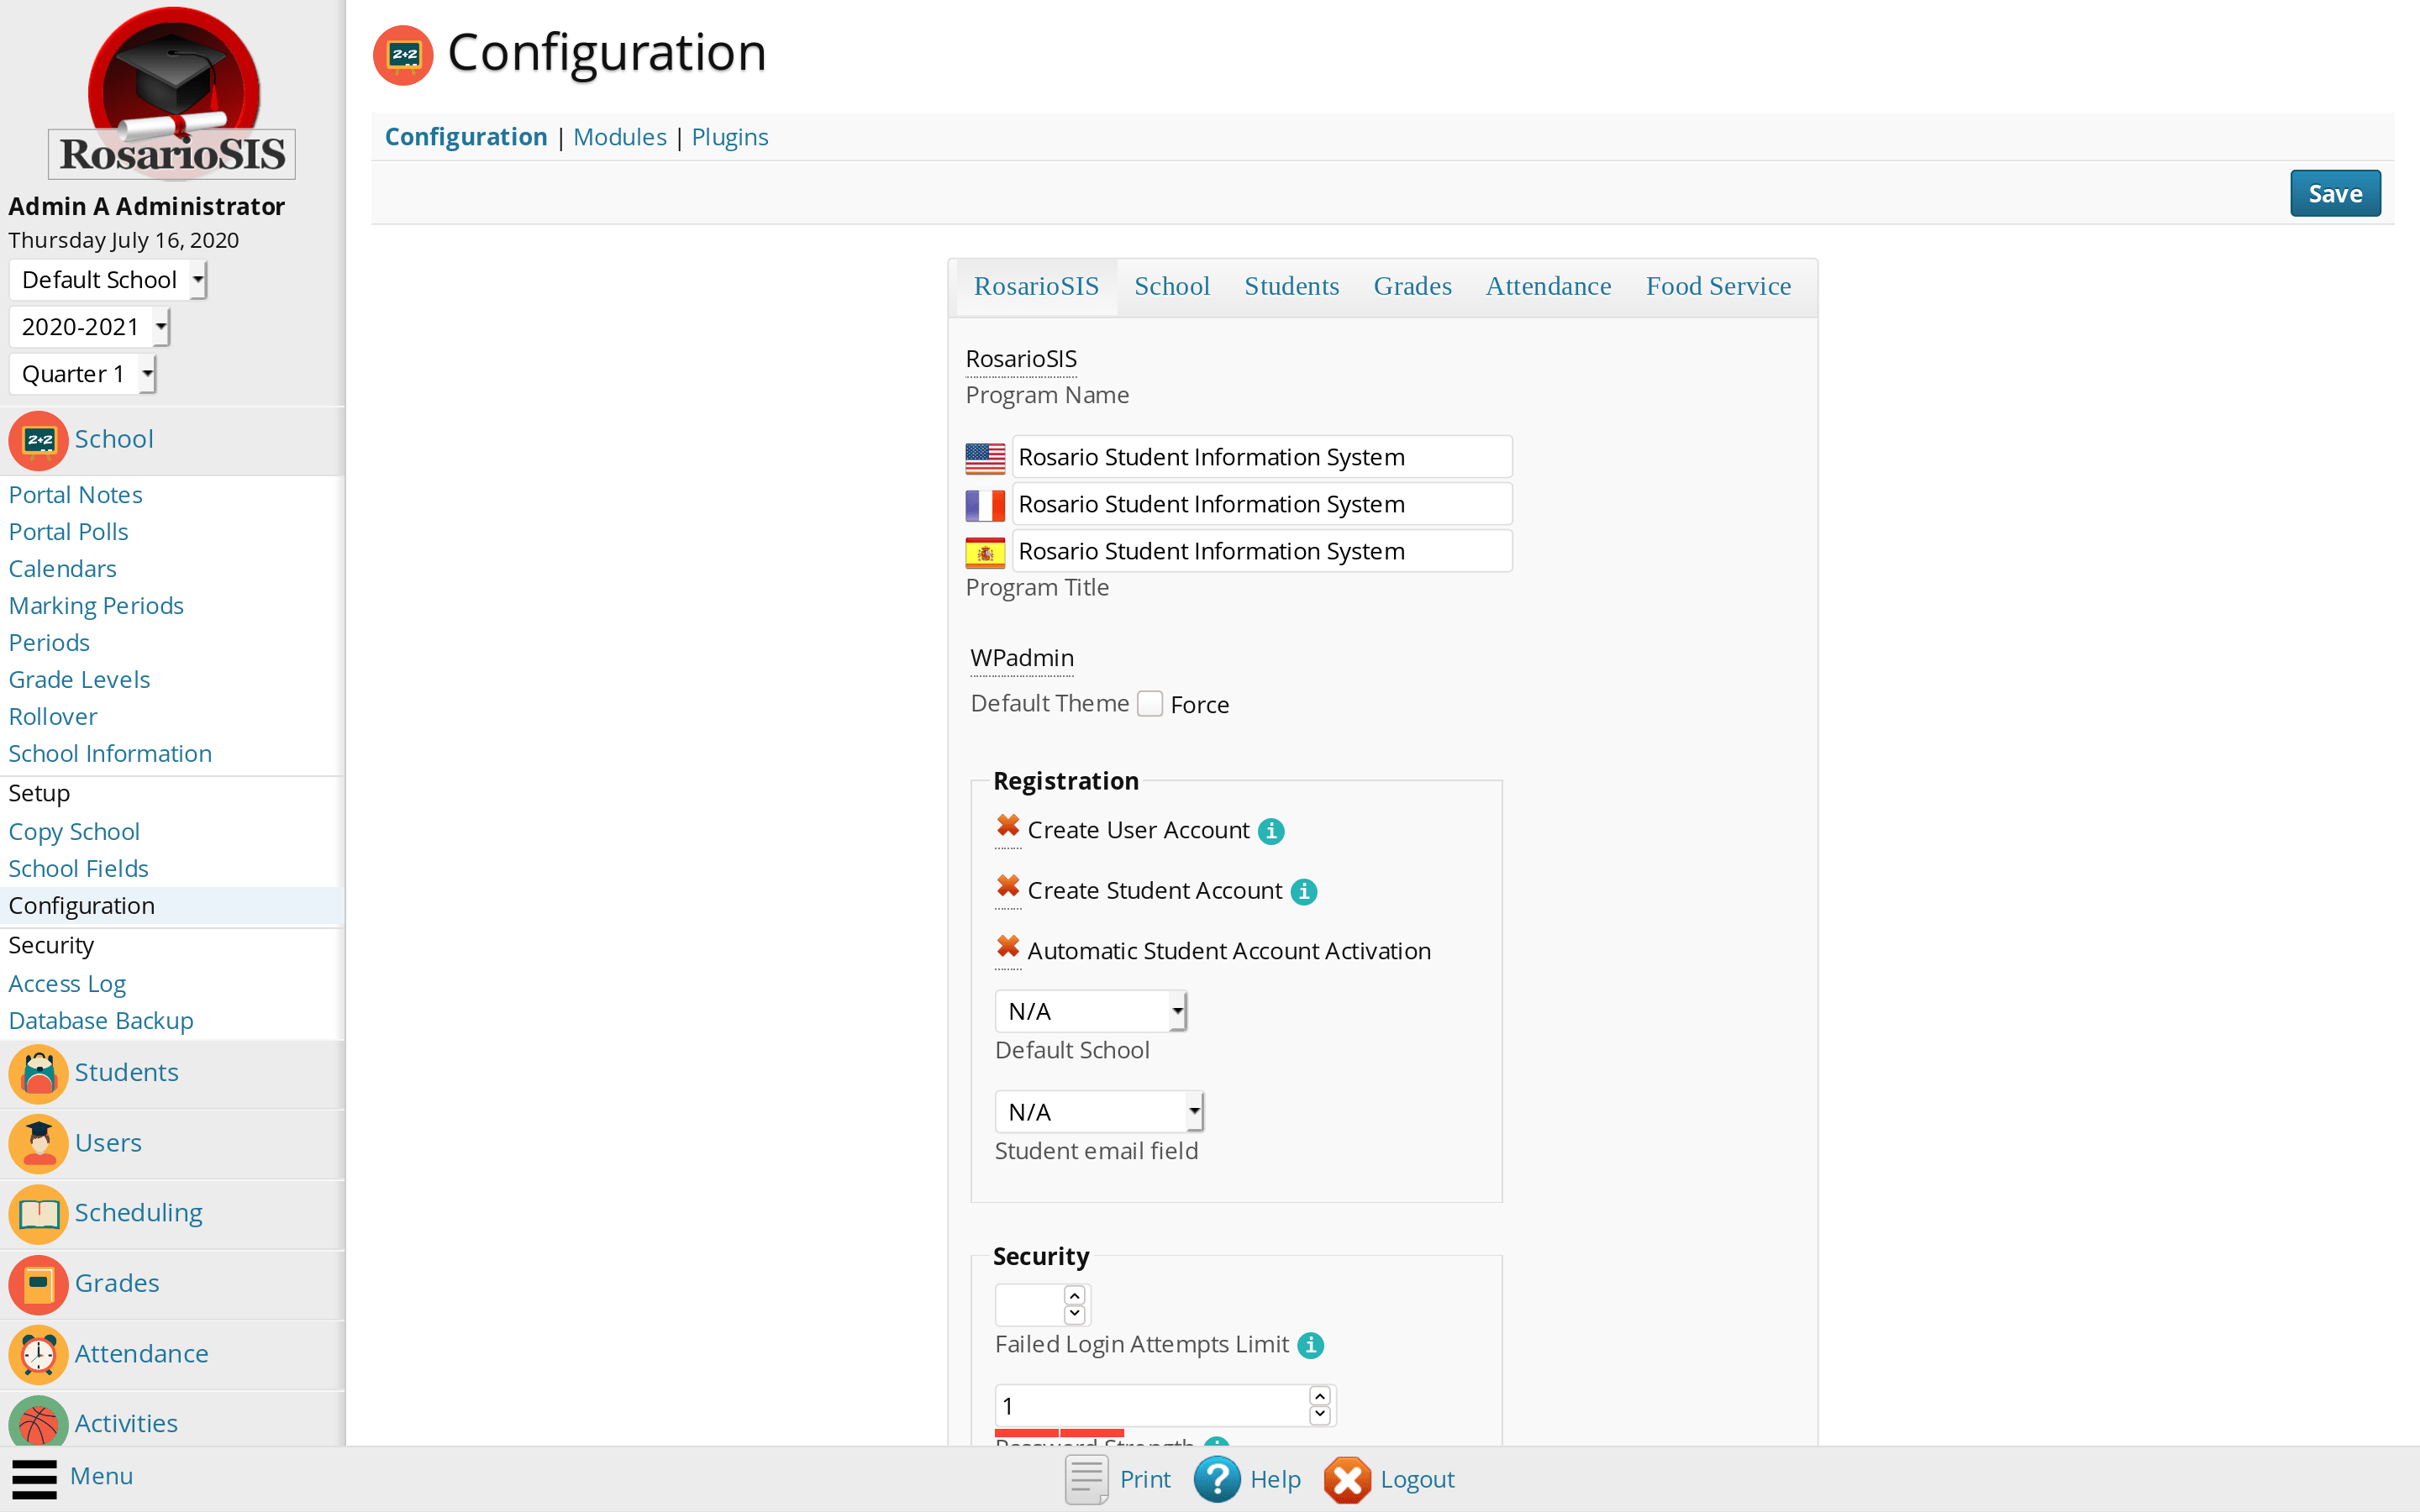
Navigate to School > Configuration using the menu.
Please consult the Administrator Handbook or the inline Help for details about the configuration options.
Marking Periods Setup
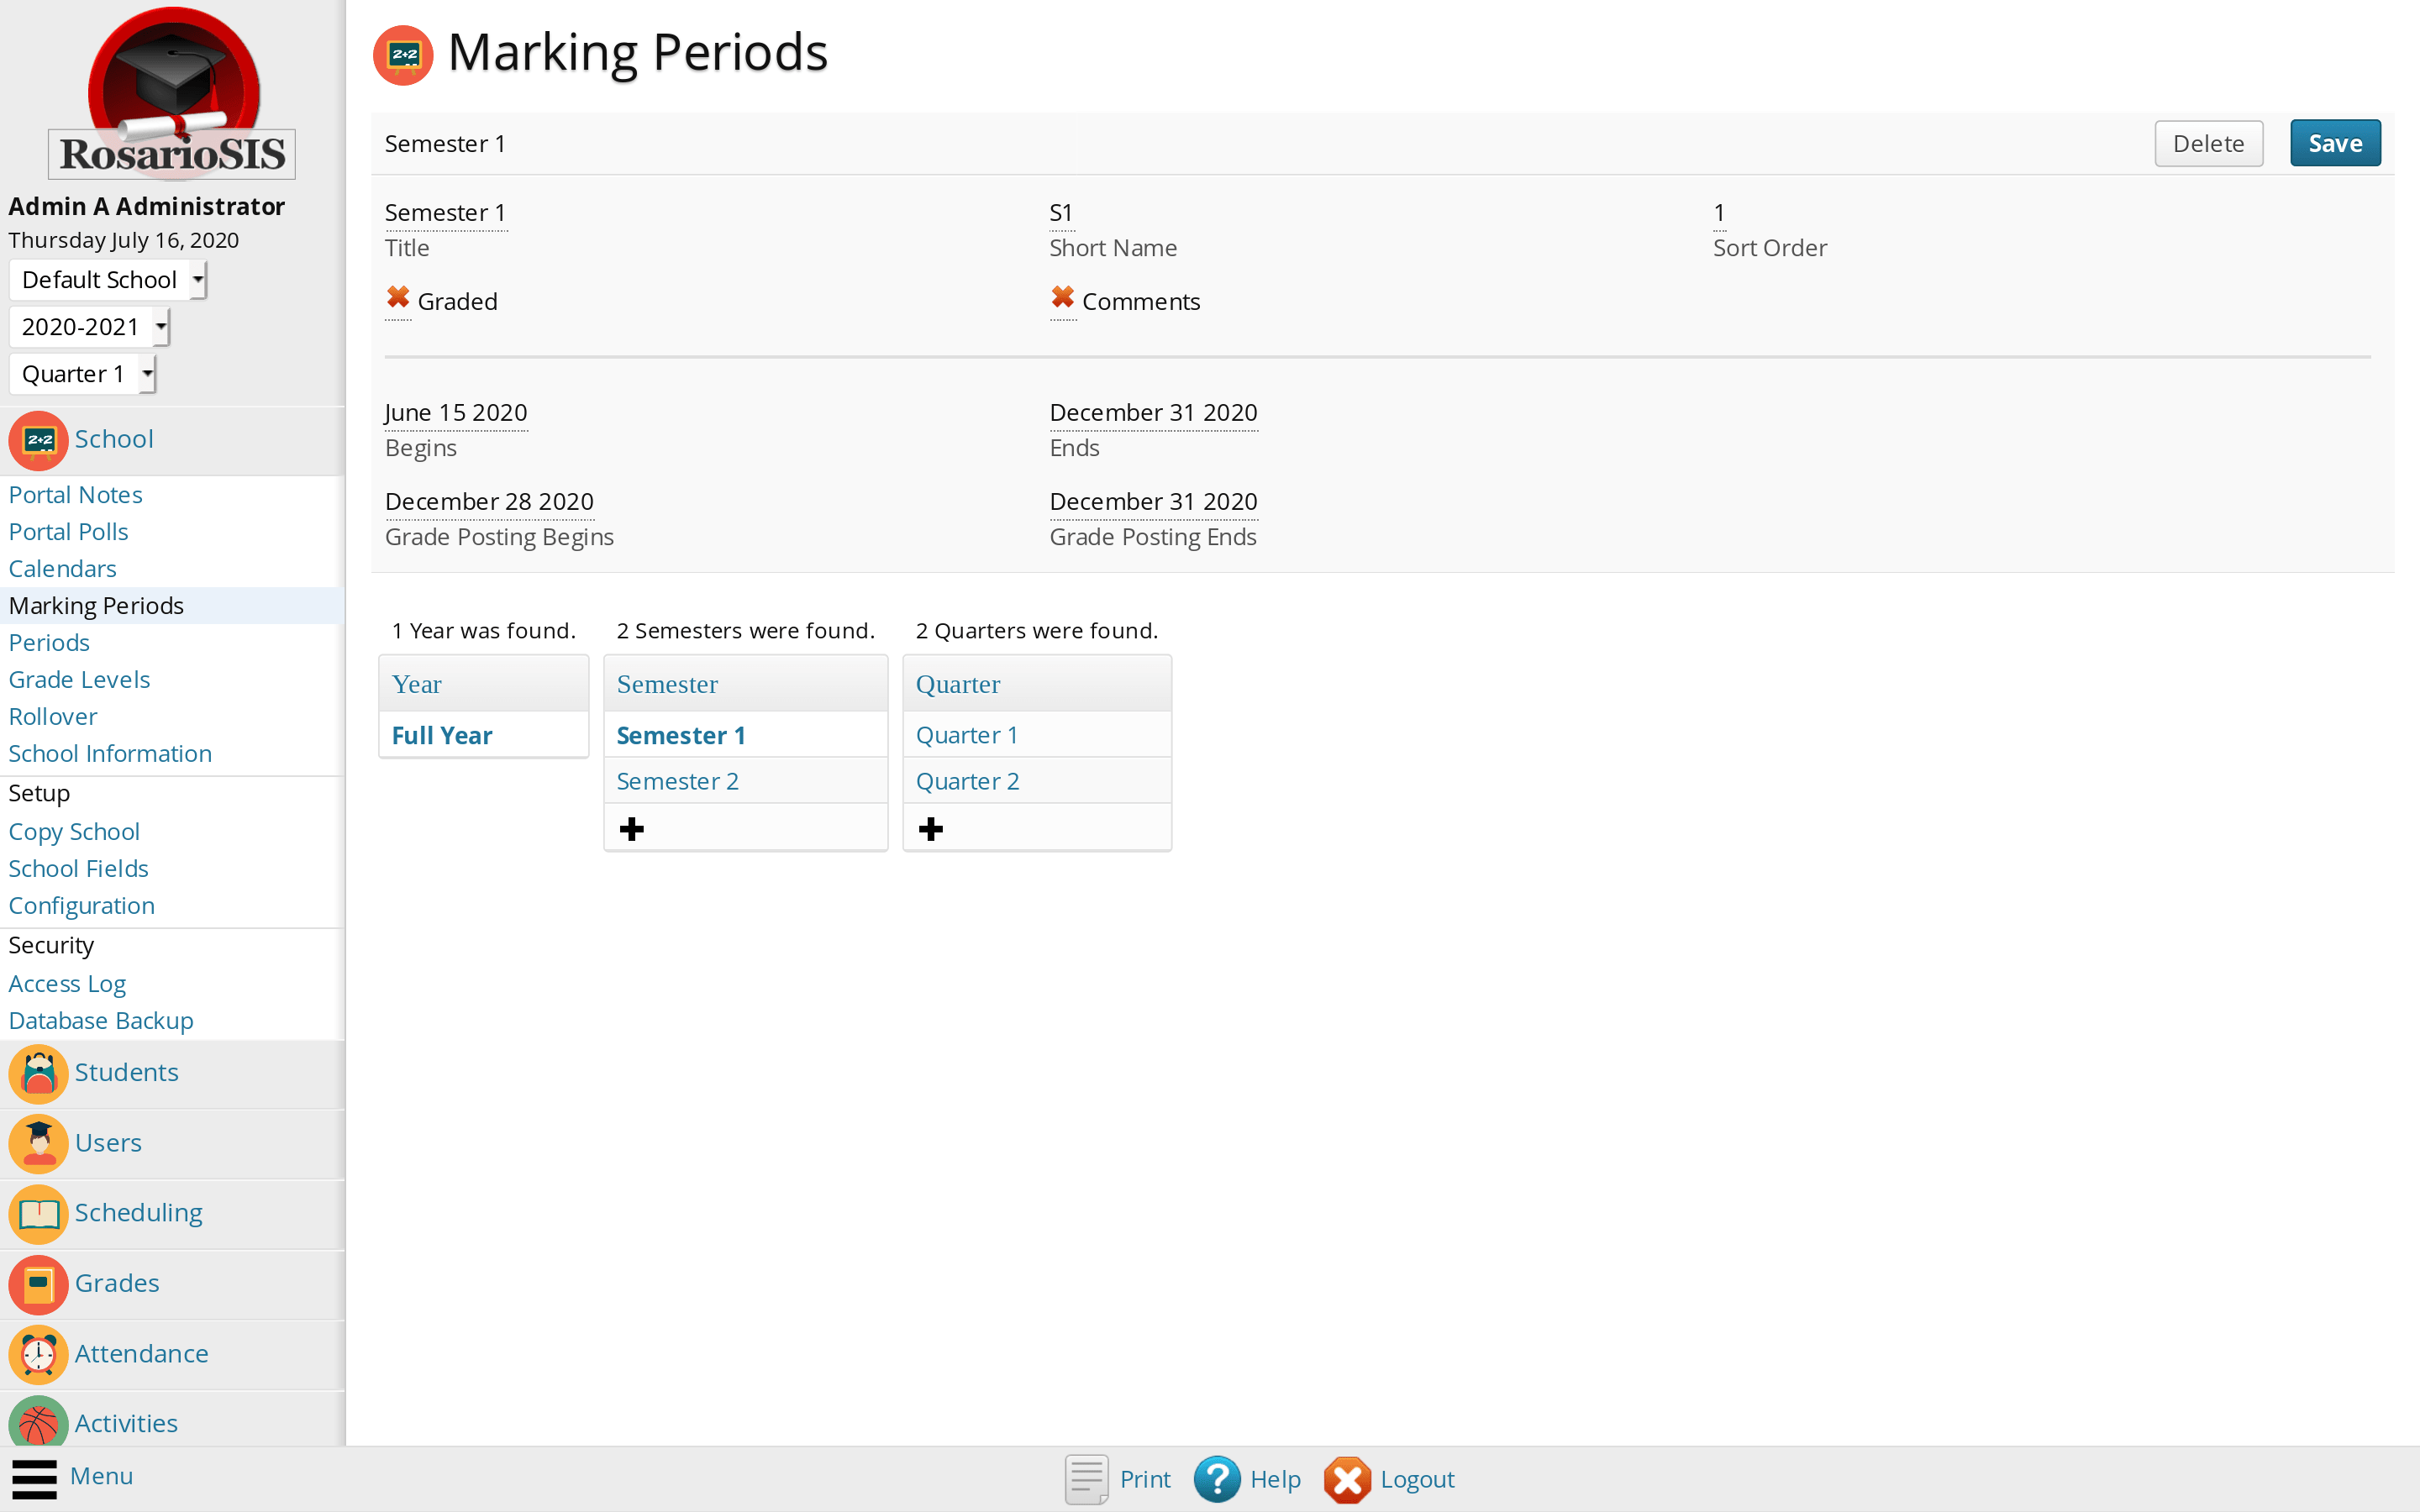
Navigate to School > Marking Periods using the menu. Here you can create as many Semesters and Quarters as you need.
Even if you only need Semesters, RosarioSIS requires Quarters to work well. For example, you can create 2 “quarters”, one for Continuous Assessment and the other one for Semester Exams.
Check the Graded checkbox to allow teachers and administrators to enter final grades for that marking period.
Check the Comments checkbox to allow teachers and administrators to add comments to the final report card grades.
Adjust the Begins and Ends dates of each marking periods.
Grade Posting Begins and Grade Posting Ends dates are the dates when a teacher is allowed to enter final grades for that marking period. We advise to set it to the last days of the marking period.
Note: once the marking periods are set up, you can (or let teachers) define Final Grading Percentages for Year and Semester marking periods using the Grades > Configuration program. For example, you may define the Semester grade to be 60% of the Continuous Assessment grade + 40% of the Exams grade.
School Calendar
Now we are going to create the school Calendar. Navigate to School > Calendars using the menu.
Click the Edit link to recreate the default, empty Main calendar.
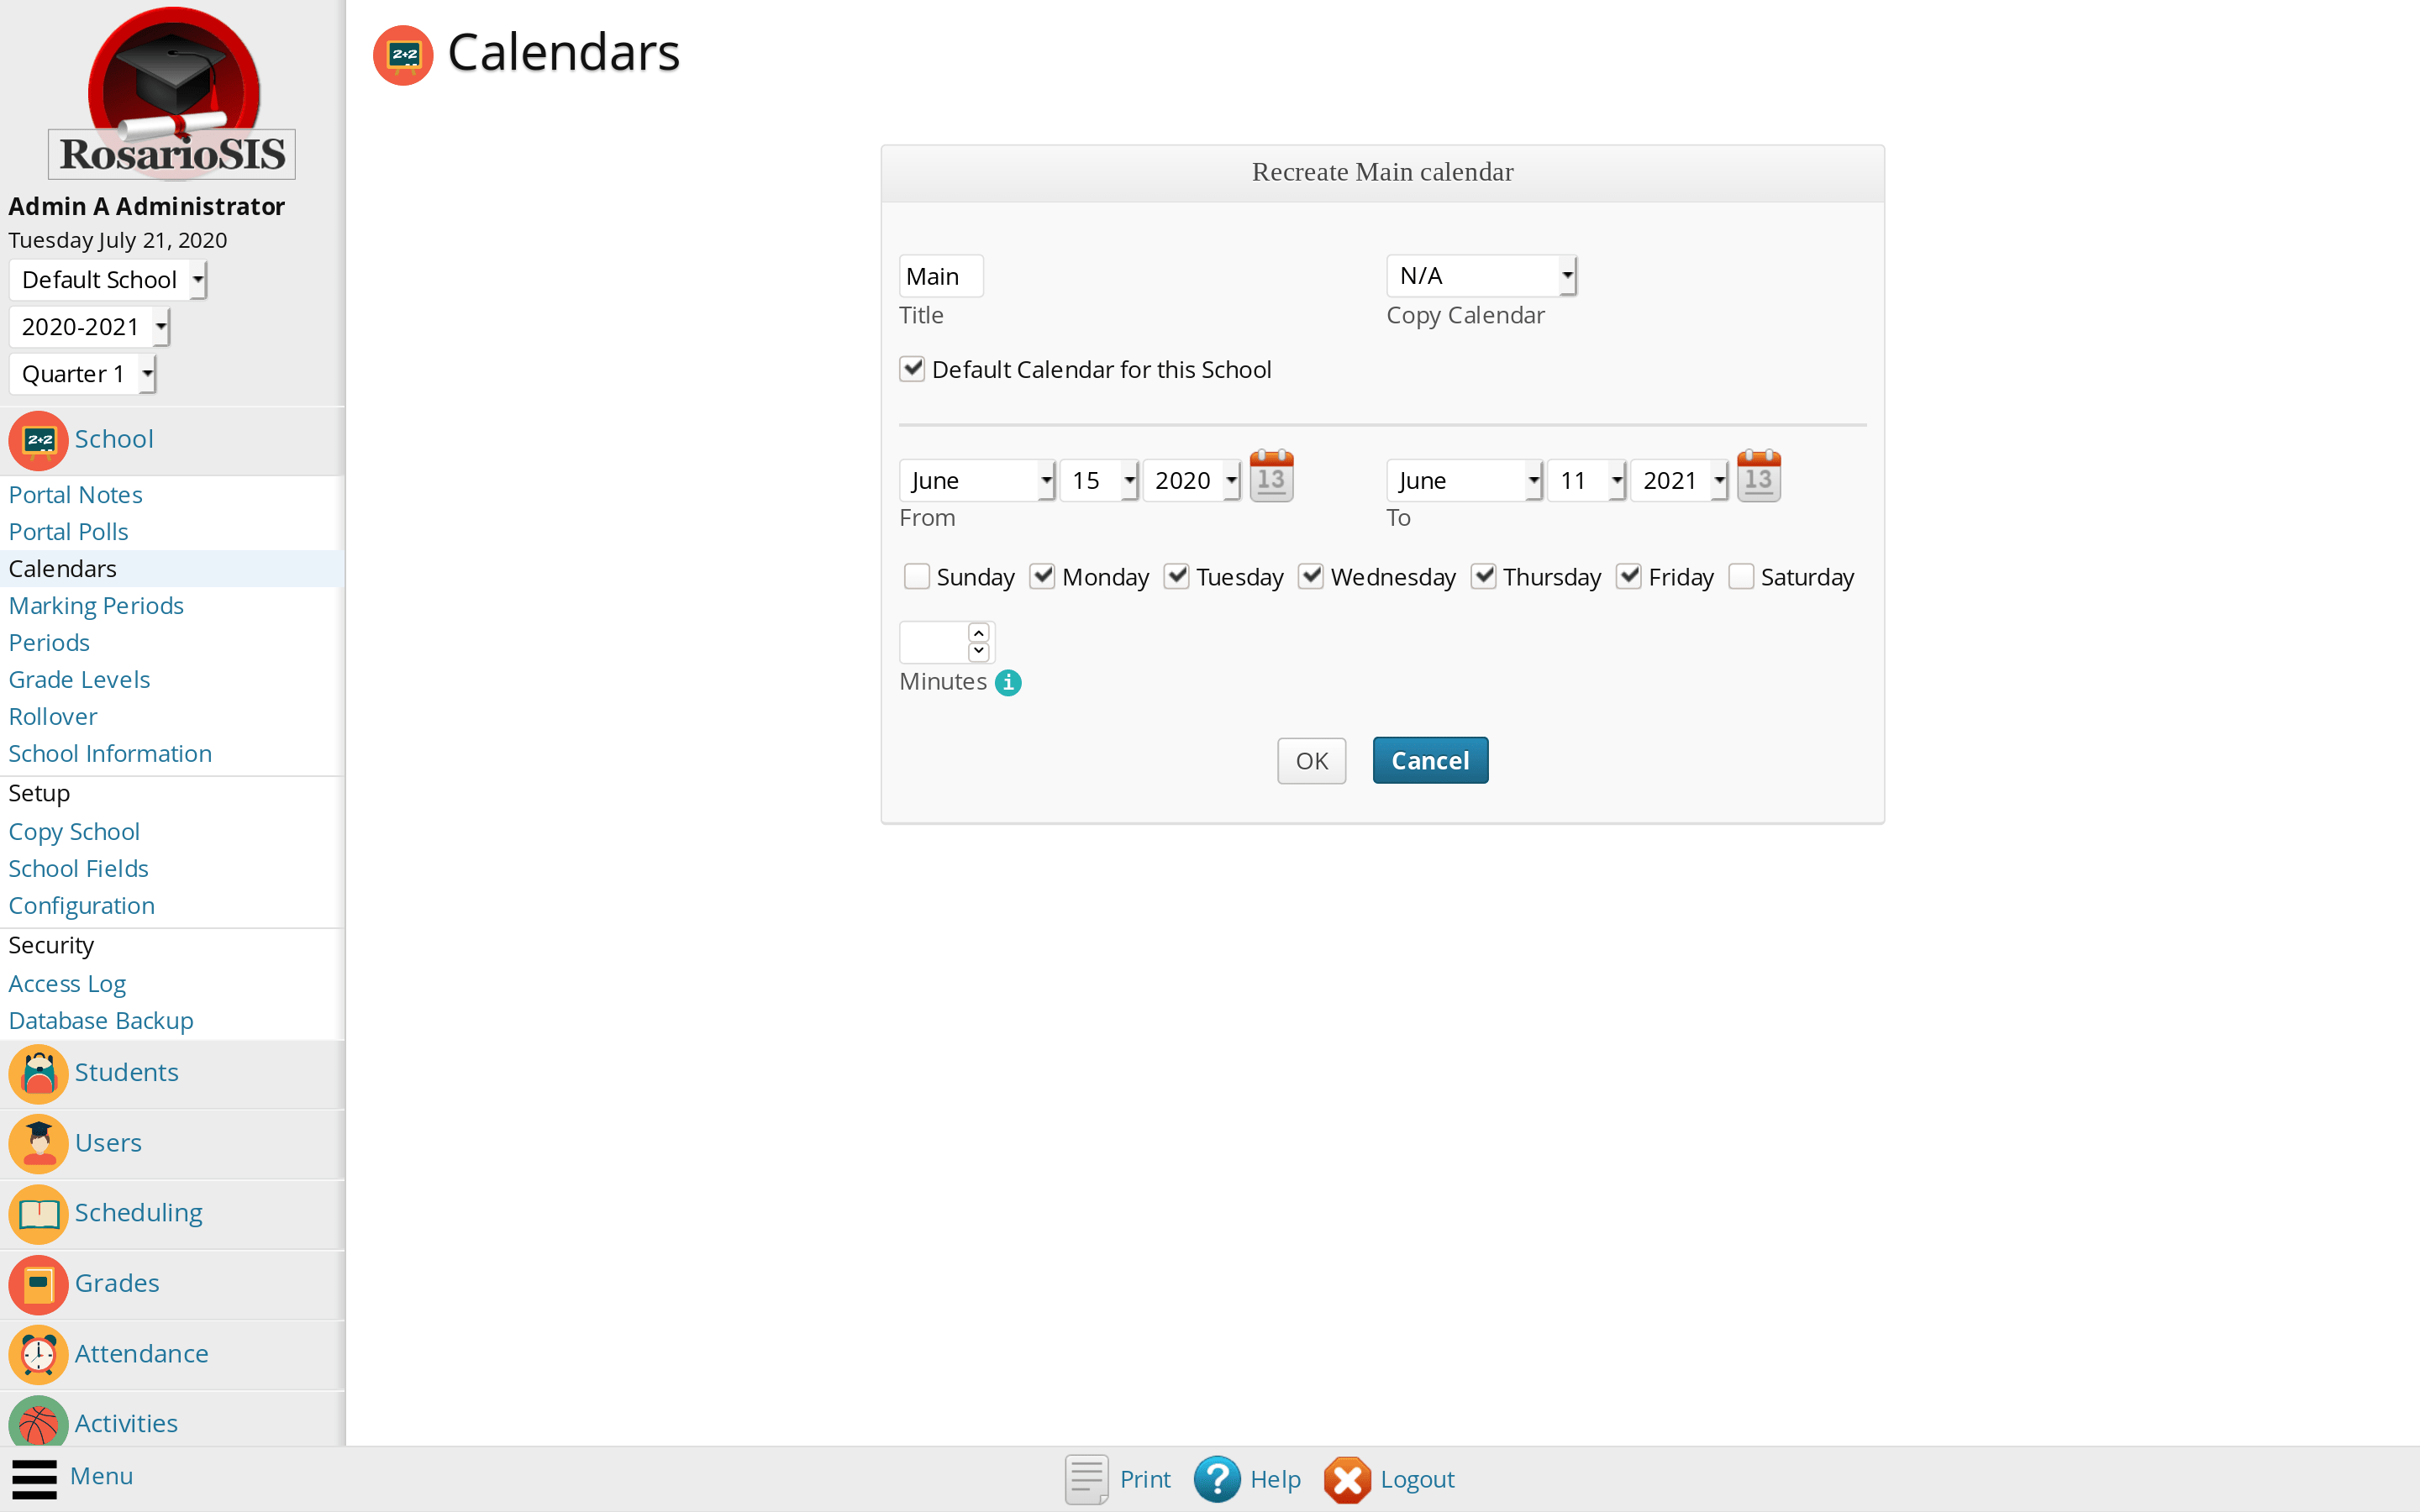
Then, select `N/A` in the Copy Calendar dropdown list. Give the Calendar a Title and mark it as the Default Calendar for this School. The system will automatically fill in the From and To dates with the ones you have entered for the Year in the Marking Periods program. Check the days of the week the school is in session and click the OK button to recreate the default calendar.

Now, in the calendar month view, school days are shown in green with check marks and holidays are displayed in pink. If you need to change a school day to a holiday, simply uncheck the checkbox and click the Save button. That day is now displayed in pink, a holiday.
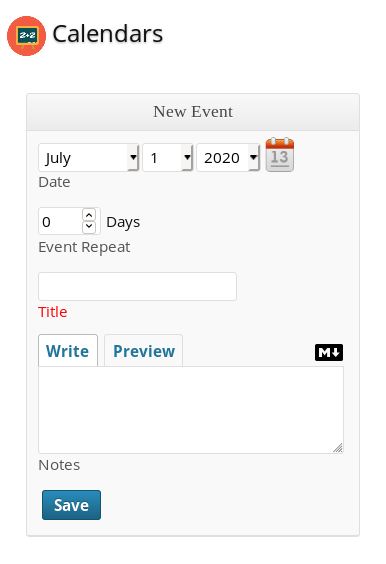
To add an Event to a calendar day, click the + icon. Enter the event Title and its Notes and click the Save button. The event will be displayed on both the calendar and the Portal (Upcoming Events).
School Periods Setup
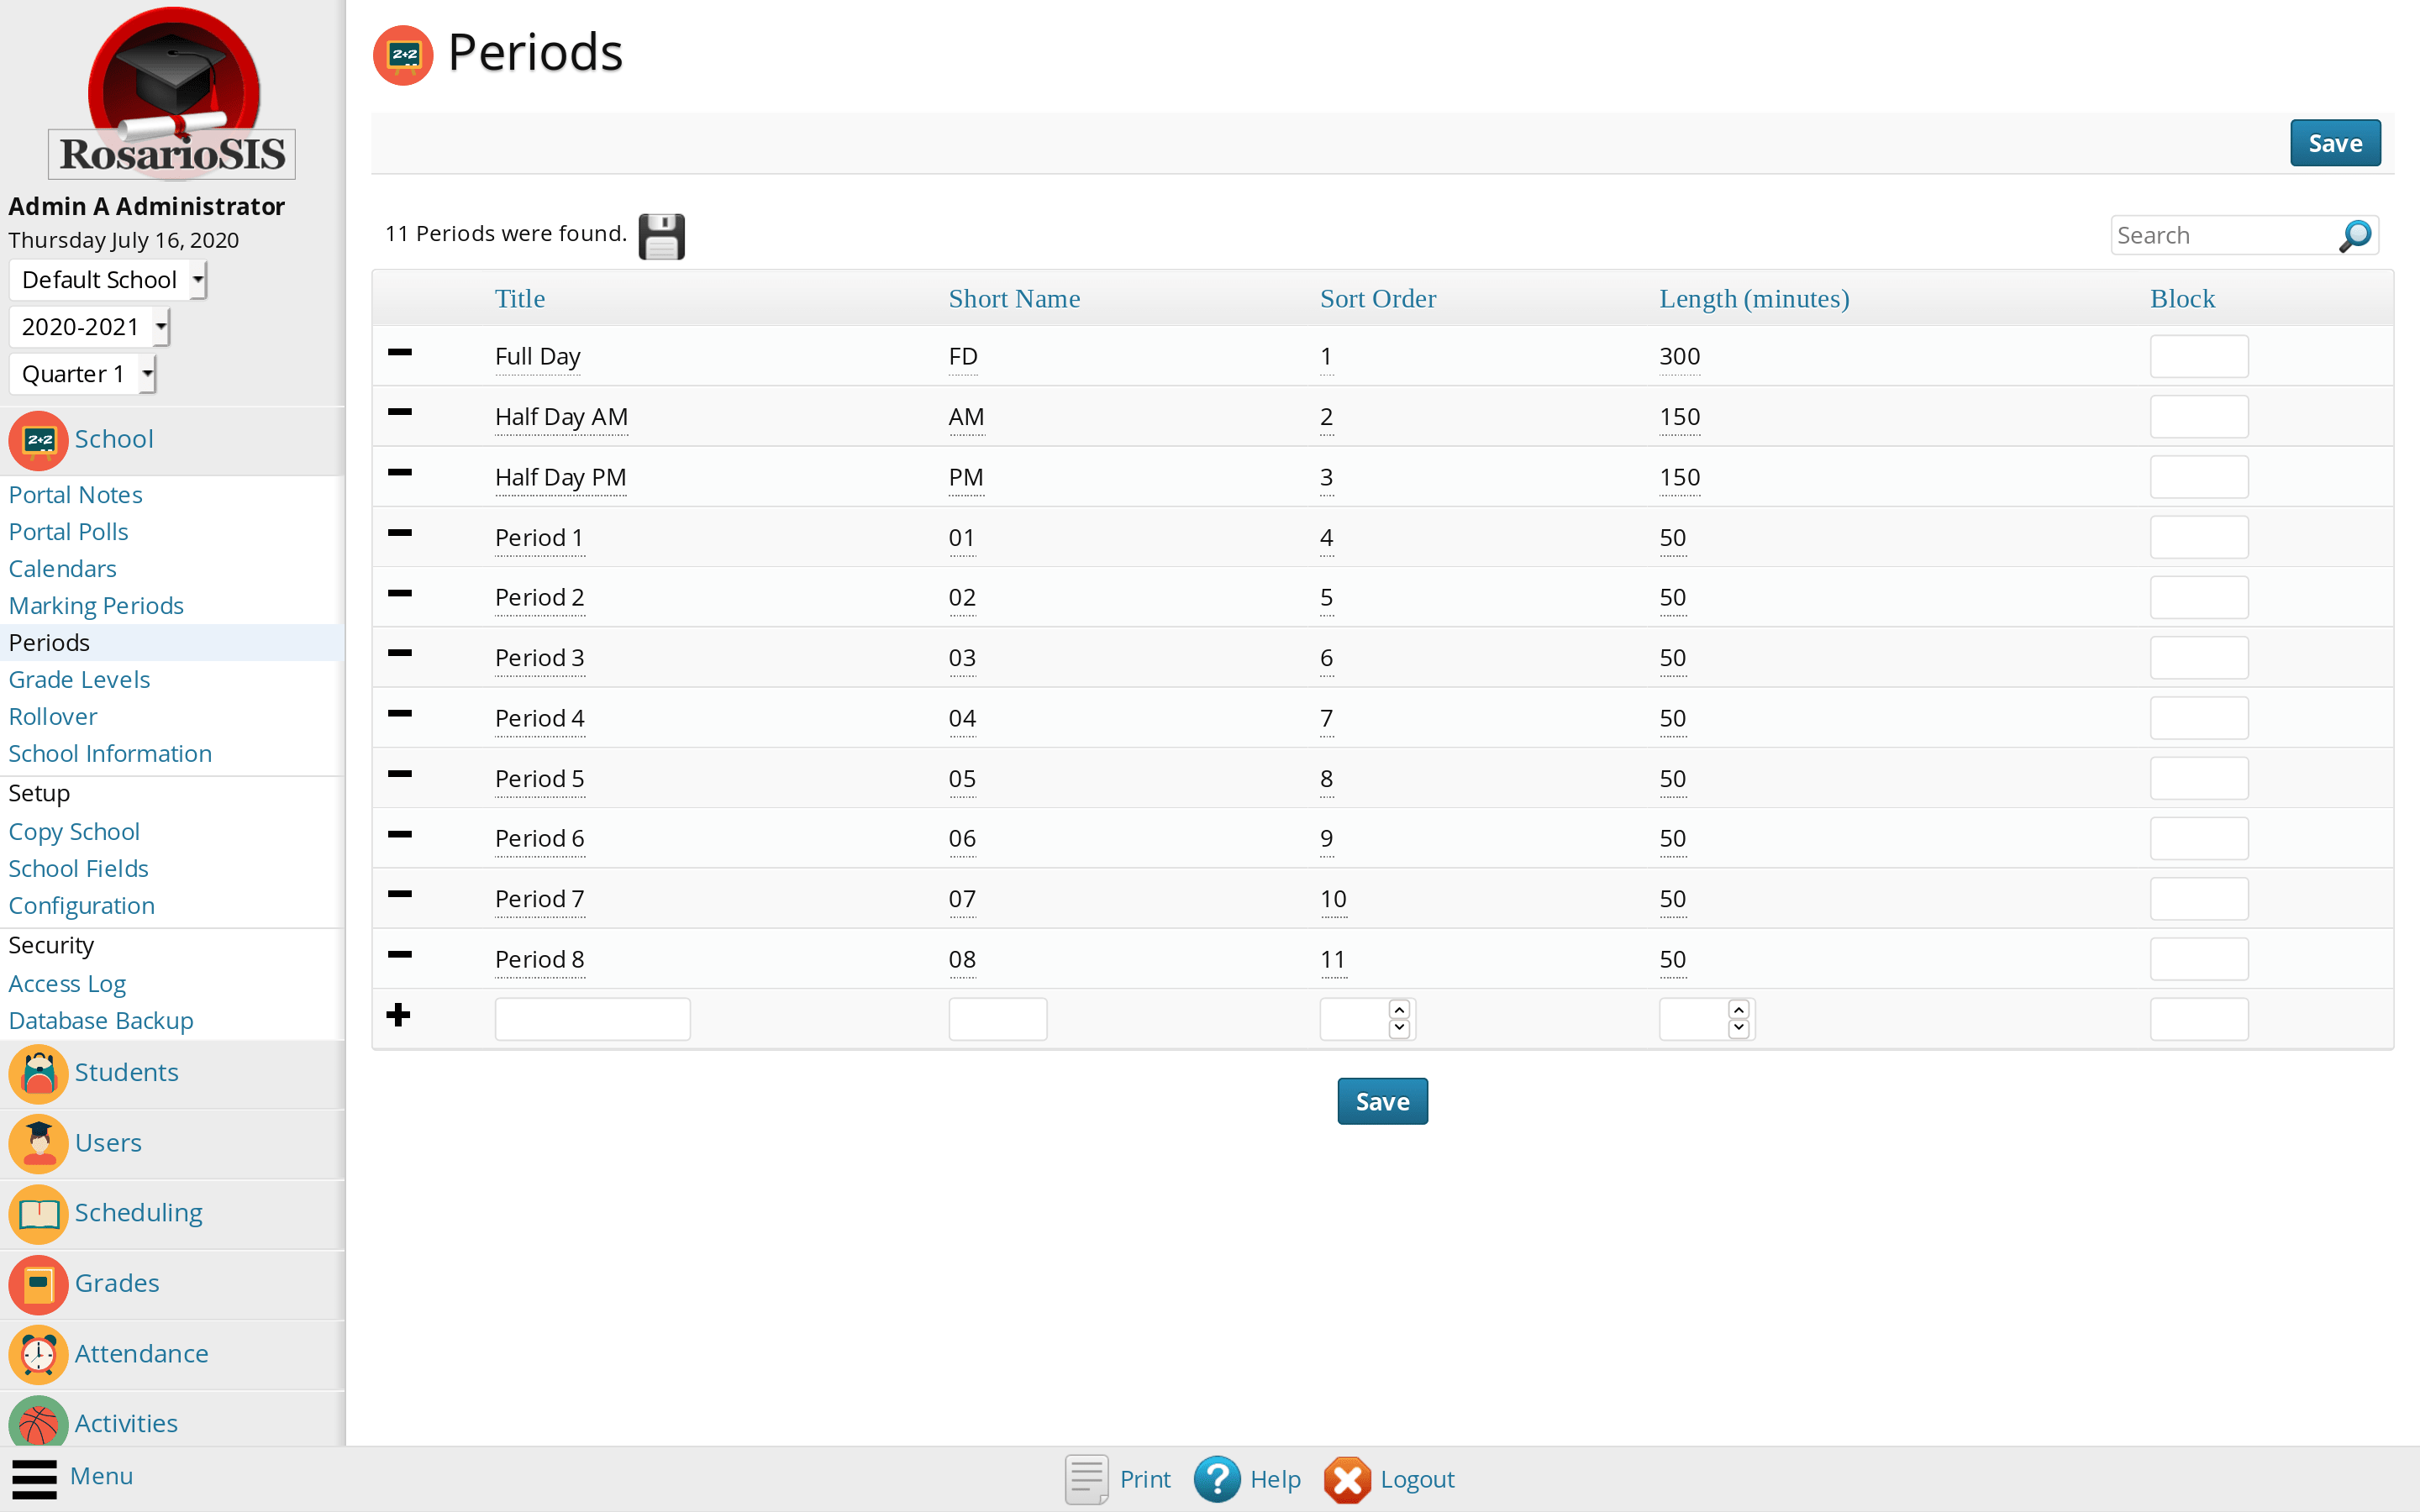
Navigate to School > Periods using the menu. The School Periods define how you will divide a school day into periods of time. Create and setup here all the Periods that are in use in your school.
The Length (minutes) option will be used to calculate the students daily attendance, in concordance with the Minutes in a Full School Day option set in the School Configuration program.
Blocks can be used to define irregular periods which happen on specific days. See the Calendars program for setup.
Grade Levels Setup
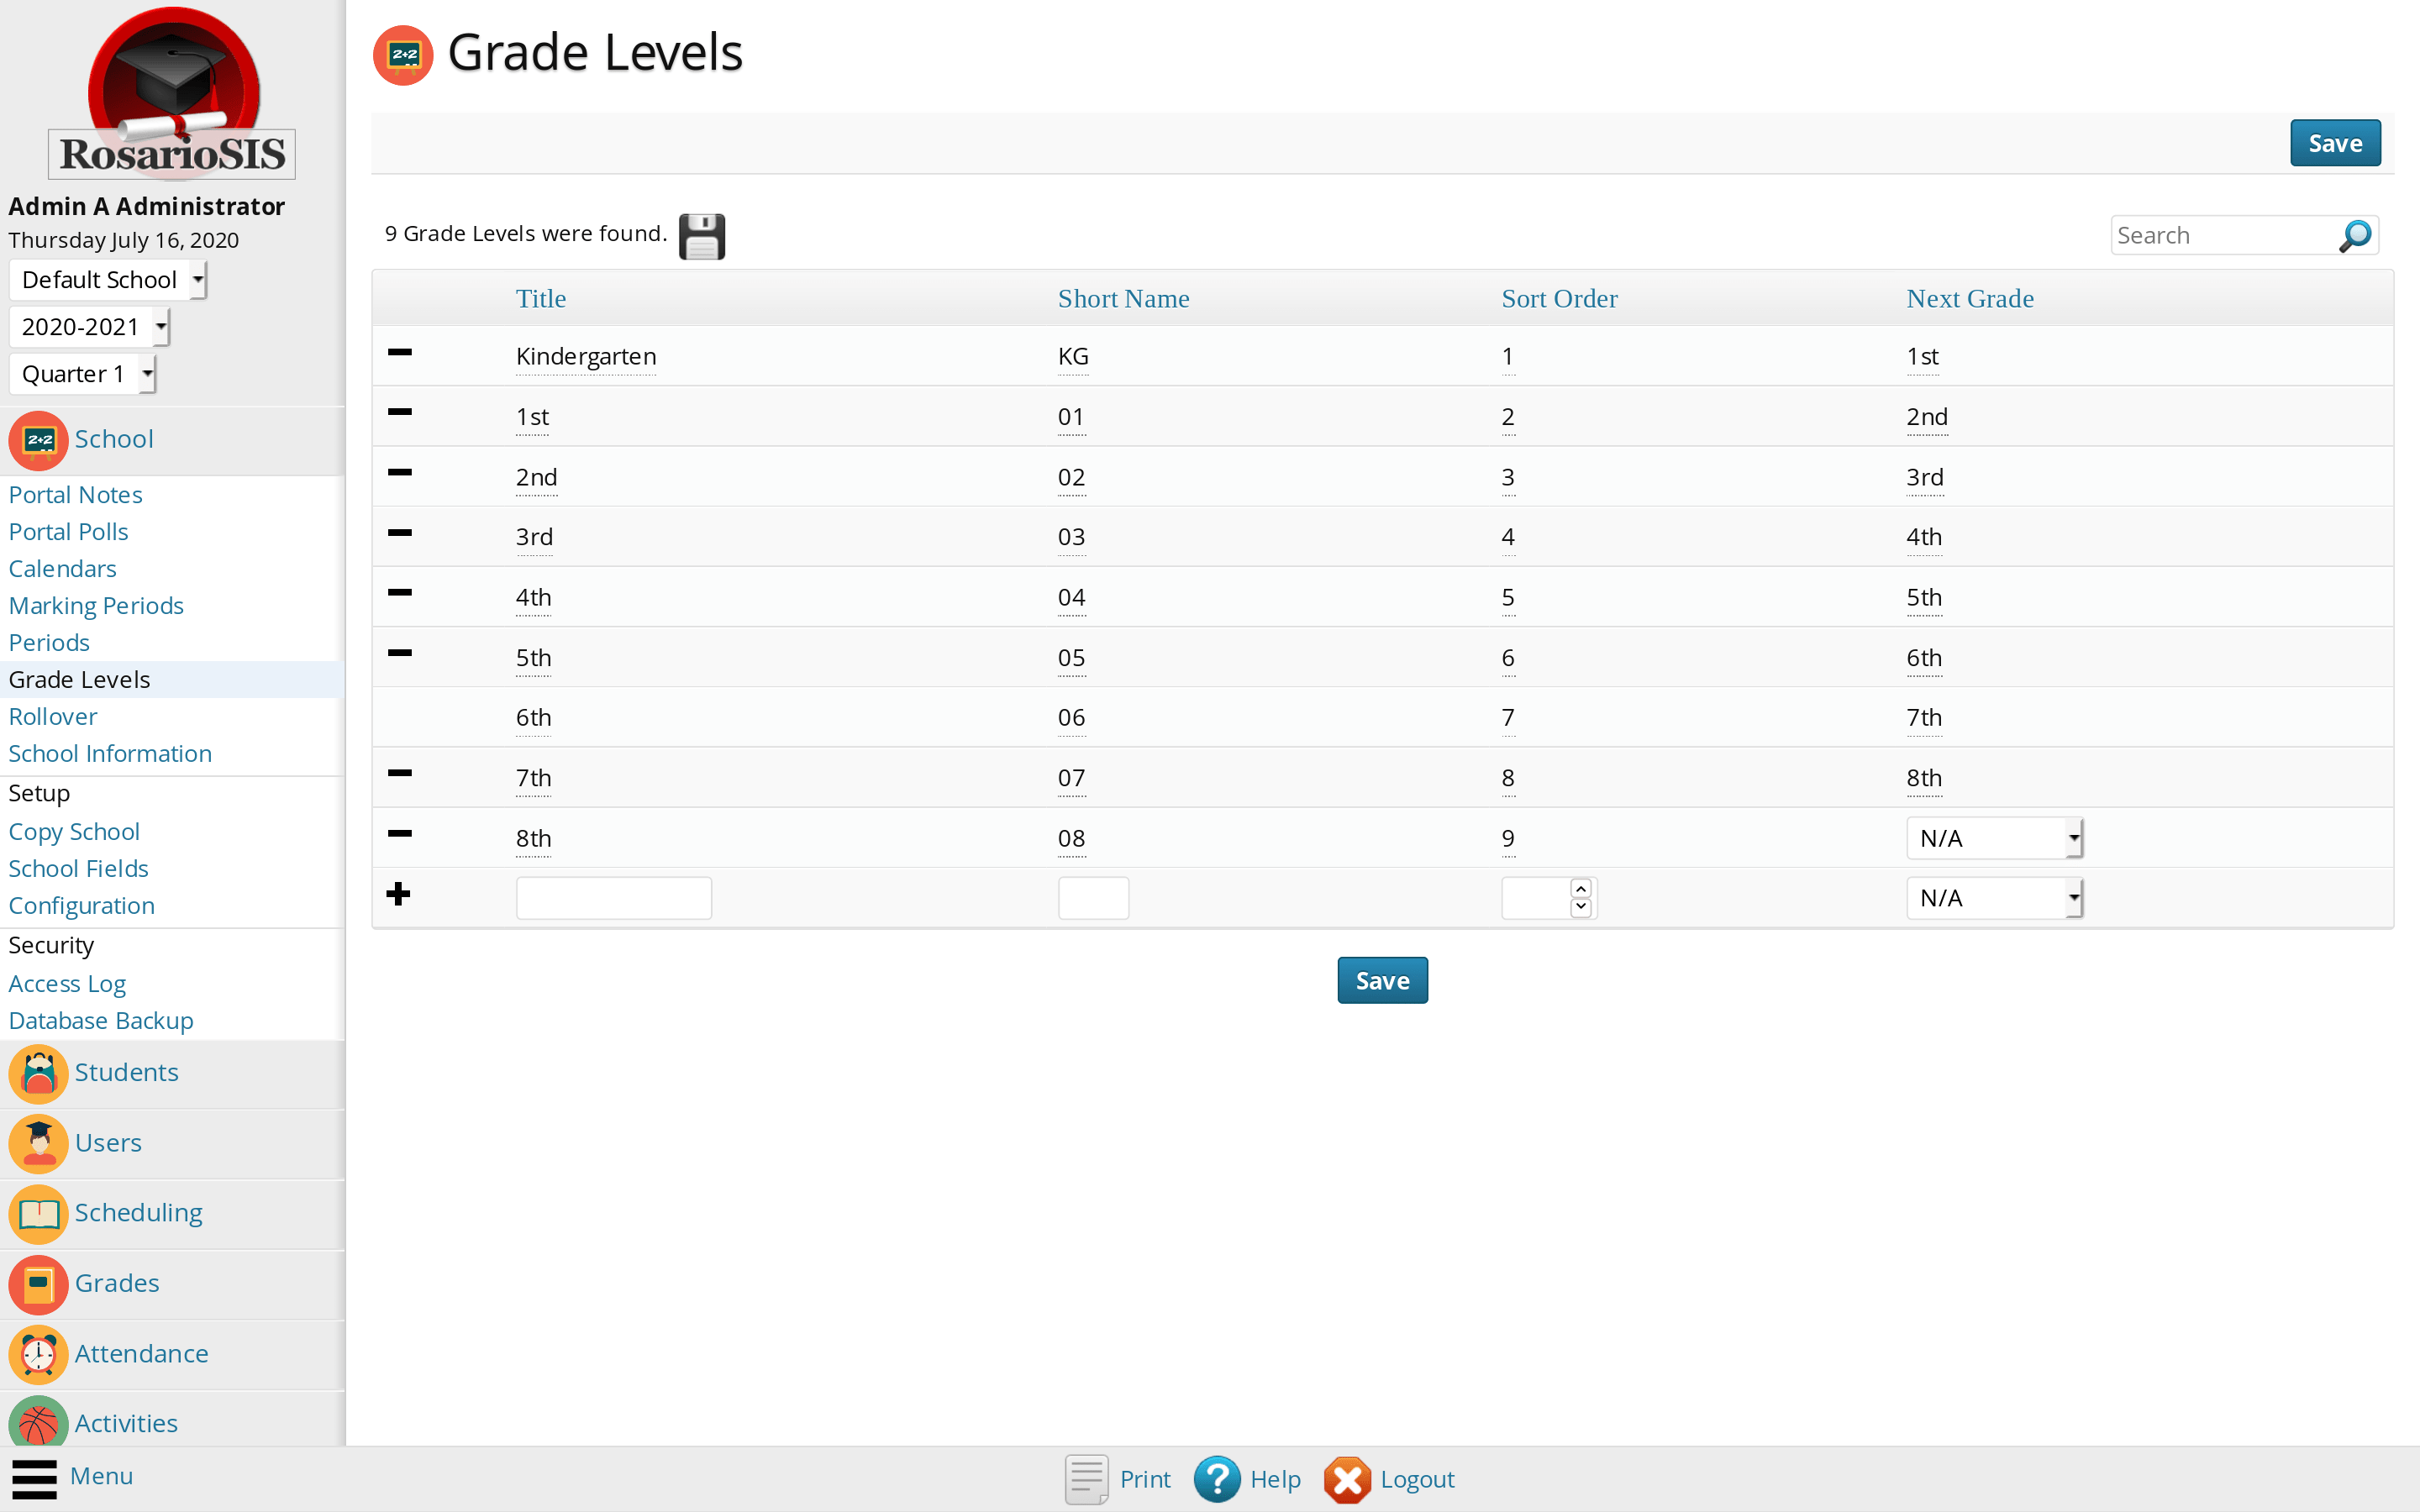
Navigate to School > Grade Levels using the menu. This program allows you to set up your school’s Grade Levels.
The Next Grade field lets you define to which Grade Level students will be promoted at the end of the academic year, after proceeding to the Rollover.
Attendance Codes Setup
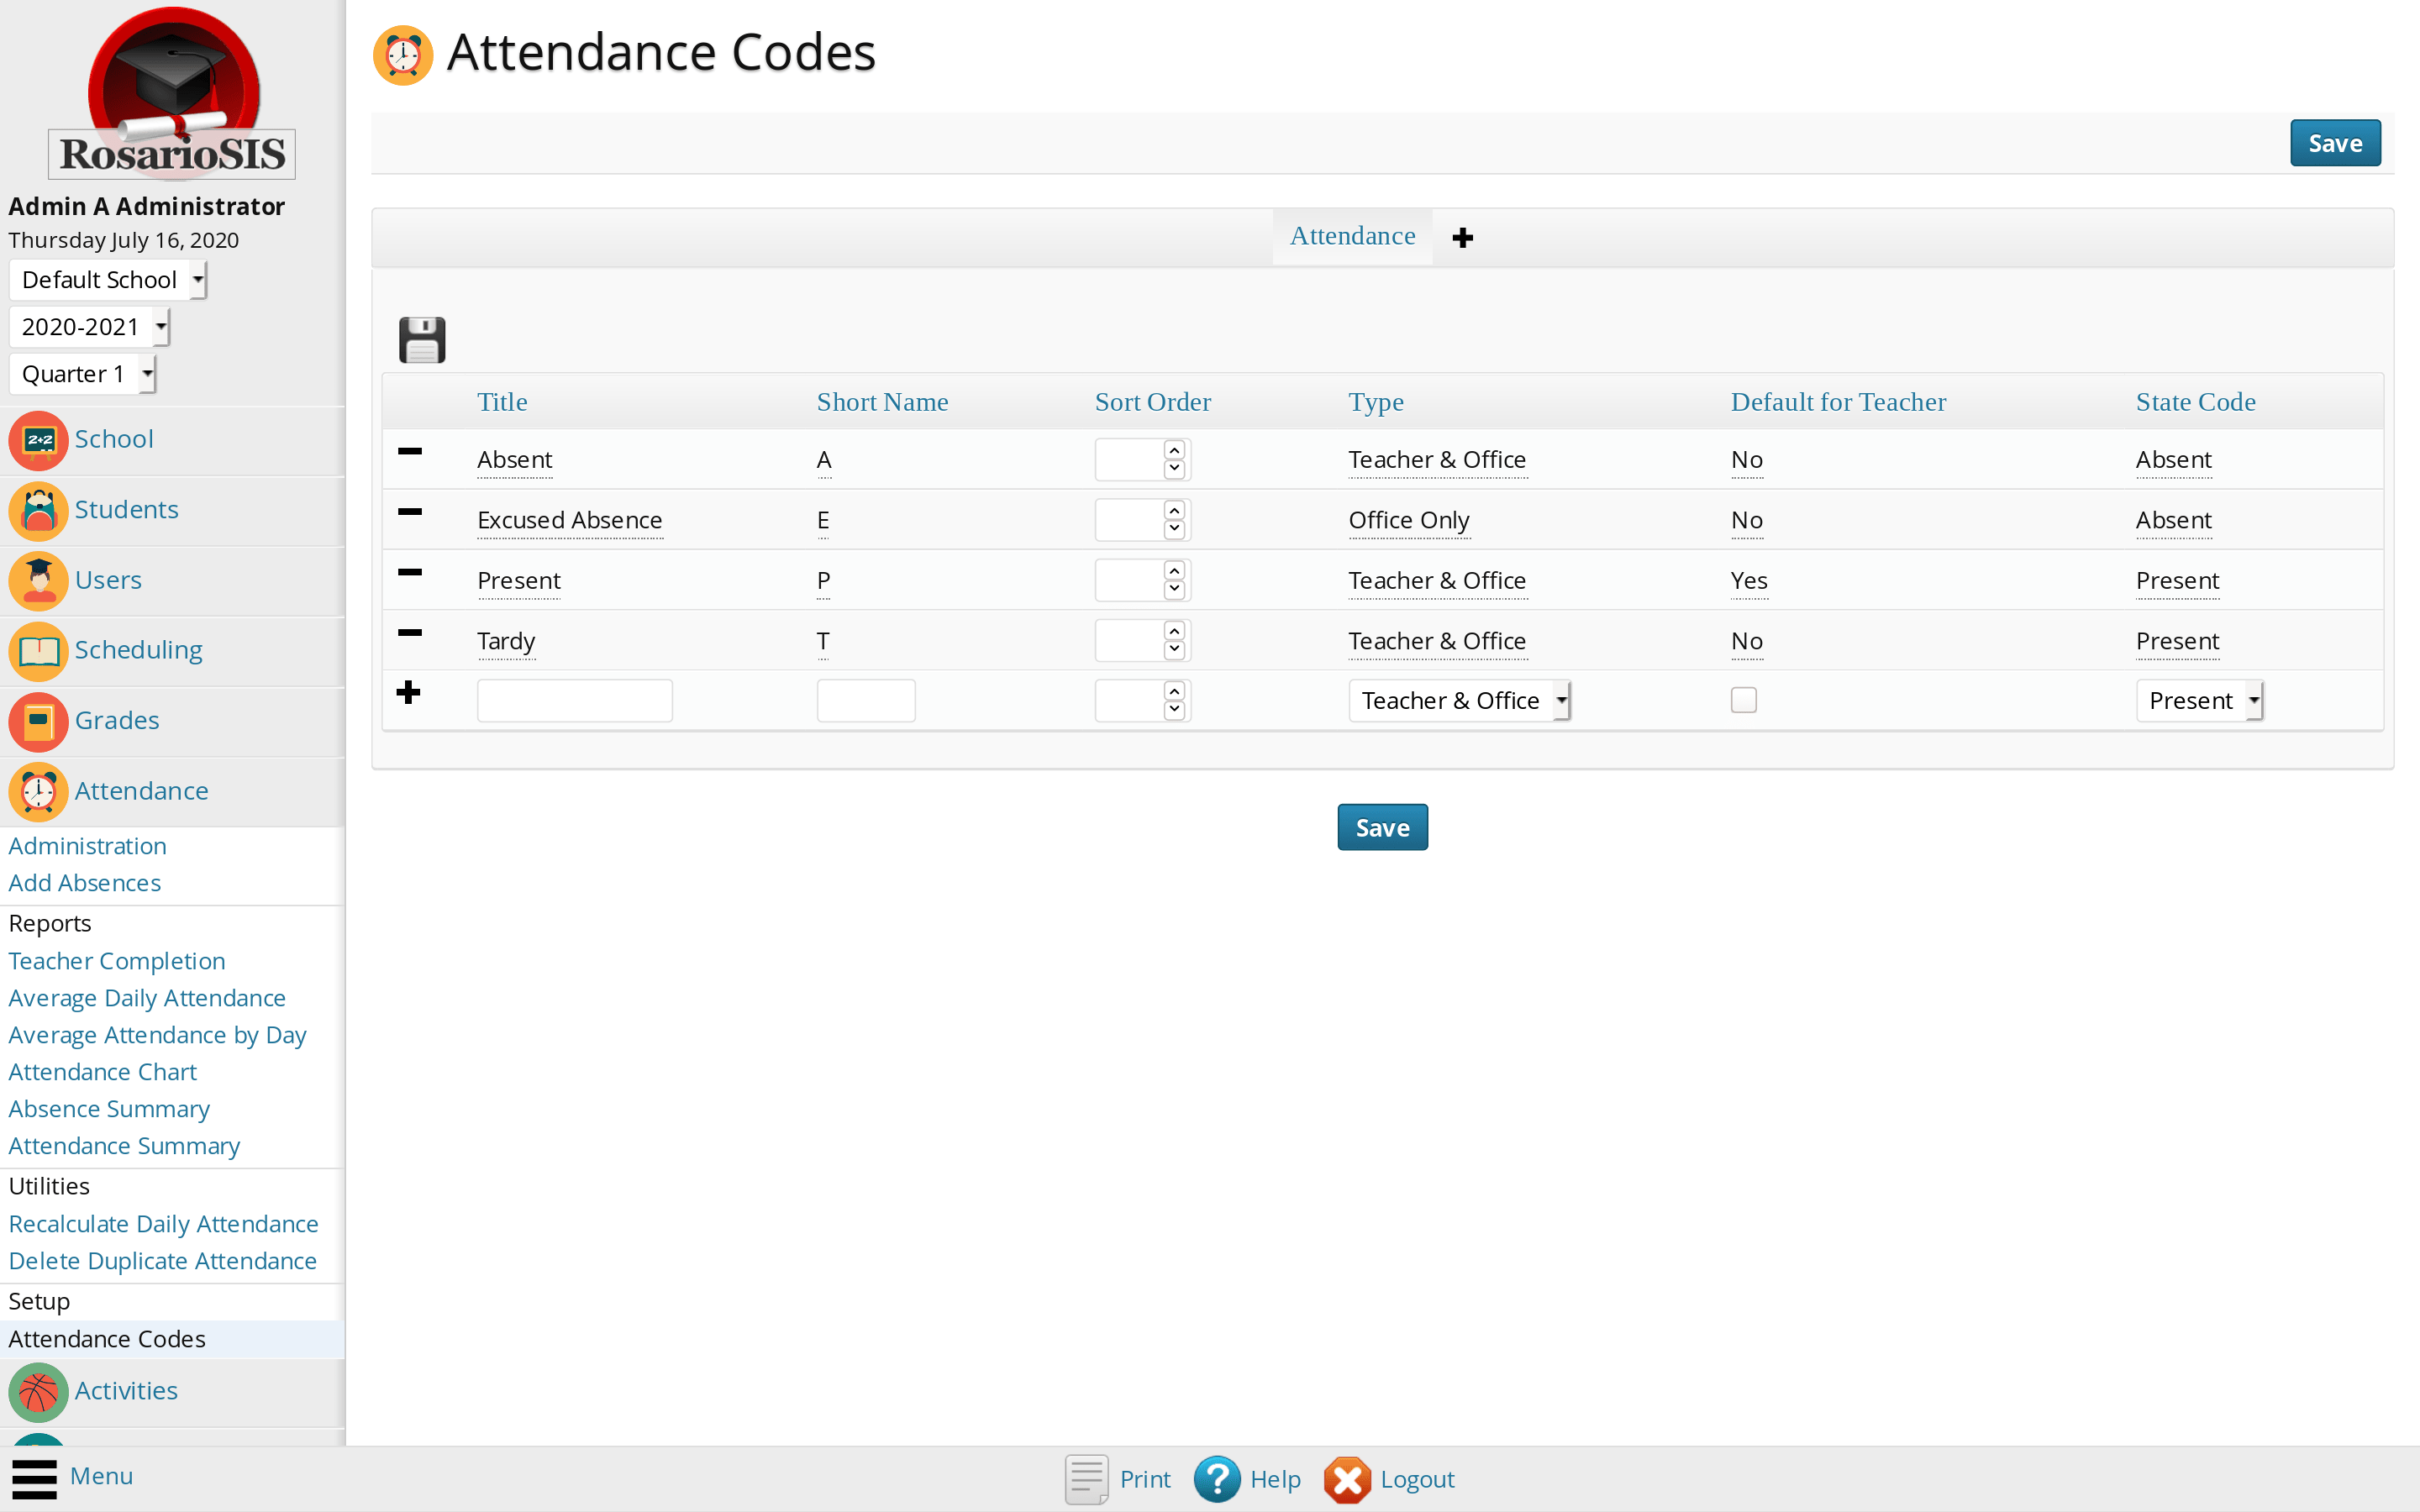
Navigate to Attendance > Setup > Attendance Codes using the menu. Now you can set up the Attendance Codes in use in your school. Click the Save button when you are done.
We advise you to default all students to Present by selecting `Yes` in the Default for Teacher column for the Present Attendance Code. Attendance taking will be made easier for teachers since most students should be present in class.
Do not forget to set the State Code value for each Attendance Code.
Report Card Grades Setup
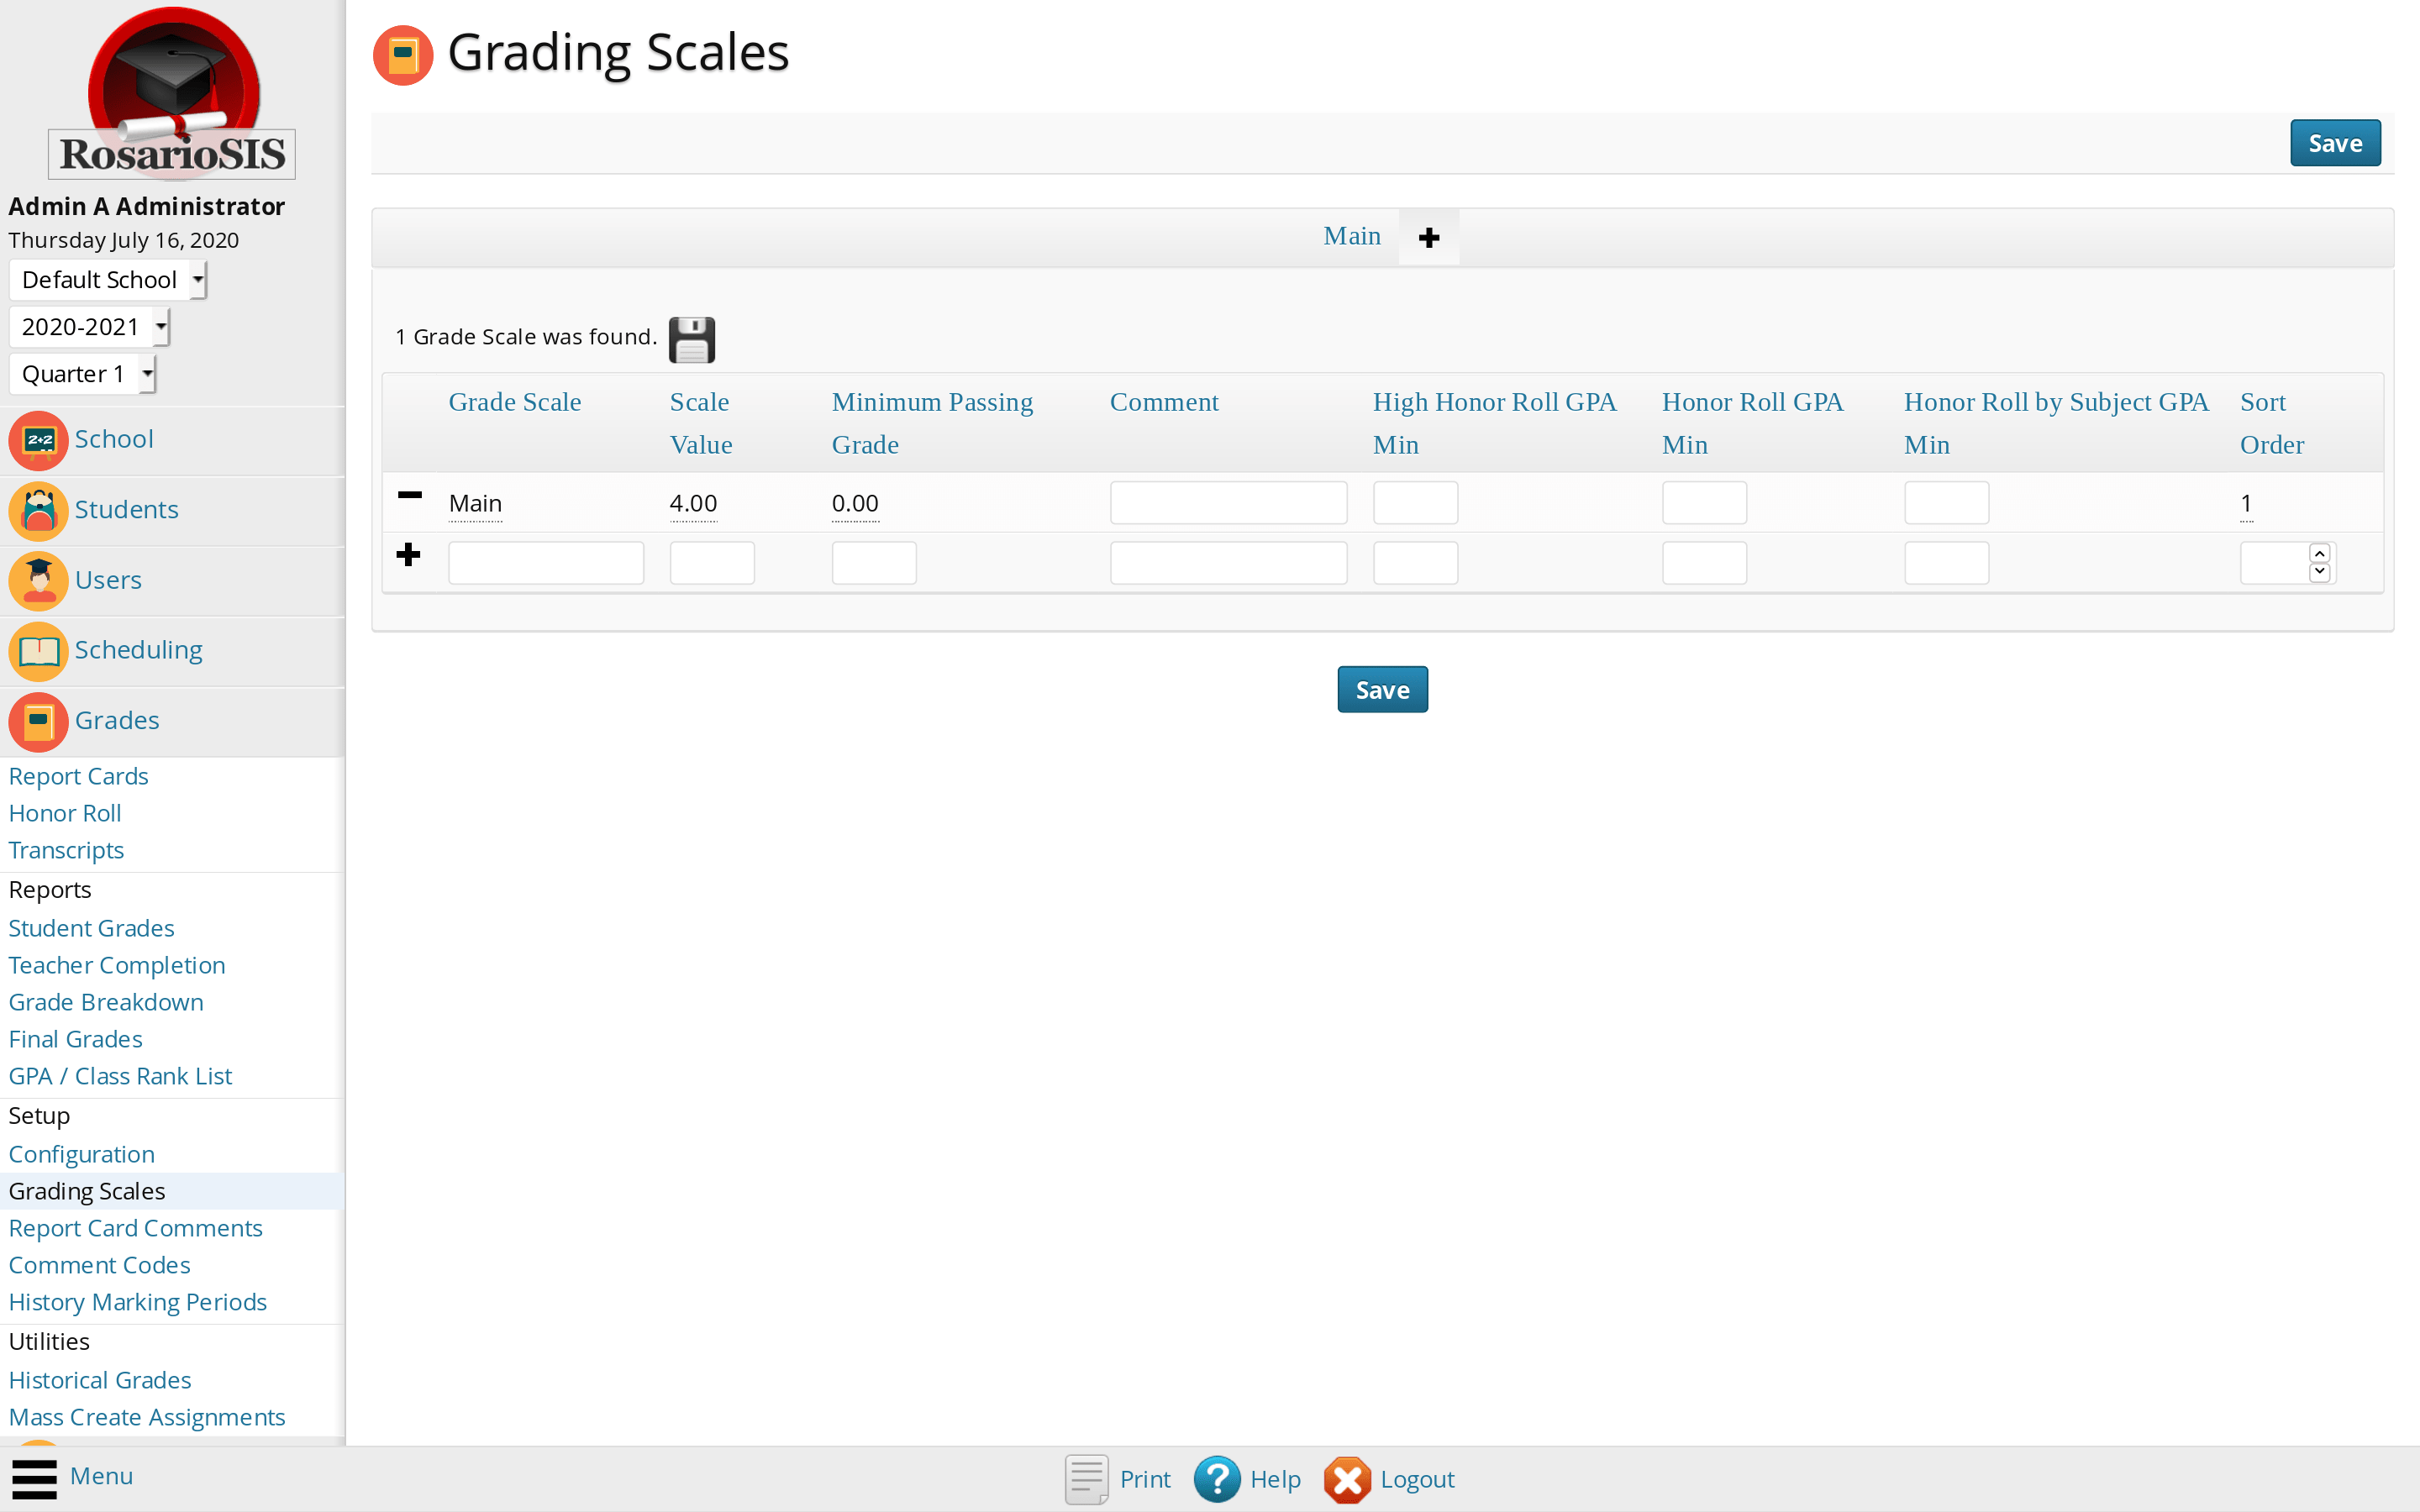
Navigate to Grades > Setup > Grading Scales using the menu.
Enter the + icon tab to set up the Main Grading Scale: namely, the Scale Value, the Minimum Passing Grade to earn credits and the minimum Grade Point Averages to qualify for Honor Roll. When you are done, click the Save button and go back to the Main Grading Scale tab.
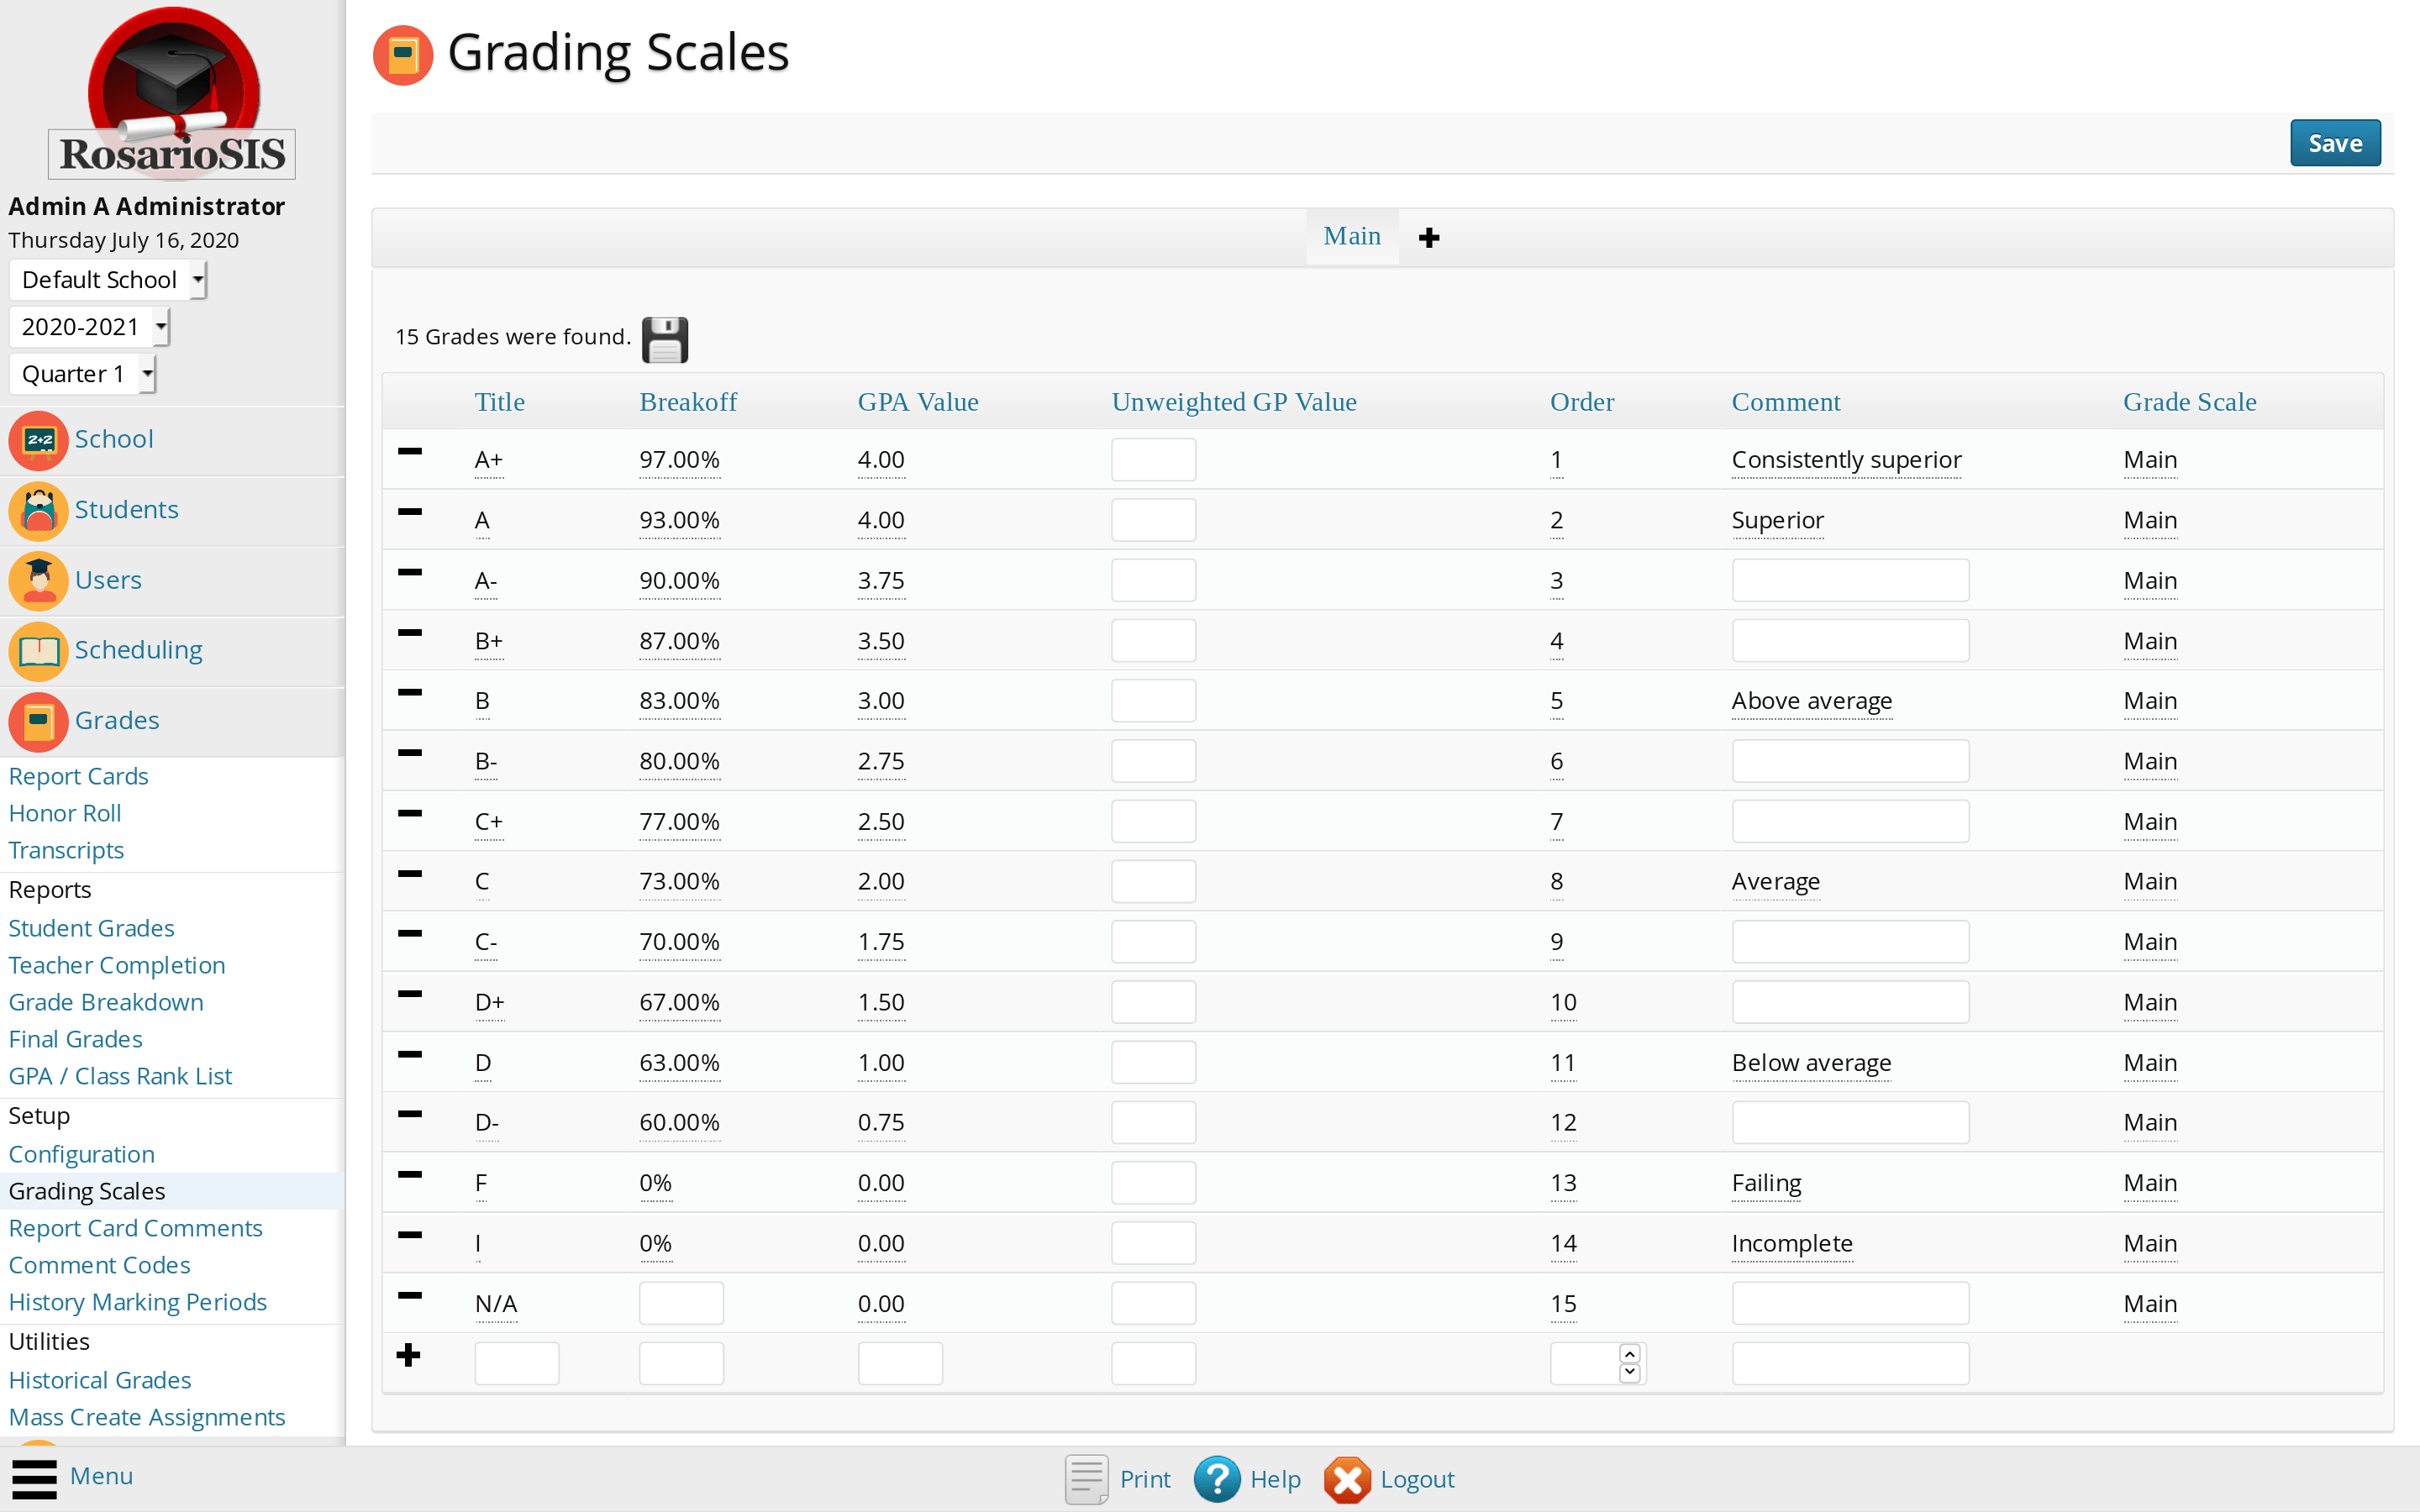
Enter the letter grade in the Title field.
The Breakoff value is the bottom limit, in percent, used to determine the letter grade. For example, a grade with a breakoff of 97 will be assigned to the following percent grades: 100%, 99%, 98% and 97%.
Enter the weighted grade value in the GPA Value field corresponding to each grade. The GPA values are required for the Transcripts to work.
If your grading scale counts with hundreds of grades (for example, a 20 point scale with 1 decimal, that is 20 x 10 = 200 grades), you can create it automatically thanks to the Grading Scale Generation plugin.
Report Card Comments Setup
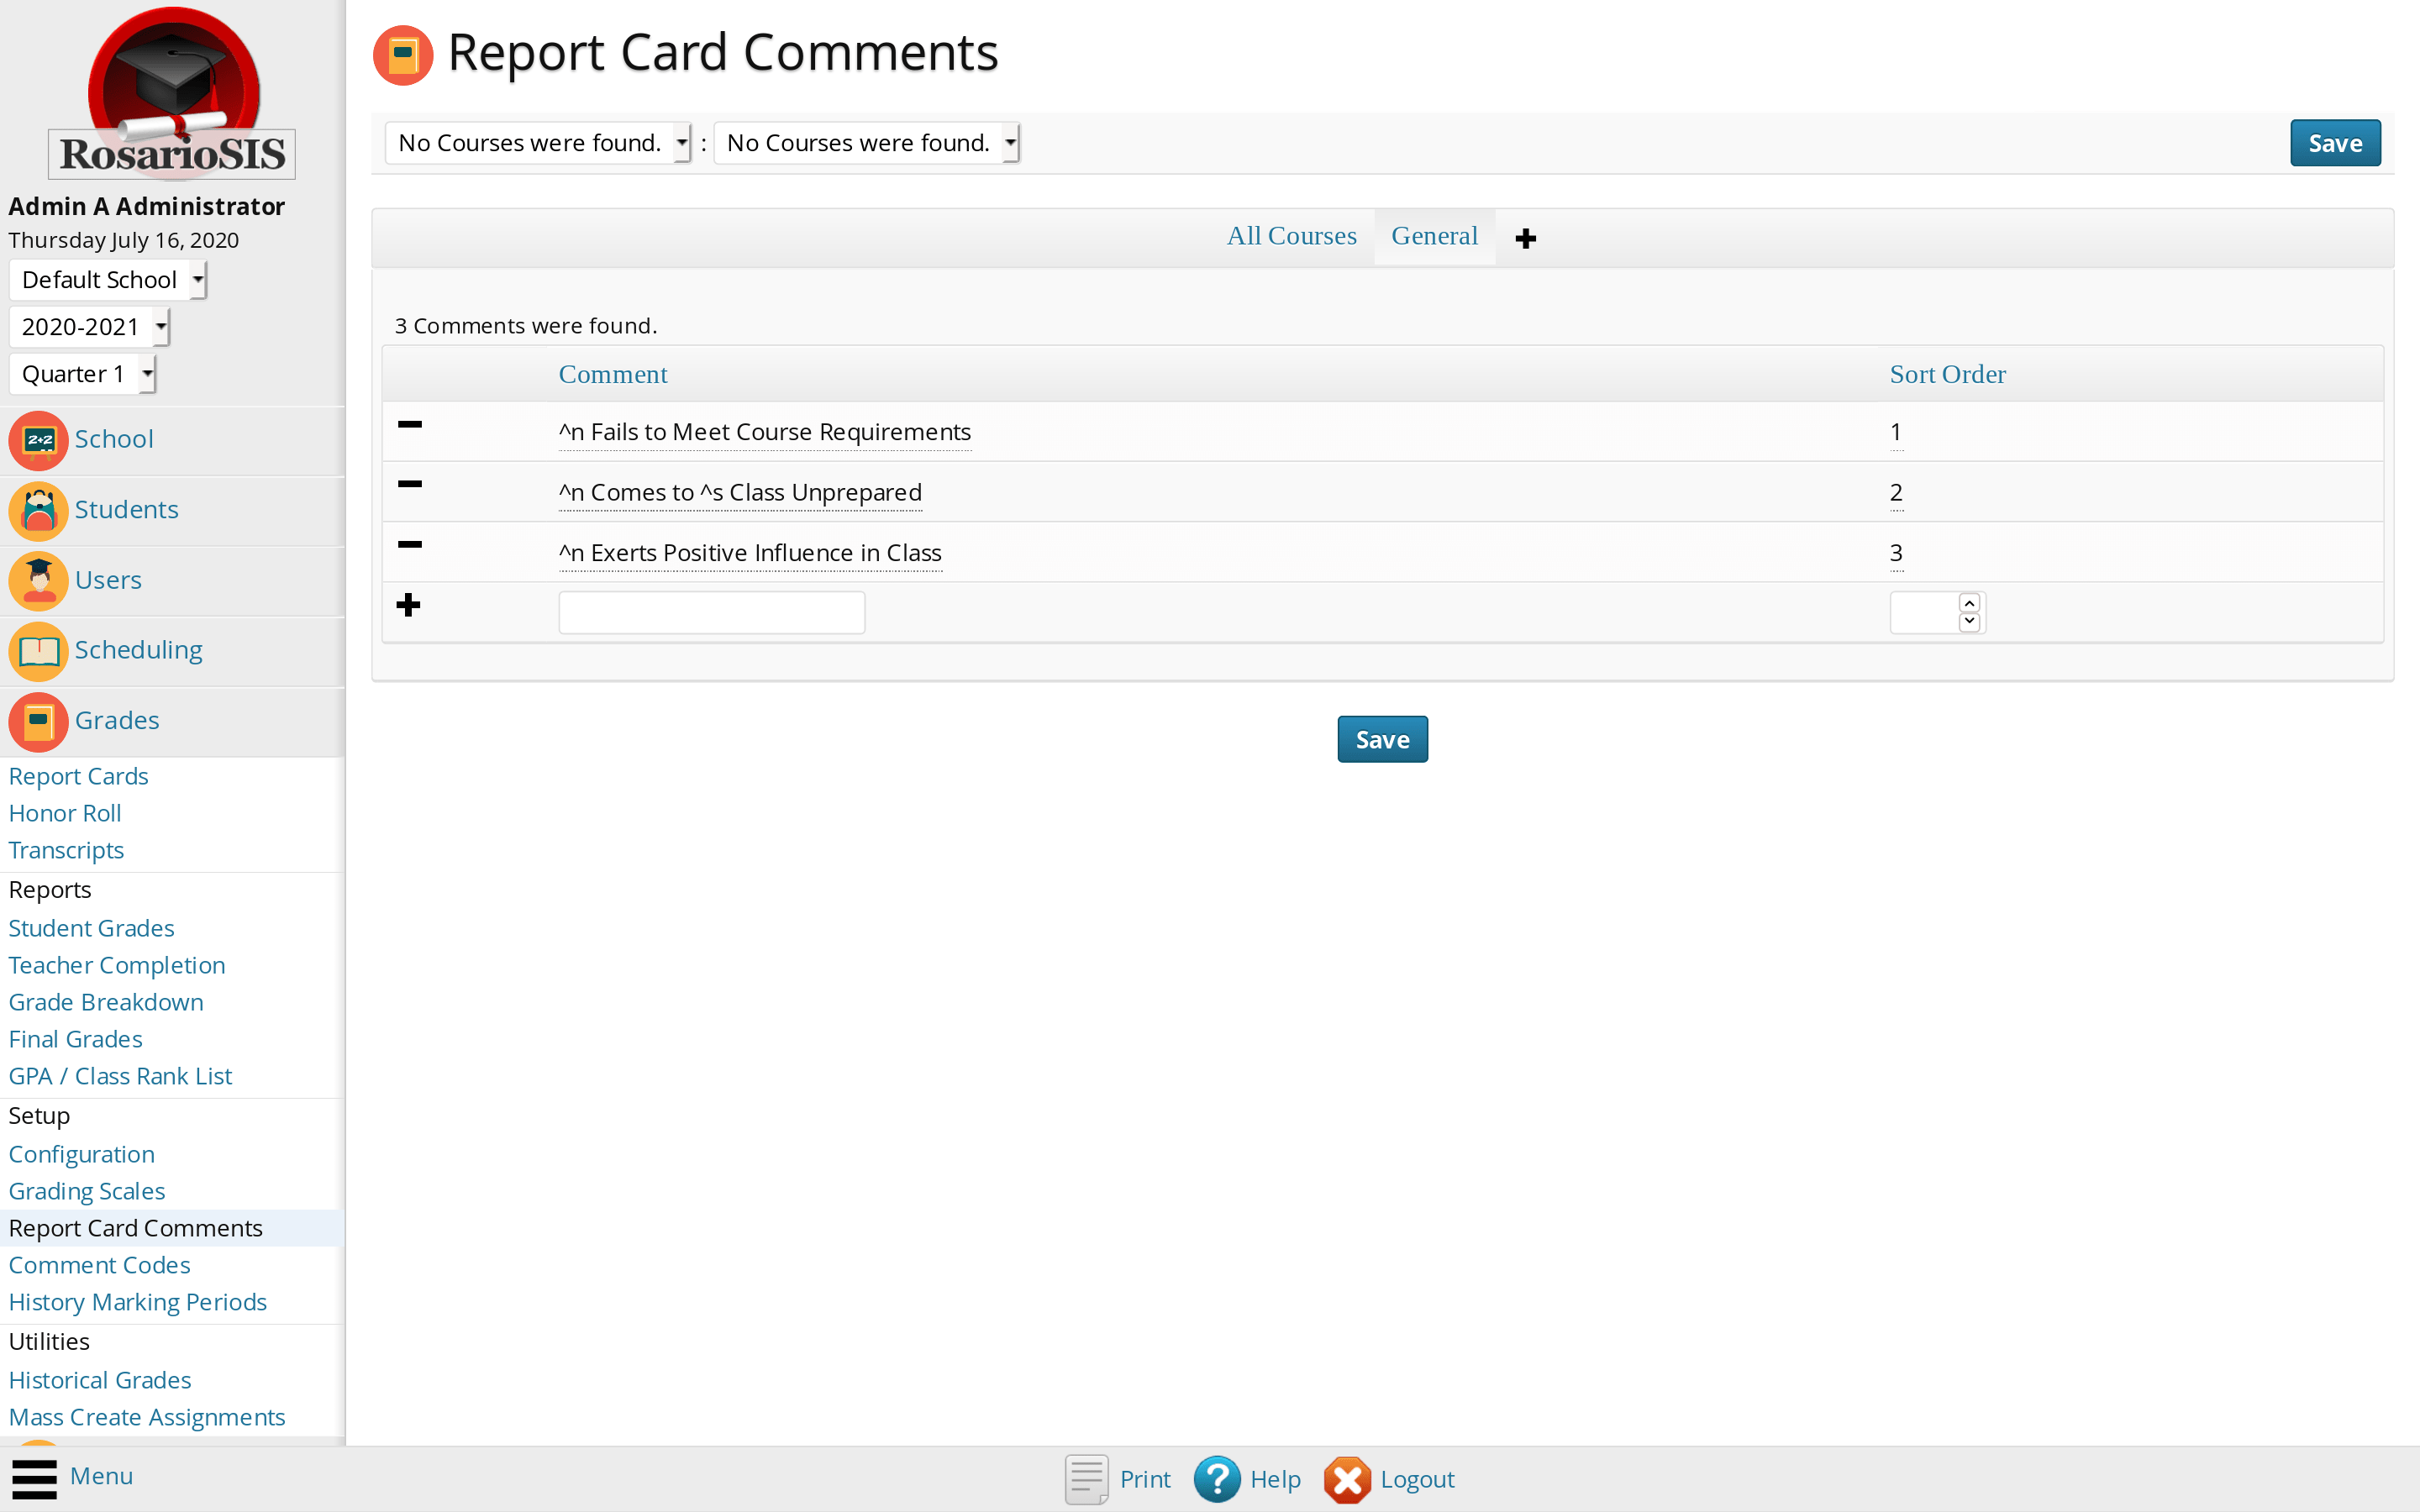
Navigate to Grades > Setup > Report Card Comments using the menu. The Report Card Comments are the comments that teachers can use when entering the final report card grades.
Fill in the General comments and click the Save button. After creating courses, course specific comments can be added (consult the Administrator Handbook or the inline Help for details).
Student Enrollment Codes Setup
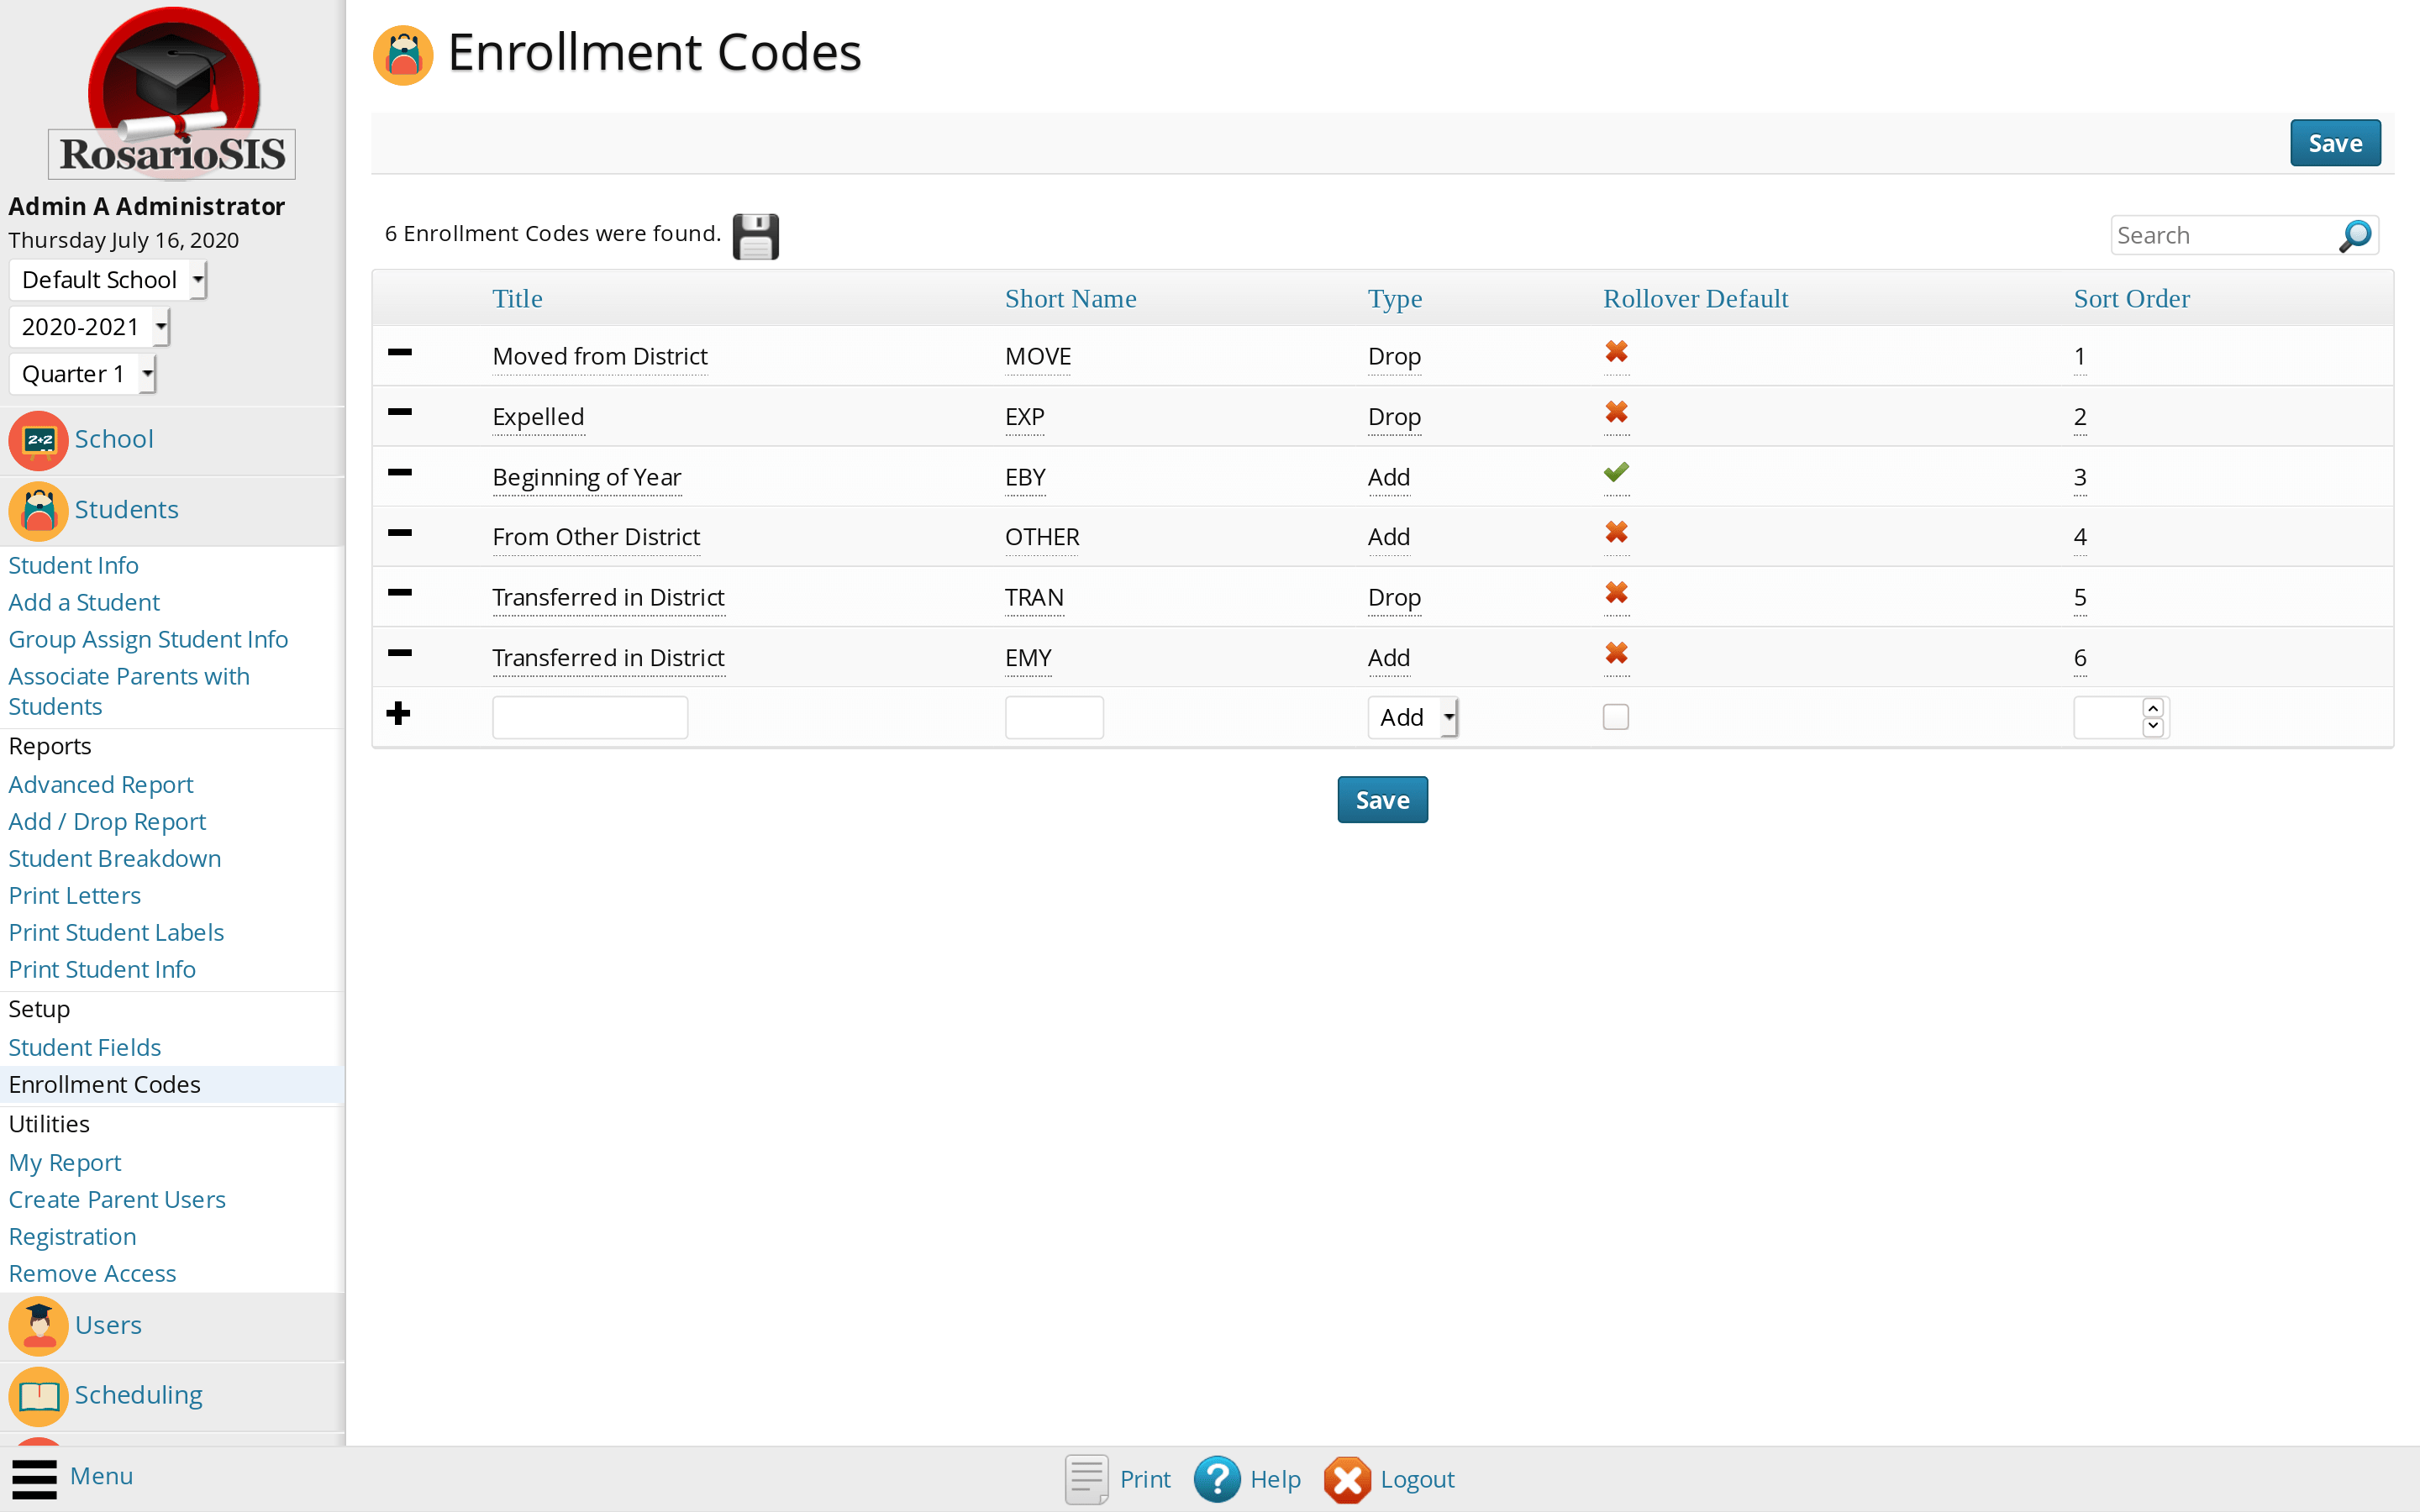
Navigate to Students > Setup > Enrollment Codes using the menu.
The Enrollment Codes are used to add or drop a student from a school. They are displayed in the Enrollment Records of each student (below the General Info in the Student Info program).
Portal Notes

Navigate to School > Portal Notes using the menu. The Portal Notes are a simple communication system. Using this program, you can create text messages that will be published on the Portal of the user.
You can set the note to be visible only for a certain period of time by adjusting the Visible Between dates.
You can write a note visible to Students or Parents or Teachers or Administrators, or any combination of the previous, by adjusting the Visible To options.
Add Users
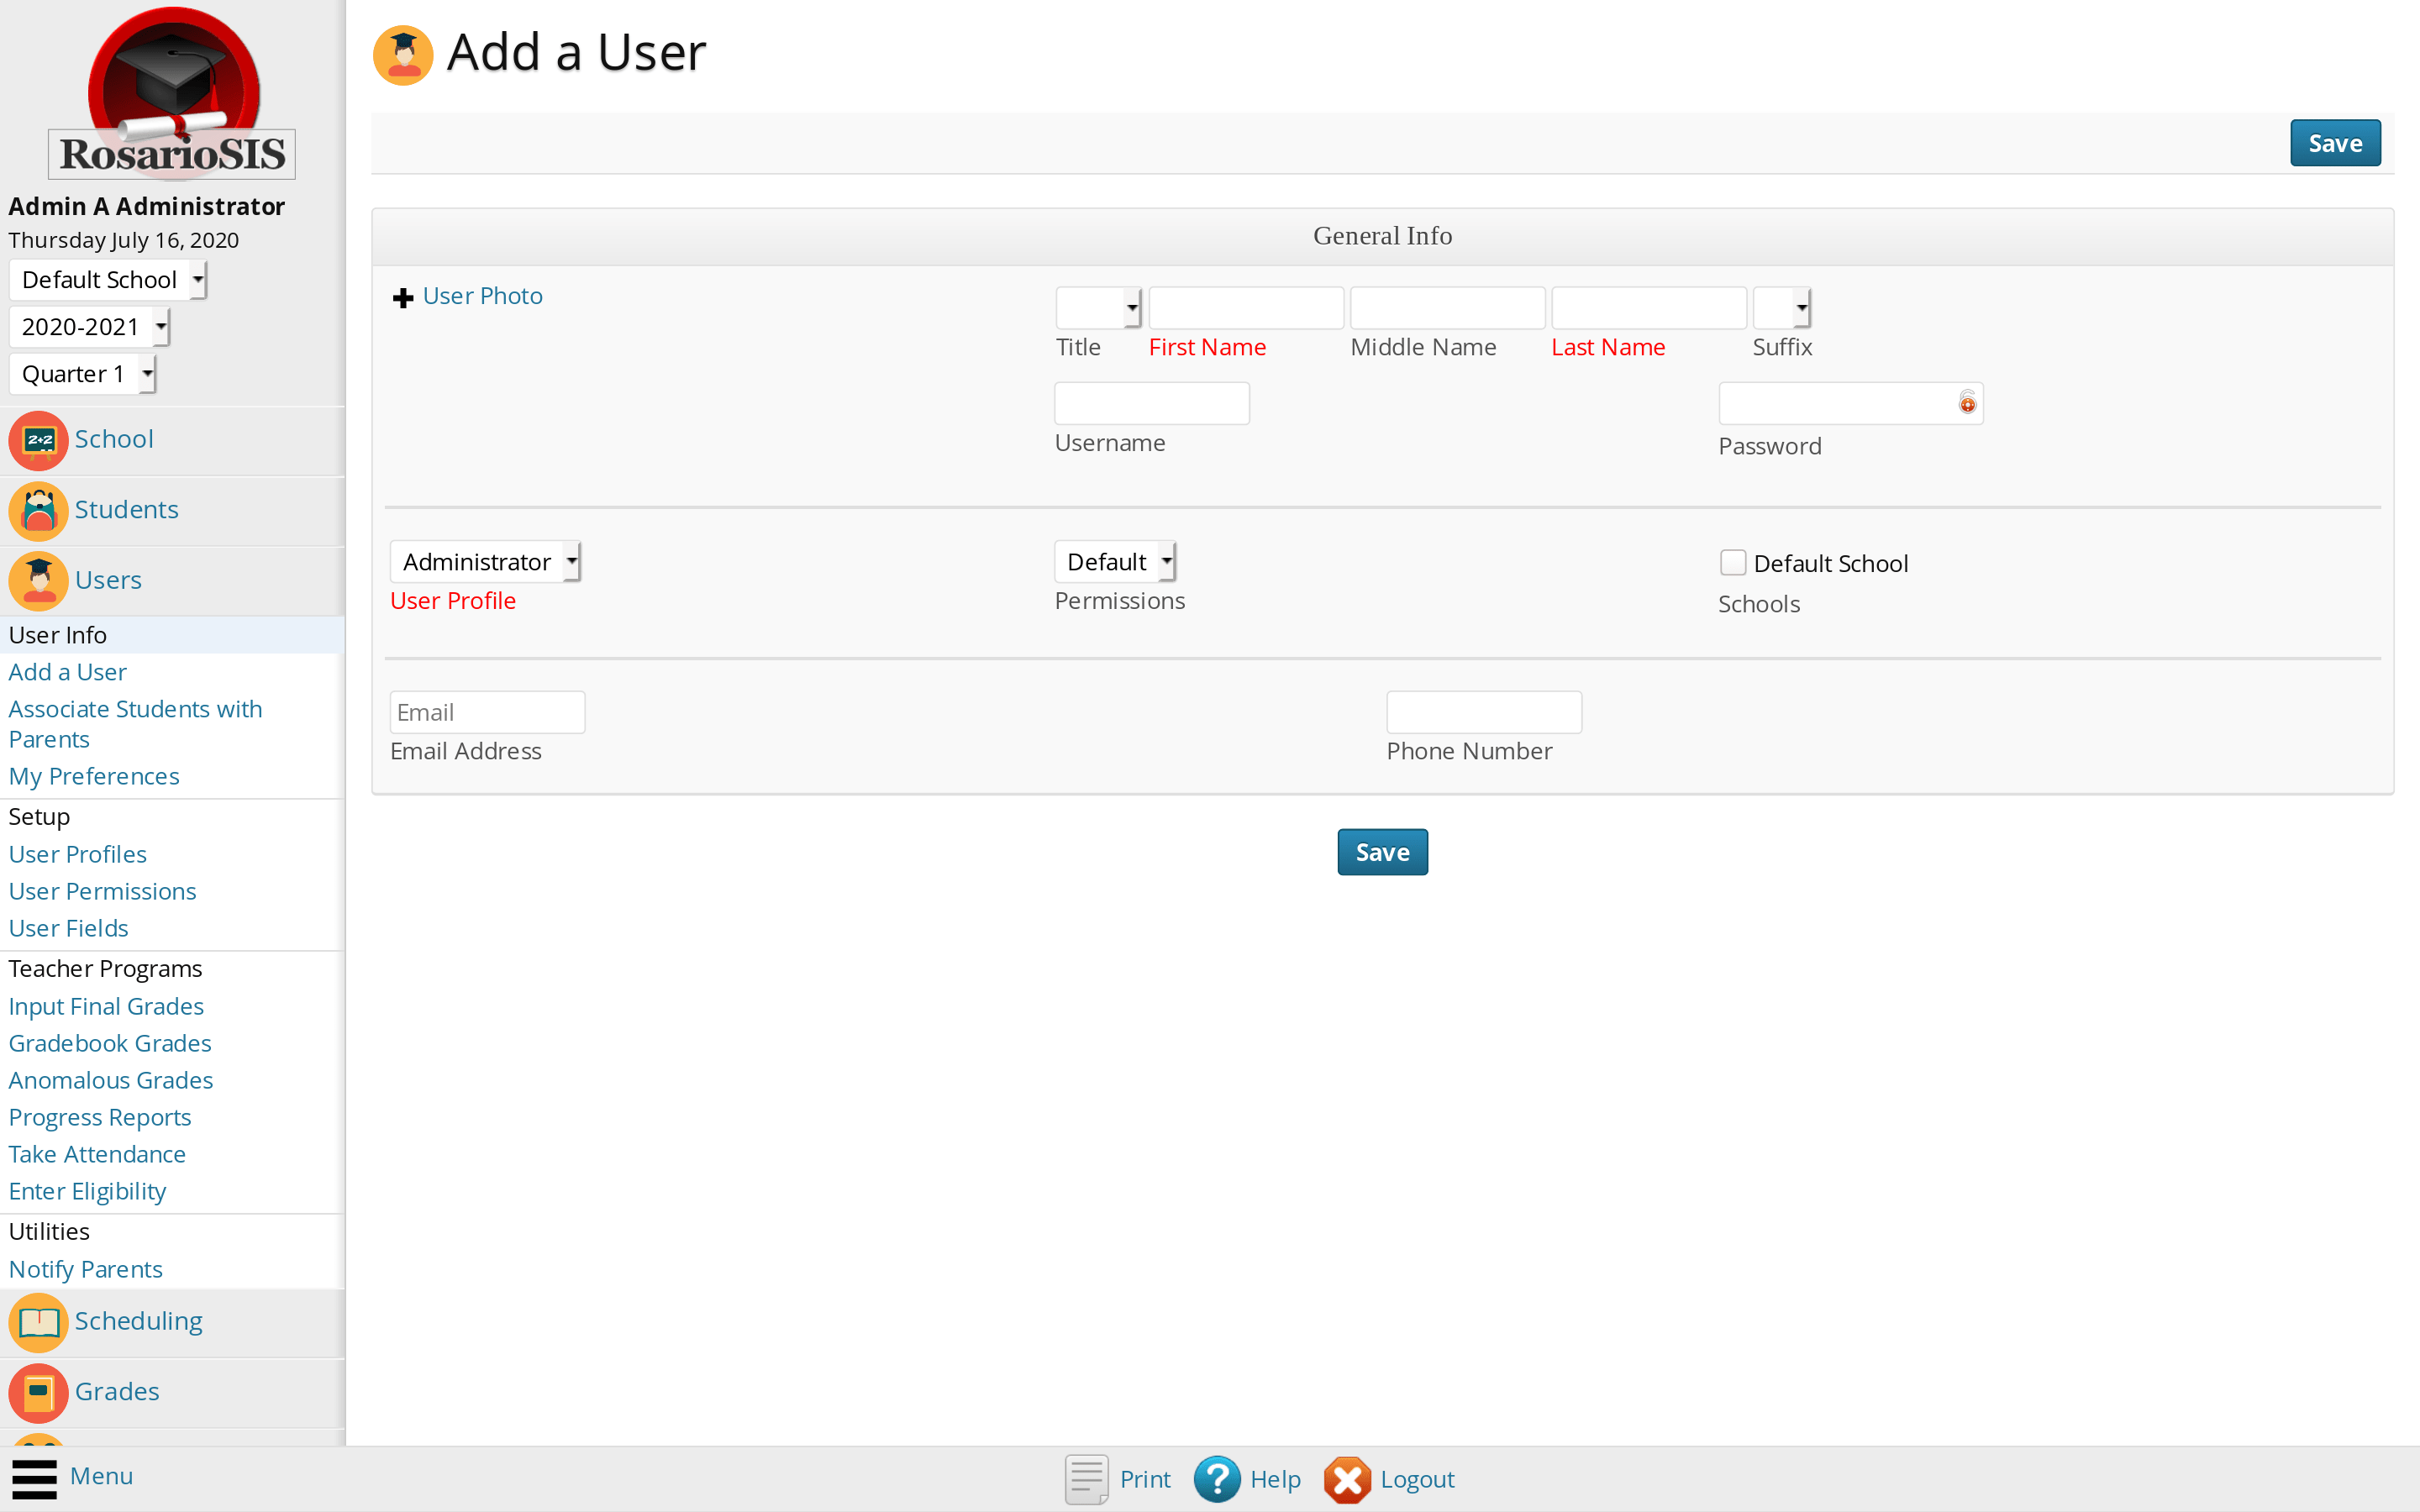
Now we are going to add teachers to the system. Navigate to Users > Add a User using the menu.
Fill in the General Info form and select `Teacher` in the User Profile dropdown list. To create an Administrator or a Parent, do the same and select the User Profile accordingly.
Create Courses
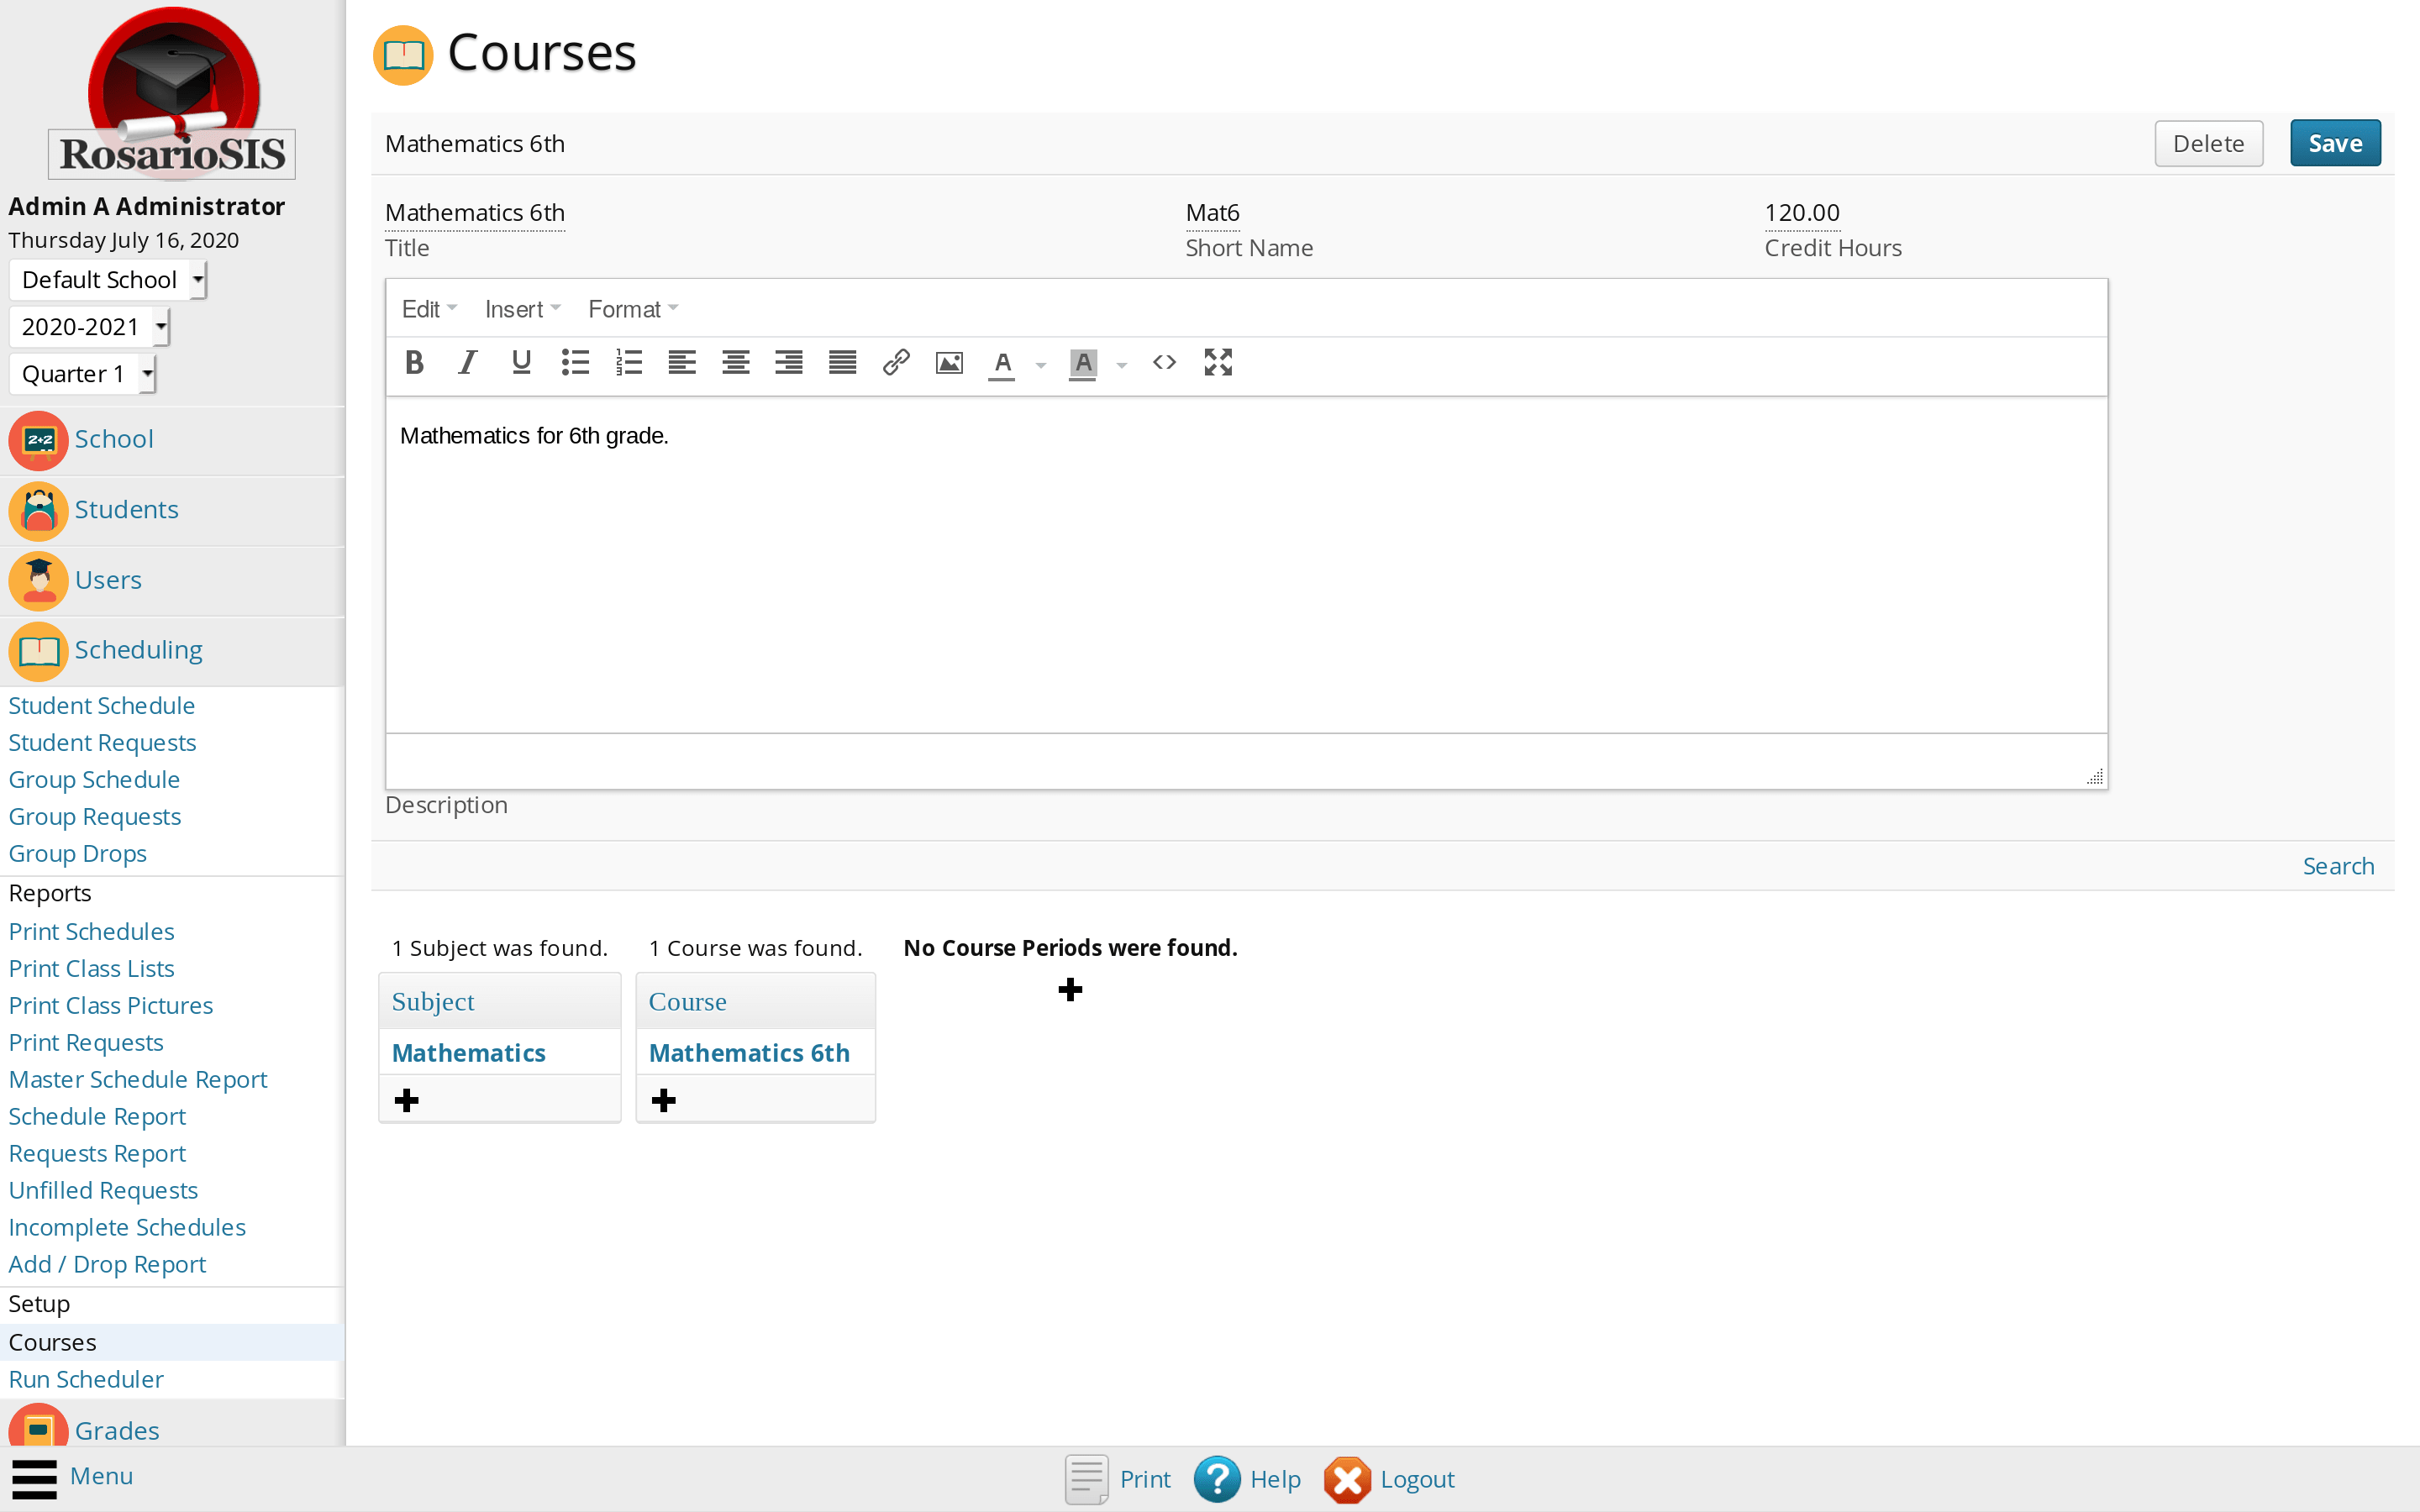
Next, we are going to create the Subjects, Courses and Course Periods. Navigate to Scheduling > Courses using the menu.
You can create as many Subjects as you need. First click on the + icon, then enter the Subject Title, and click the Save button.
Select any Subject and click on the + icon to create a Course within the Subject. You can create as many Courses as you need.
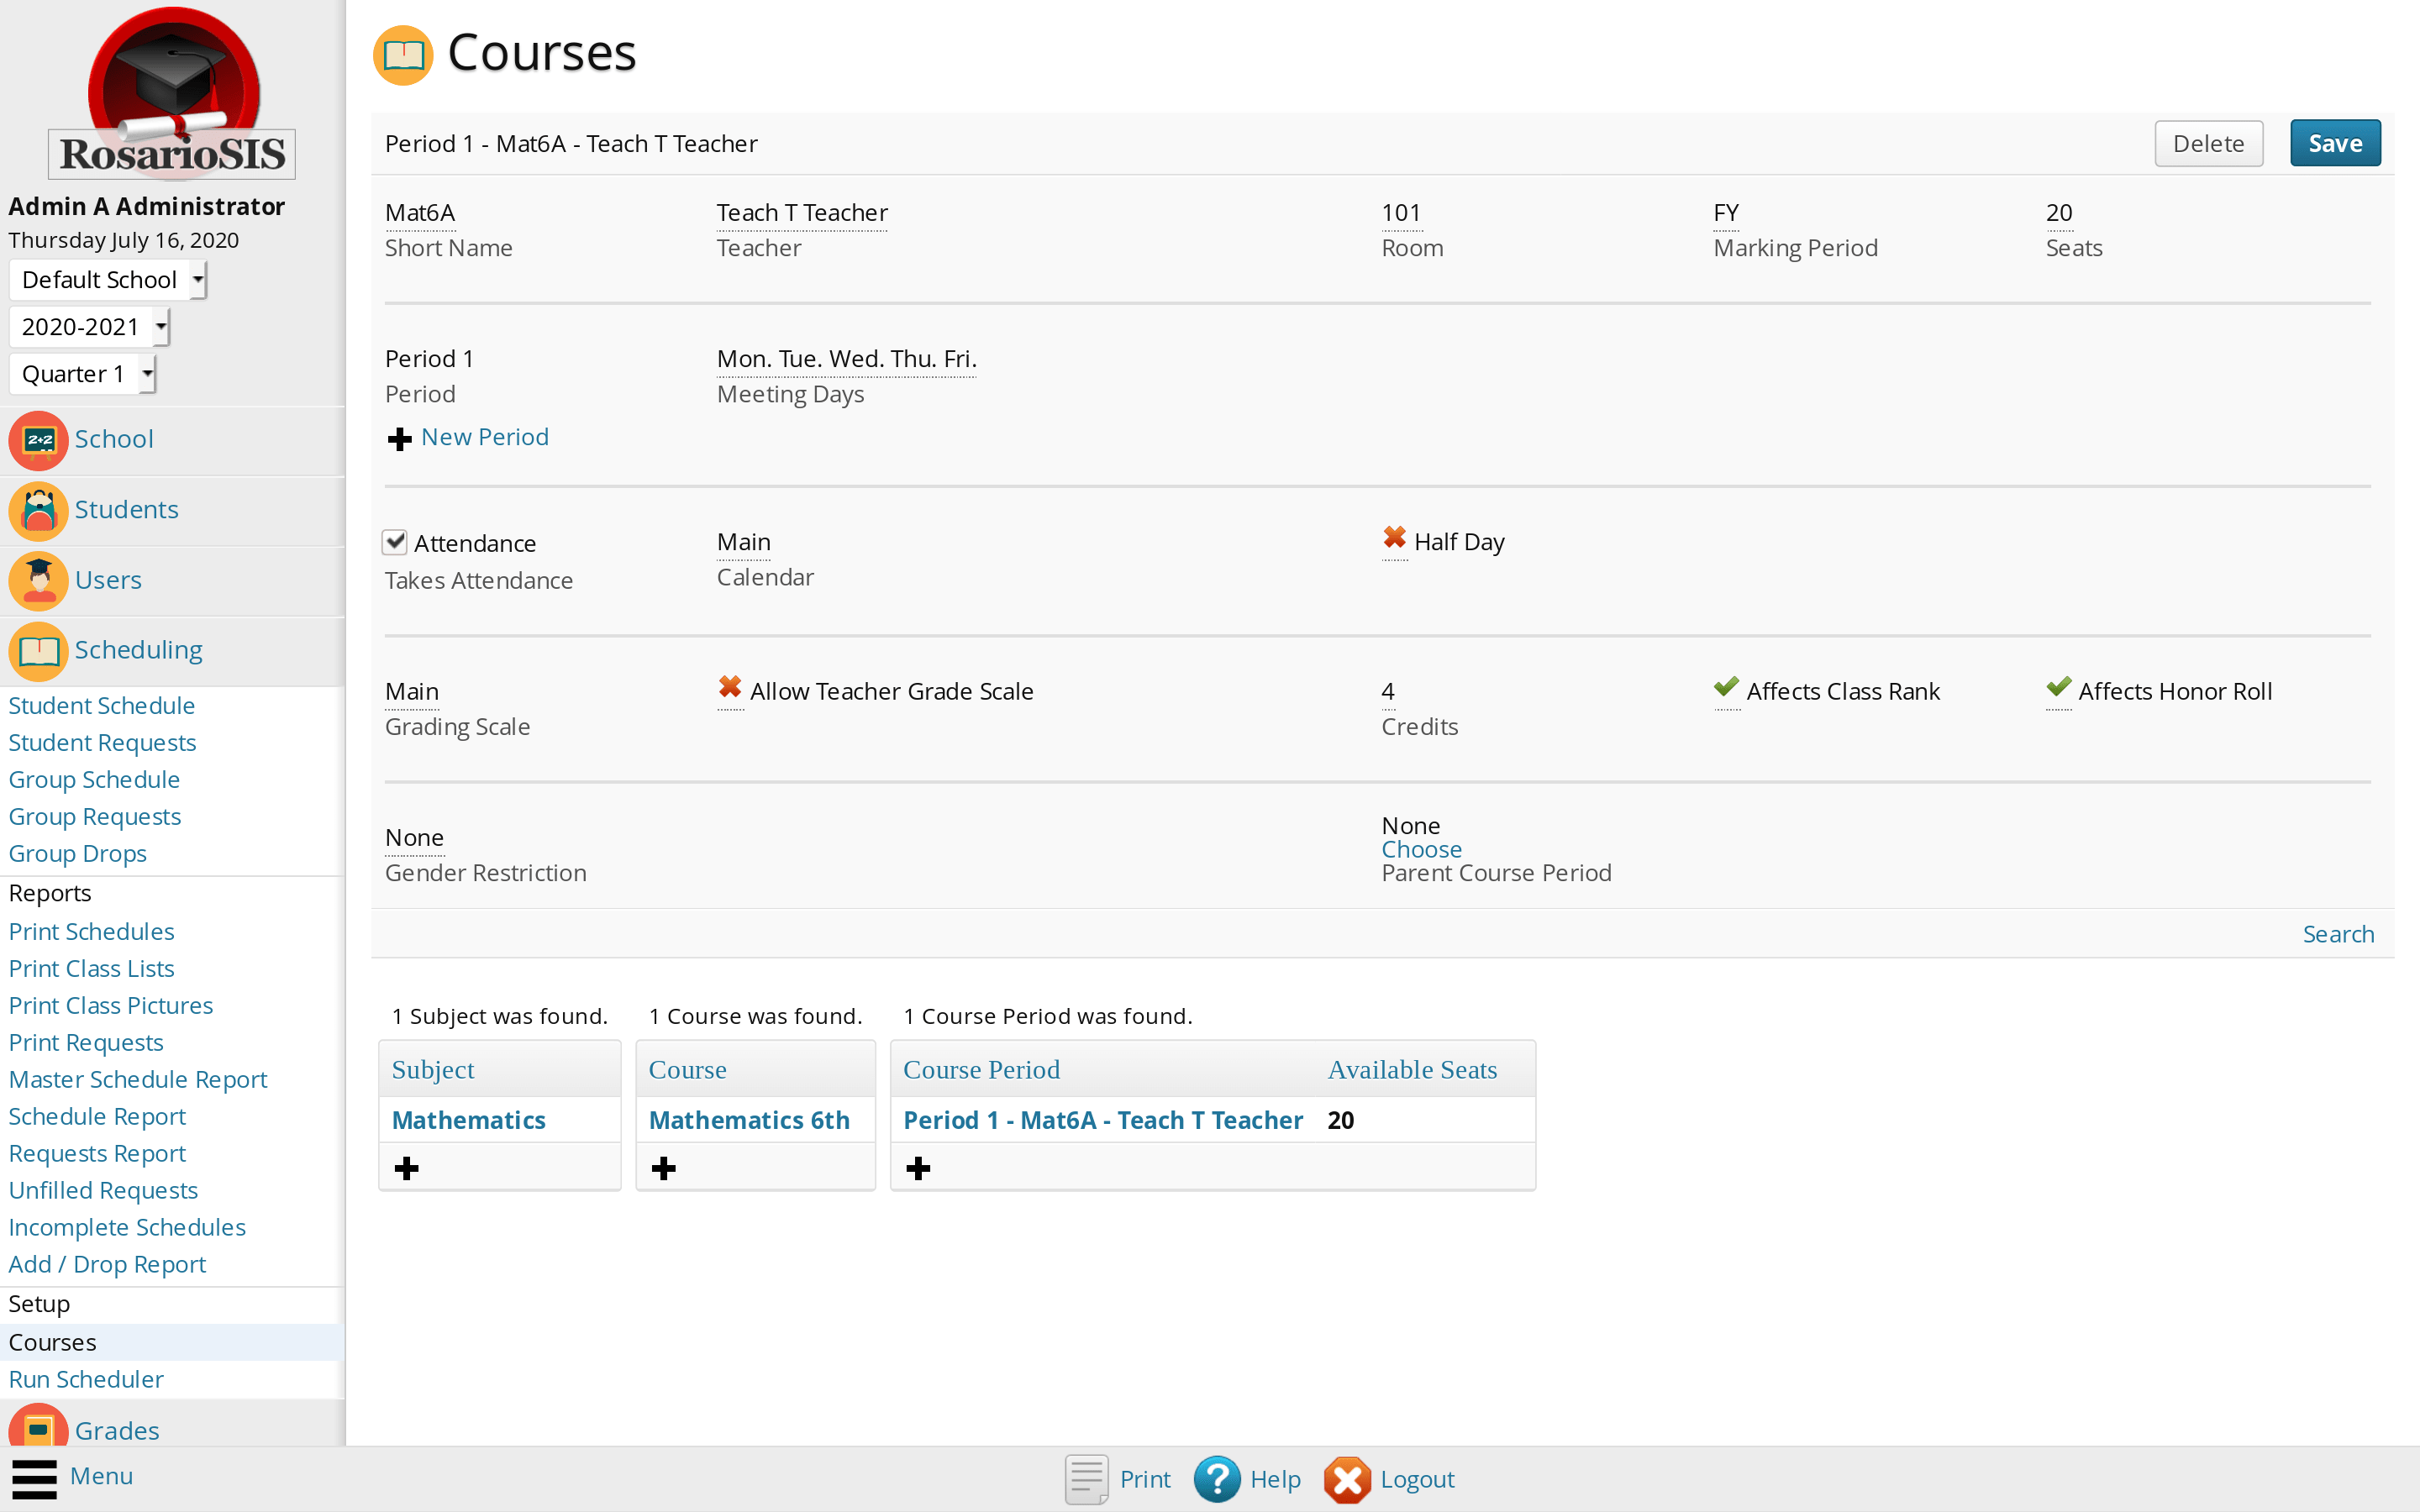
Select any Course and click on the + icon to create a Course Period (also known as Course Section) within the Course.
Check the Takes Attendance checkbox to enable attendance for this Course Period.
Select the Grading Scale in the dropdown list to allow teachers to grade the Course Period (Final Grades; in all cases teachers can create assignments and manage the Gradebook).
Check the Affects Honor Roll checkbox if you want the Course Period to be part of the honor roll.
Check the Allow Teacher Grade Scale checkbox to allow teachers to use their own grade scale instead of the school’s one.
You must fill in the Credits (coefficient) field for the transcripts to show credits earned for a Course Period as well as to calculate cumulative GPA.
Add Students
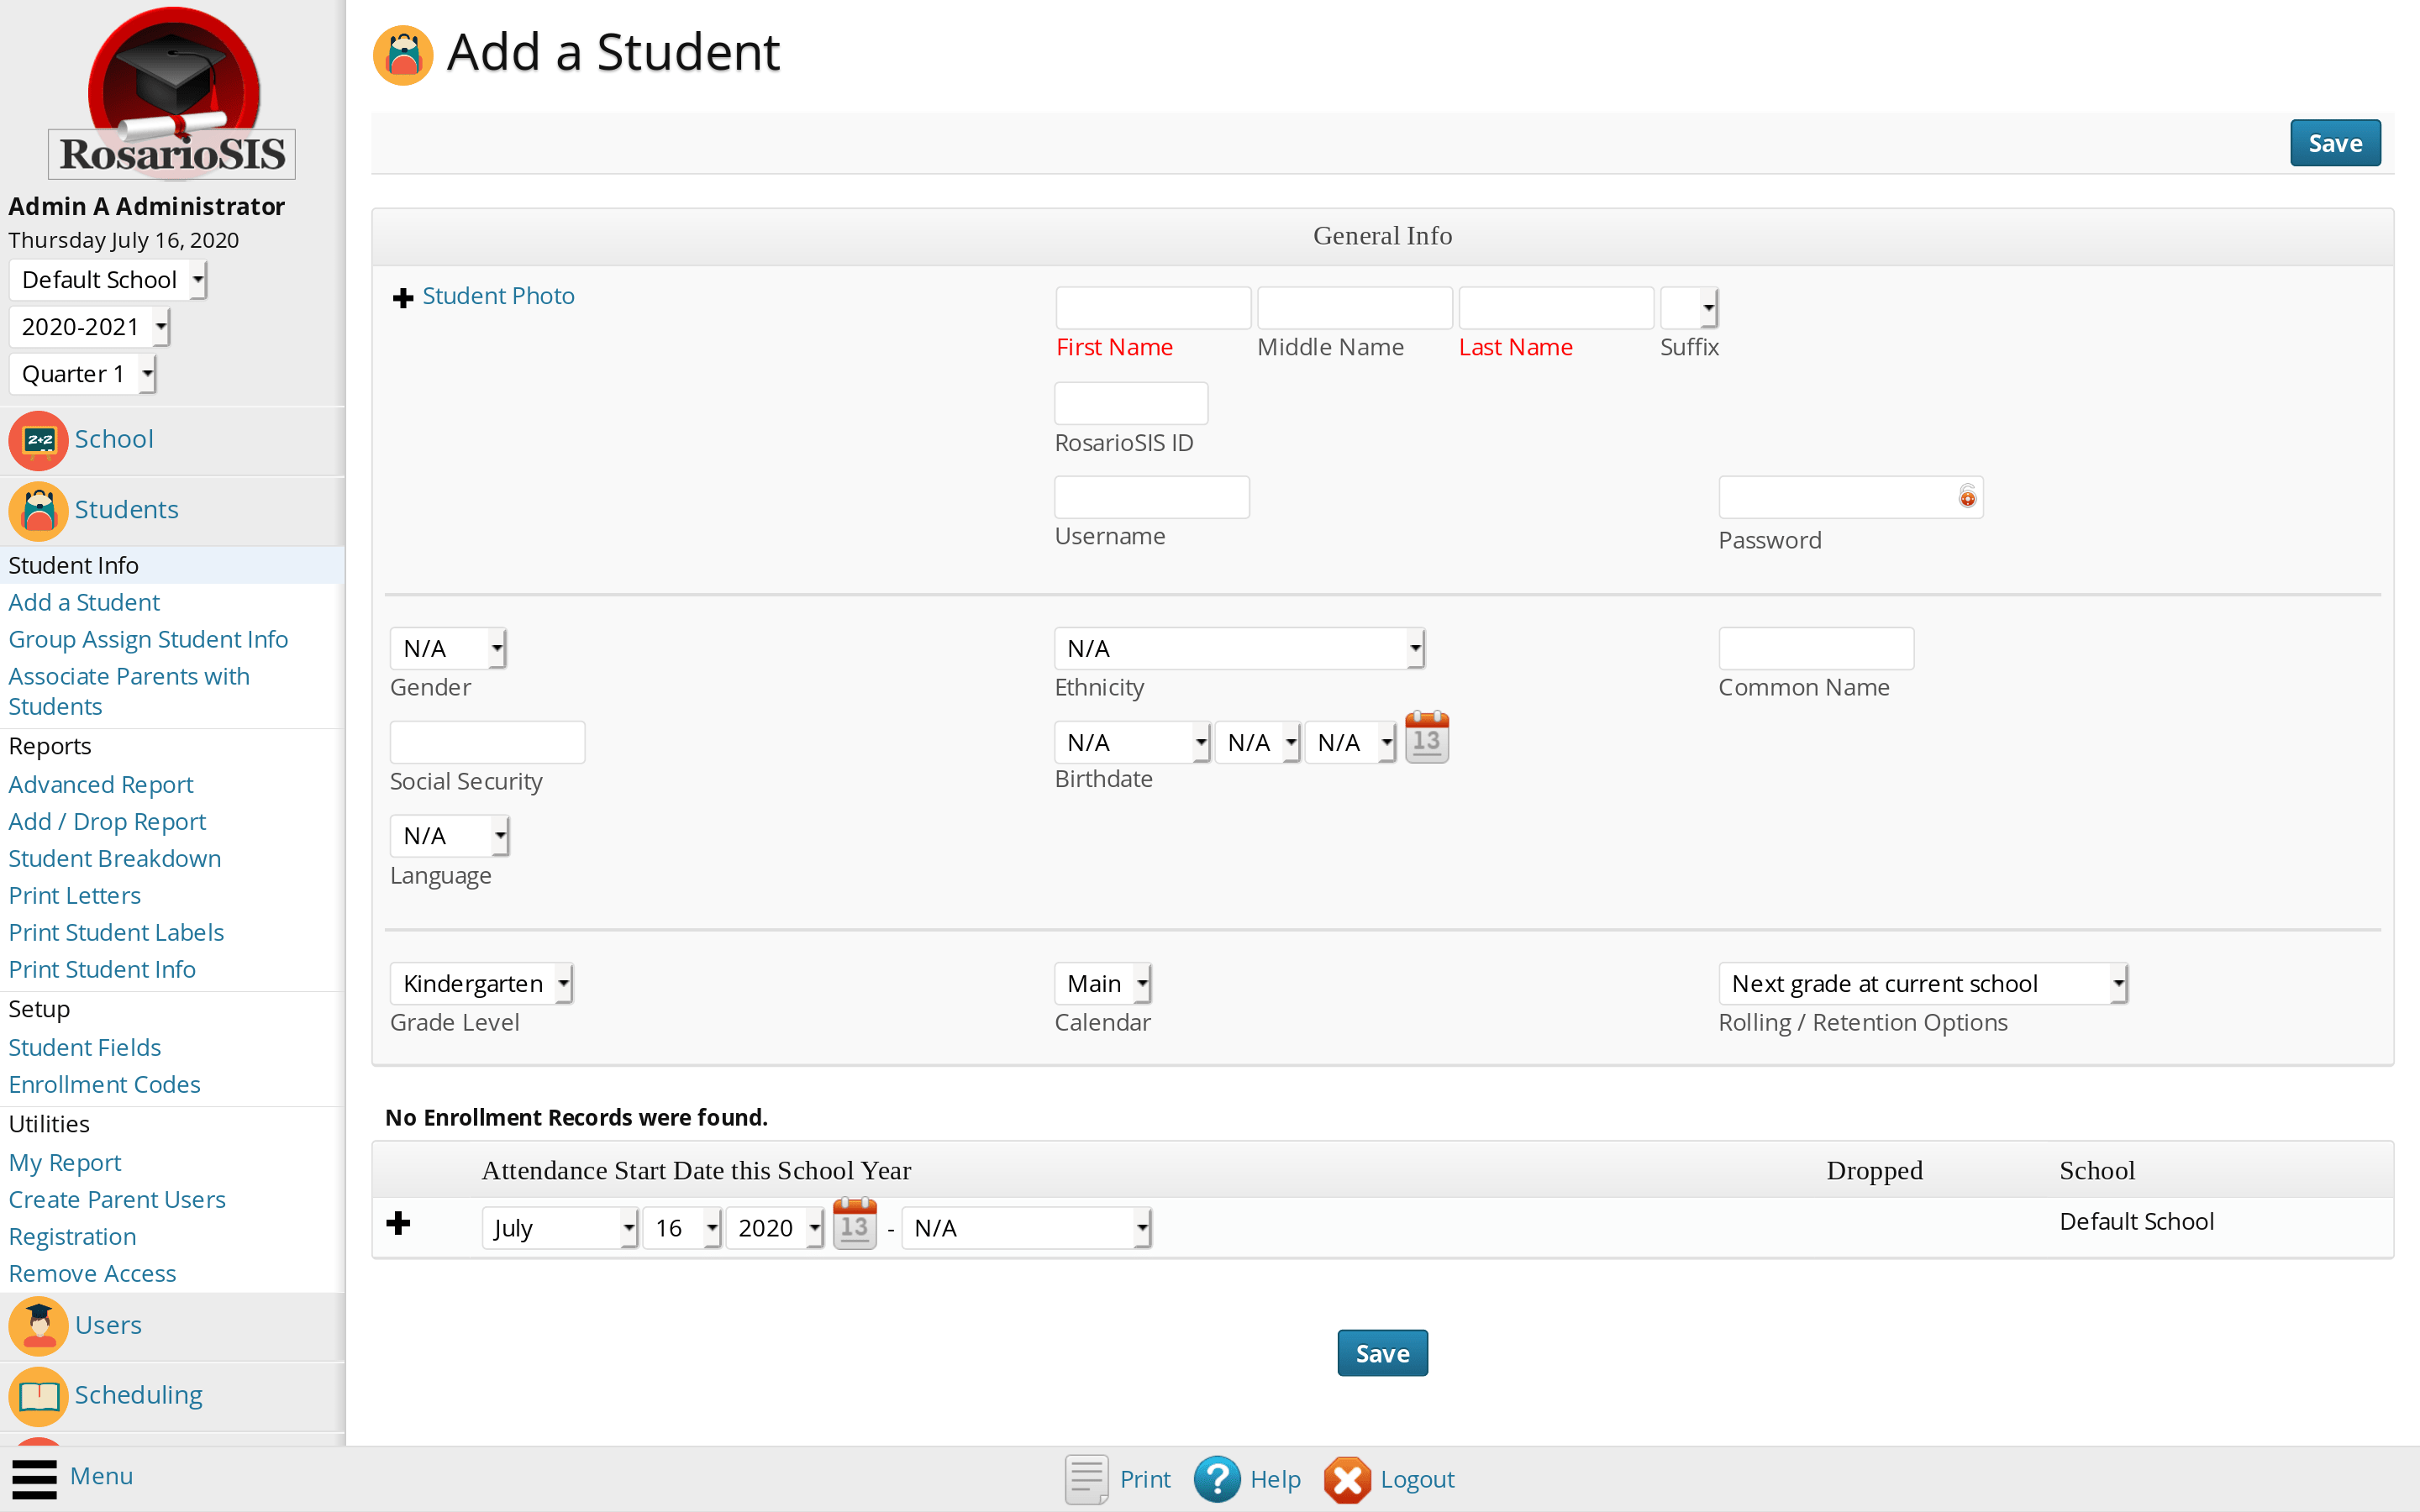
Navigate to Students > Add a Student using the menu.
Fill in the General Info and the Enrollment Record forms and click the Save button. Now you are able to navigate to the other tabs and enter, for example, the student contacts and addresses.
To import students from a CSV or Excel file, you can use the Students Import module (add-on).
Add Custom Fields
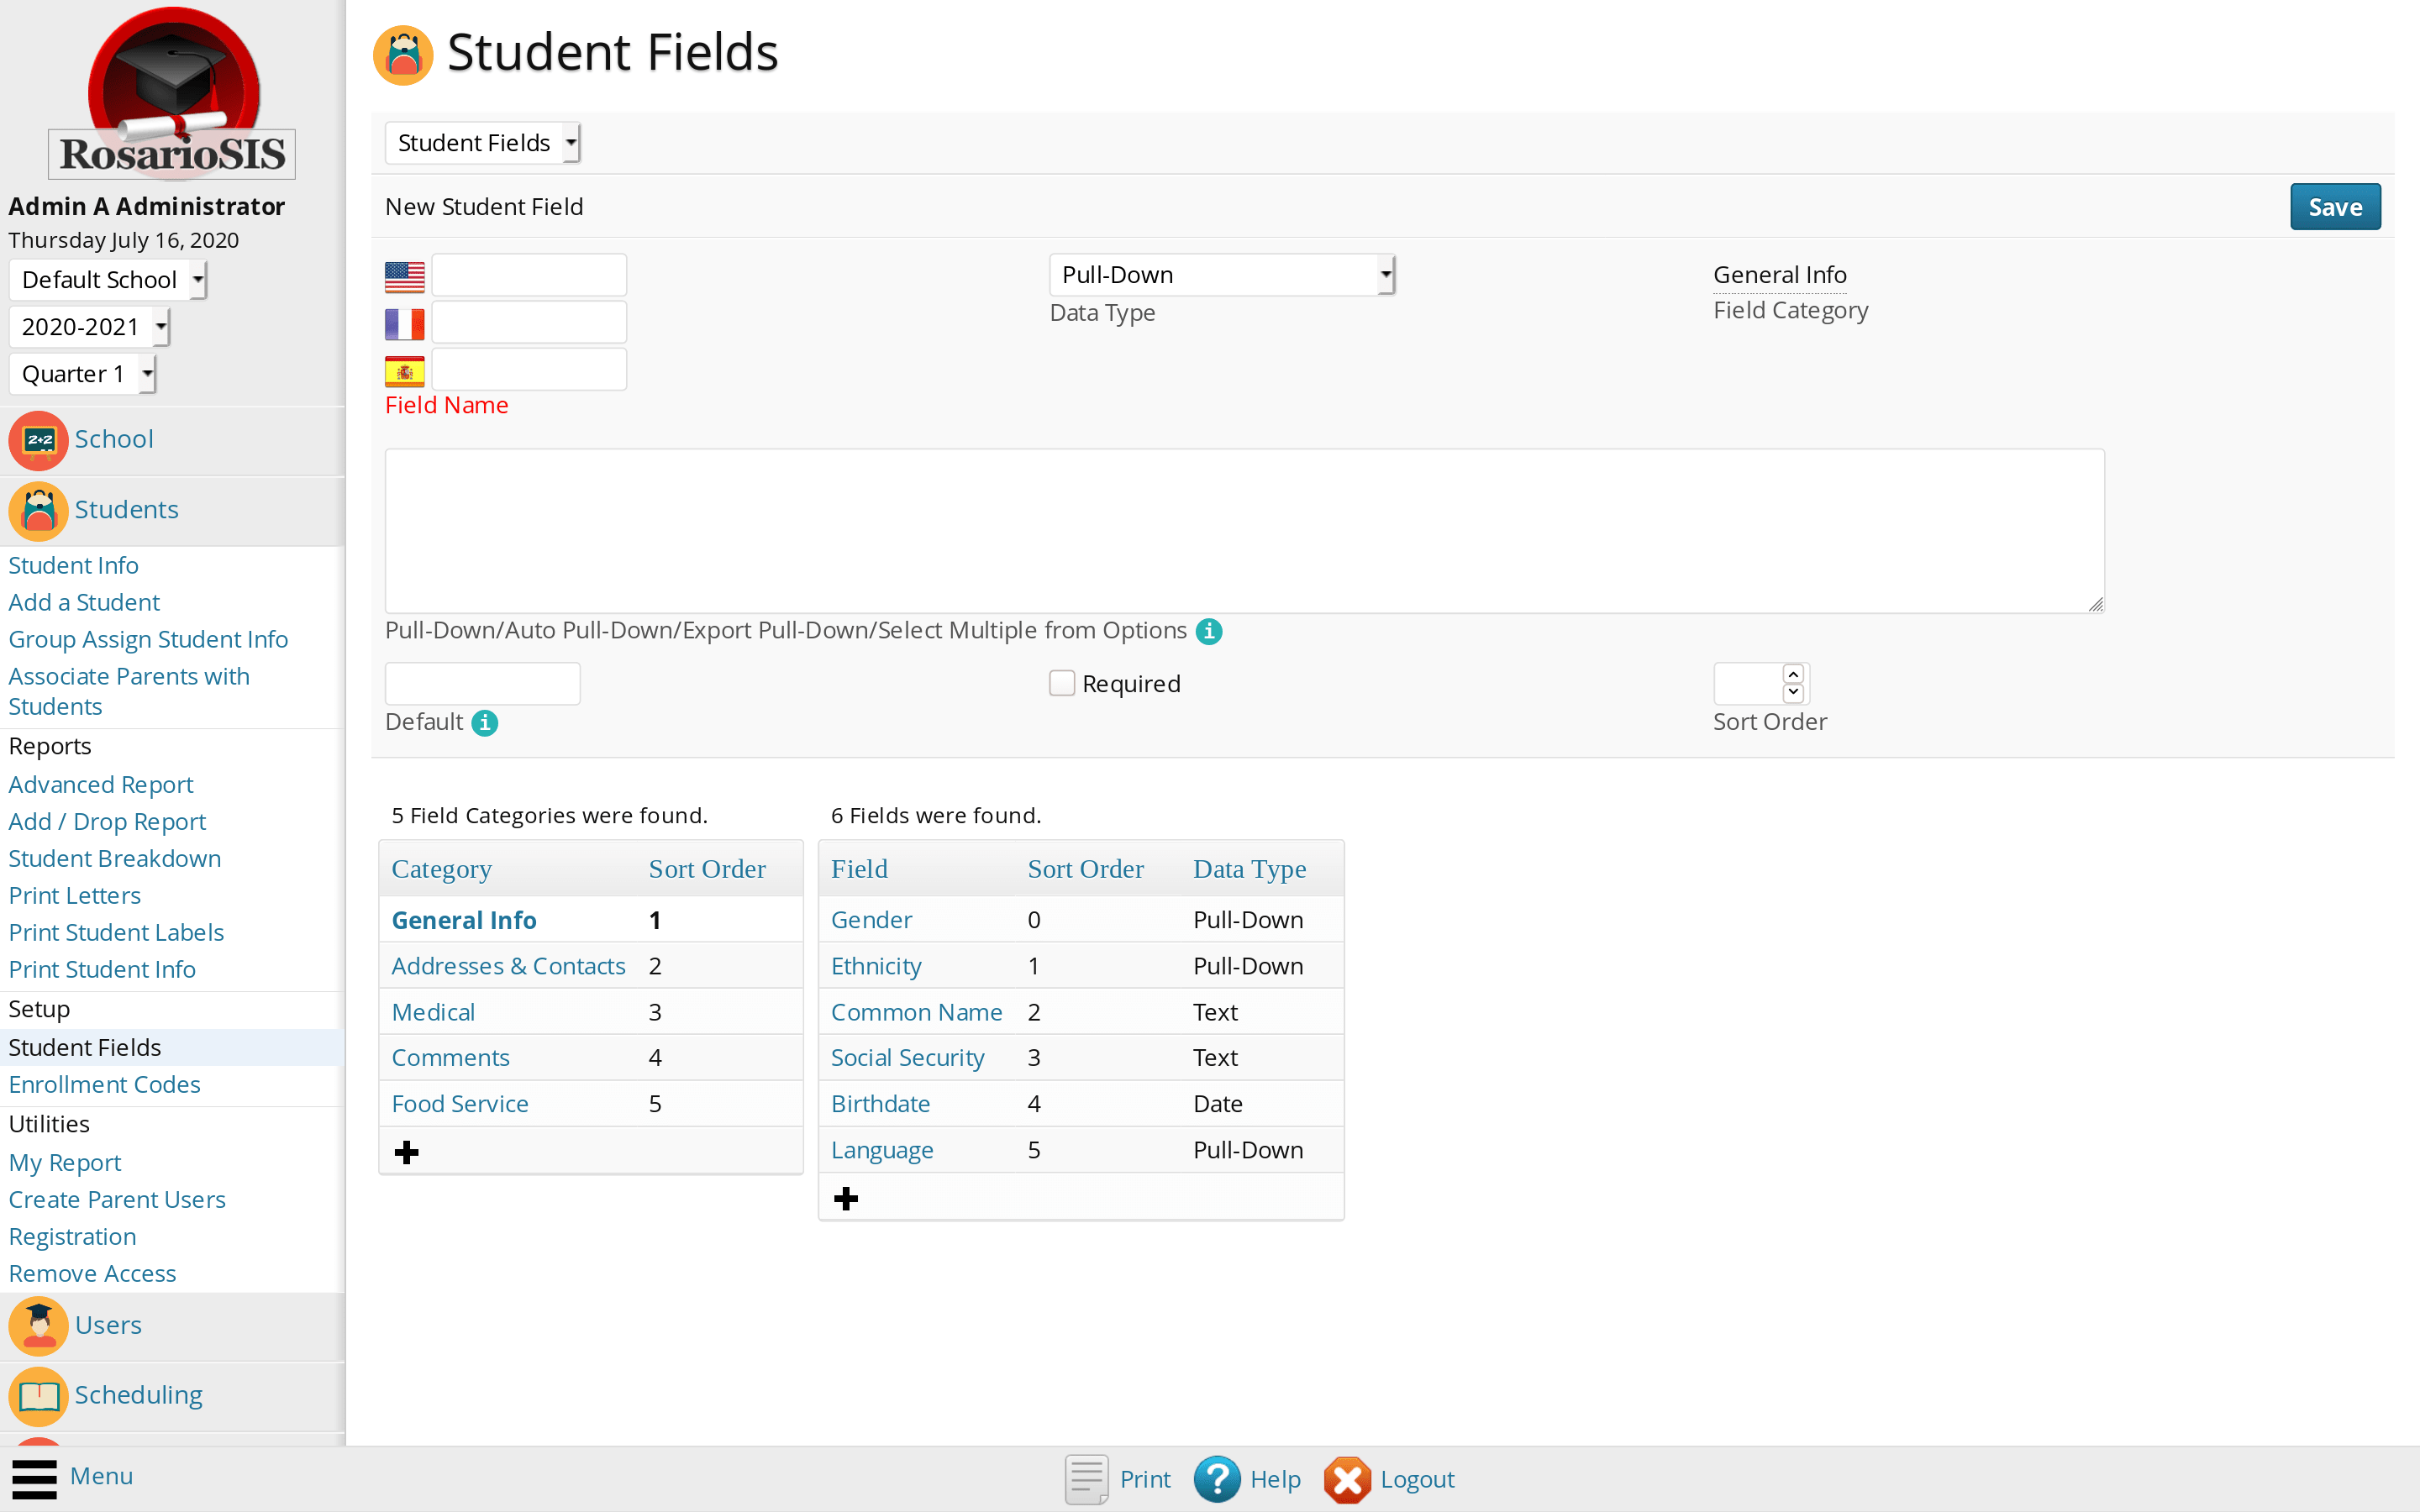
RosarioSIS provides a set of predetermined fields for student demographic records. You can create Custom Fields to record additional information by navigating to Students > Setup > Student Fields using the menu.
To add a new Student Field Category (or tab), click on the + icon and enter a Title, a Sort Order and click the Save button.
To create a new Student Field, first click on the Category and then click on the + icon at the bottom of the list of existing Student Fields.
Enter the Field Name, select the Data Type in the dropdown list and assign it a Sort Order. Check the Required checkbox if the field must have a value (will be labeled in red).
Please consult the Administrator Handbook or the inline Help for more details regarding the available Data Types.
Schedule Students
Scheduling students is the last step to complete before the school is ready for operation. There are two common ways of scheduling students: using the Group Schedule or using the Student Schedule program.
To schedule a single student, navigate to Scheduling > Student Schedule using the menu.
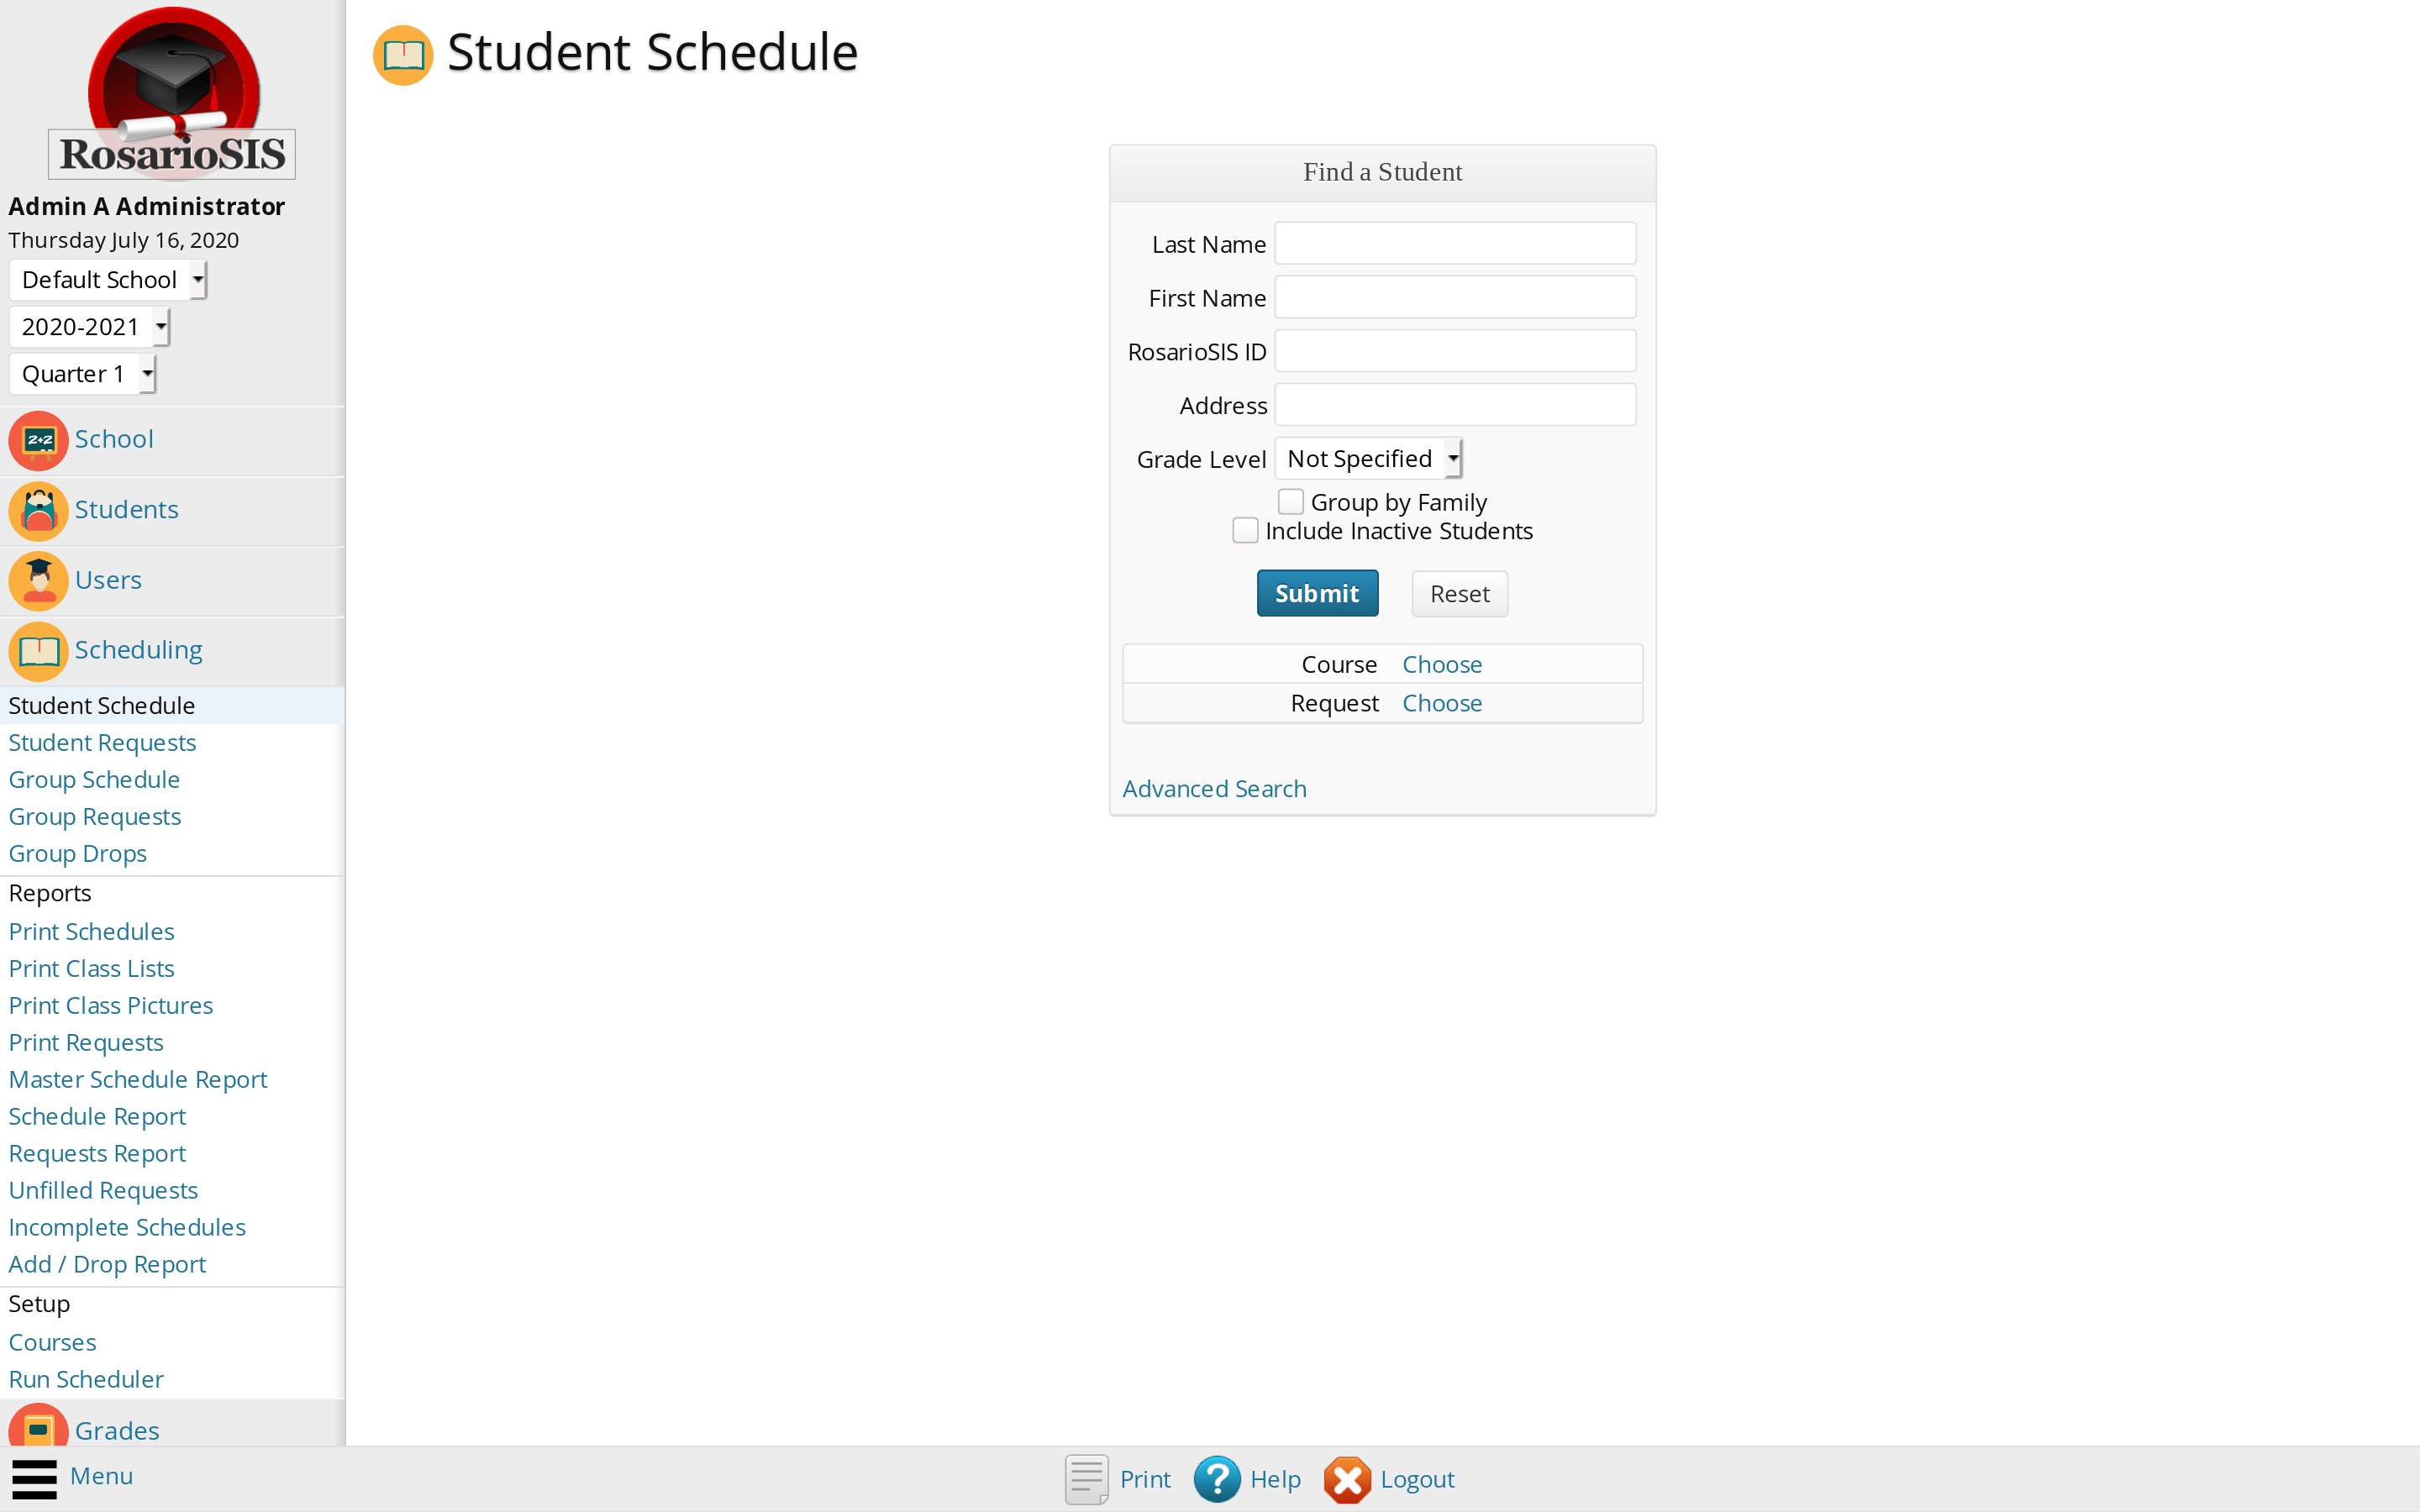
First, select the student using the Find a Student form.
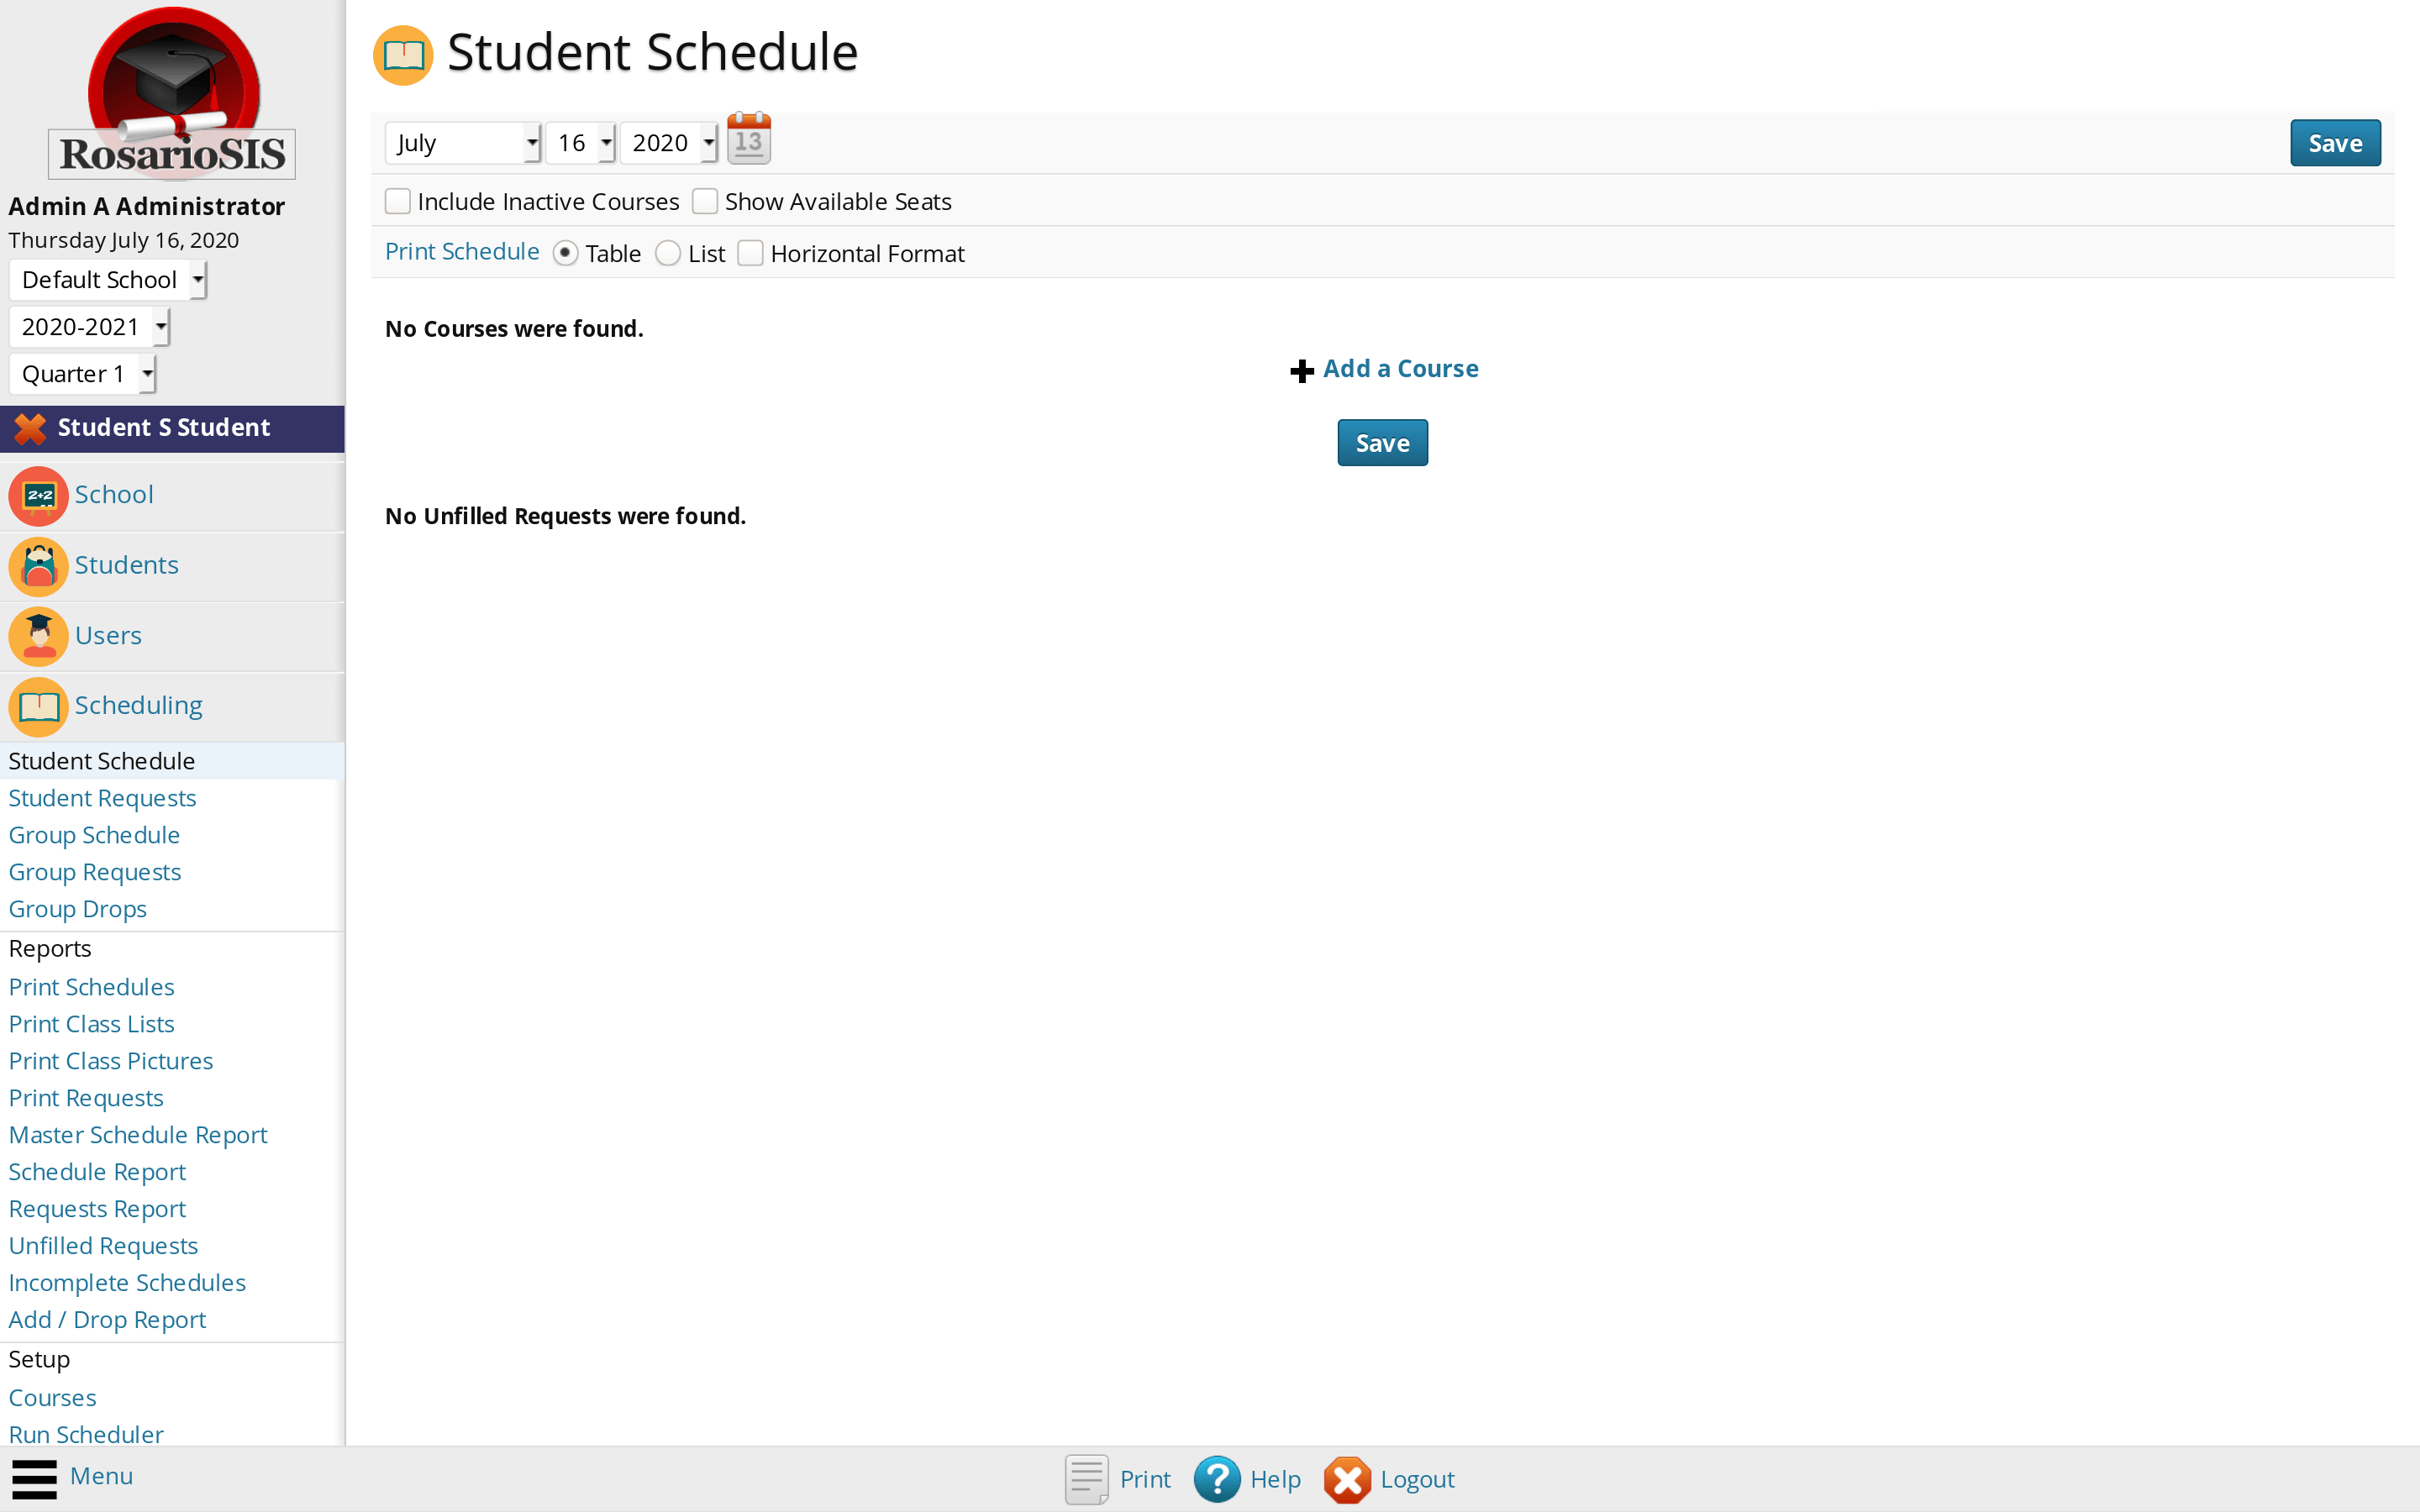
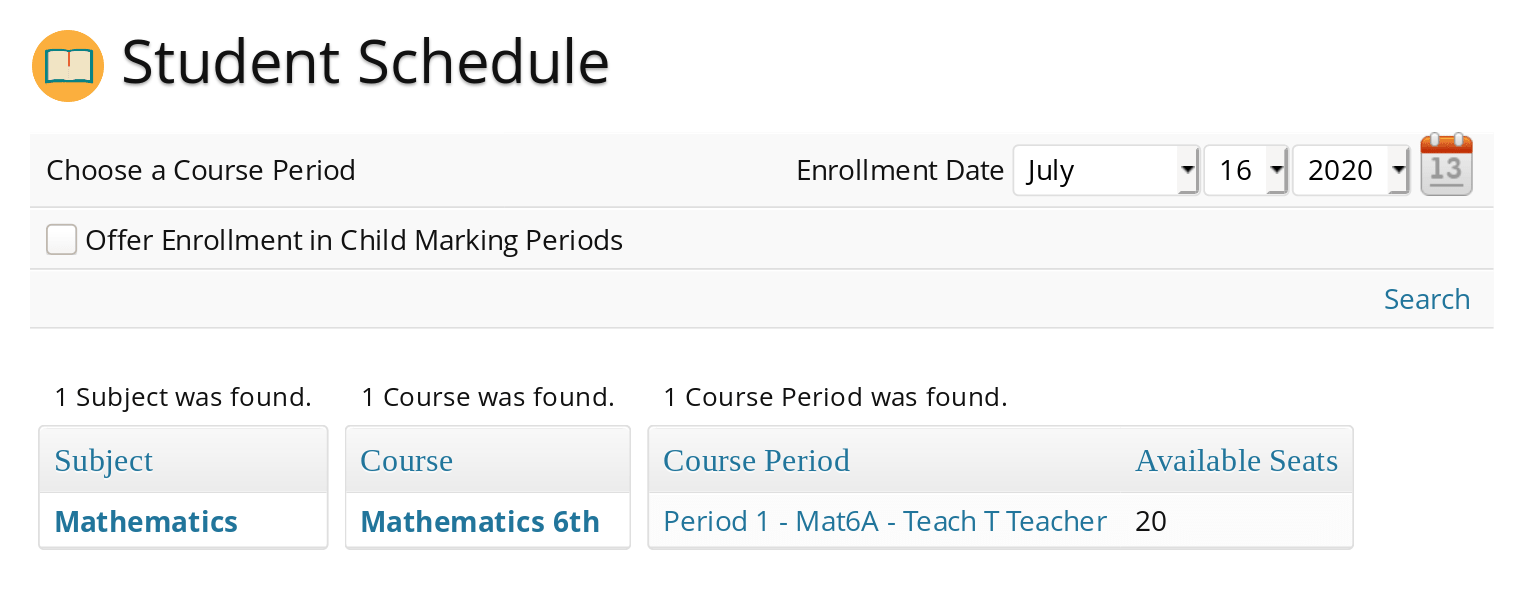
Then, click the Add a Course link: a new window will pop up. Select the Subject, Course and finally the Course Period to add for that student.
To add other Course Periods, click the Add a Course link again.
To schedule many students at once, navigate to Scheduling > Group Schedule using the menu.
First, select the students using the Find a Student form.
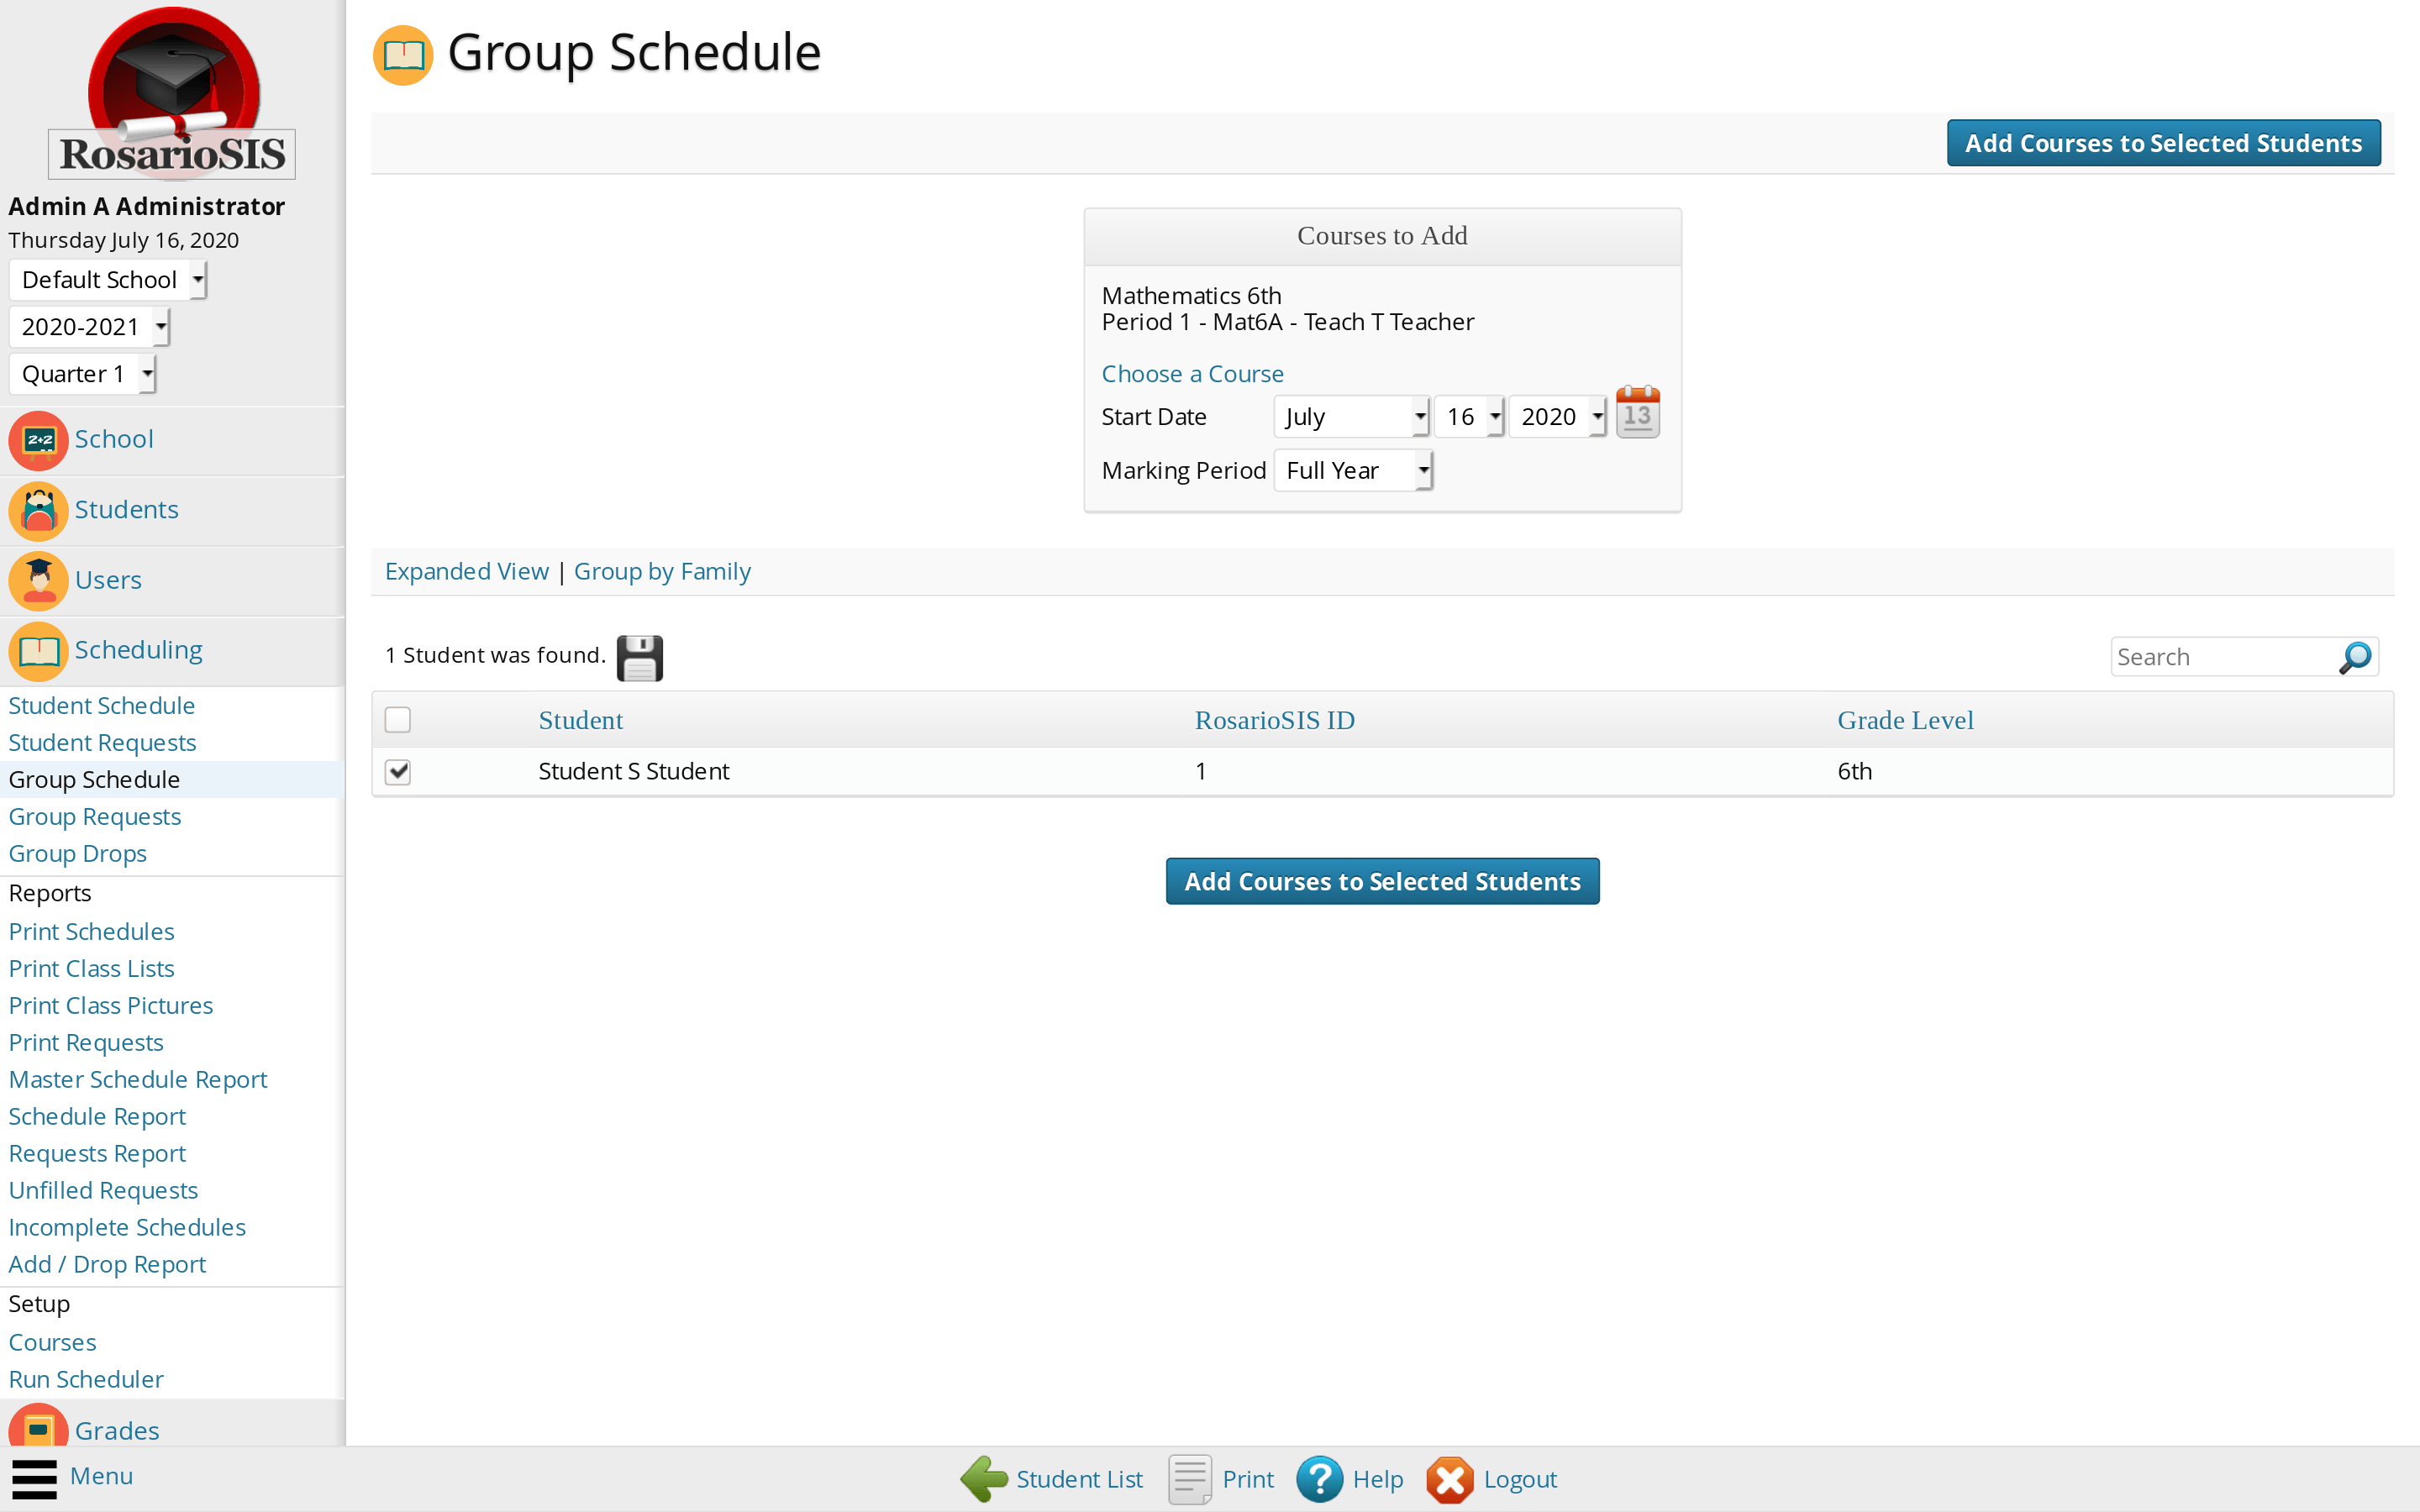
Then, click the Choose a Course link: a new window will pop up. After the Course Period is selected, select the Start Date you want the students to begin the class on. Select the right Marking Period in the dropdown list.
Finally, select the Students by checking the checkboxes next to their name and click the Add Courses to Selected Students button. This will schedule all selected students to that Course Period.
Default users
RosarioSIS comes with 4 default users:
- An administrator: username and password admin
- A teacher: username and password teacher
- A parent: username and password parent
- A student: username and password student
You are invited to browse RosarioSIS with these different profiles.
For security reasons, remember to change the default username and password!